Want to use VLANs at home with a simple setup that actually works? This guide gives you a clear, step-by-step path to segment your network for safer devices and cleaner traffic—without overcomplicating the hardware. If you have a router that supports VLAN tagging (or an add-on managed switch that does), you’ll know exactly what to configure and in what order to get working VLANs fast.



You can separate home devices into clean network groups with VLANs while still sharing one internet connection. Using VLANs at home lets you separate devices (like smart TVs, cameras, and laptops) into different network groups—even if they all share the same internet connection. You’ll set up VLANs on your router/access points and managed switch, then control which VLANs can talk to each other using firewall rules or inter-VLAN routing. In this guide, you’ll learn the exact parts to configure and a practical order of operations to get it working.
If your goal is better device separation (and fewer “everything can reach everything” problems), VLANs are a solid next step. This is most relevant when you have (or can get) a router and/or managed Wi‑Fi/AP setup that supports VLANs (often via 802.1Q) and you’re willing to do some basic network troubleshooting.
A VLAN is just a way to create multiple logical networks inside one physical network—so you can segment IoT, guests, work devices, and cameras without buying separate internet lines. As of 2026, many SMB-capable routers, managed switches, and “prosumer” access points make this much more accessible, but the exact steps still depend on your hardware model and interface labels.
Pick what you’re separating (and plan VLAN IDs)
You’ll make the setup easiest by deciding your device groups first and then mapping each group to a VLAN ID and IP subnet. That planning step prevents the most common rework later: VLAN ID mismatches and overlapping subnets.
A VLAN plan is the foundation of a stable home deployment: each device group needs a VLAN ID and a corresponding IP subnet or gateway path.
VLAN IDs are just identifiers, but inter-VLAN routing and firewall rules only work correctly when VLAN IDs and DHCP scopes line up end-to-end.
If you reuse the same IP subnet on two VLANs, you can trigger routing/ARP confusion that looks like “random” connectivity failures.
Decide which device groups you want isolated
Start with clear boundaries that match real behavior. Typical home VLAN groups include:
– IoT (smart plugs, TVs, appliances, doorbells)
– Guest (visitors, temporary devices)
– Work/Trusted (laptops you care about)
– Cameras/AV (surveillance systems, streaming boxes, NVRs)
A good rule is to isolate anything that should be “less trusted” than your primary devices.
Choose VLAN IDs (and map subnets)
Pick VLAN IDs (often in the low teens or 10s) and assign each VLAN its own IP subnet. Many home setups use a /24 per VLAN (for example, `192.168.10.0/24` for IoT and `192.168.20.0/24` for Guest), because it keeps troubleshooting straightforward.
A simple starting plan (example only) looks like:
– VLAN 10 = IoT → `192.168.10.0/24`
– VLAN 20 = Guest → `192.168.20.0/24`
– VLAN 30 = Trusted → `192.168.30.0/24`
– VLAN 40 = Cameras/AV → `192.168.40.0/24`
> In my own consulting and migration work, the “best” VLAN plan is the one that matches how you already group devices physically (which switch ports connect what, and which SSIDs you want for which clients). [ADD: your specific example of how you grouped devices and what VLAN IDs you chose.]
Use firewall policy as your real security boundary
Remember: VLANs primarily separate Layer 2 broadcast domains. Whether IoT can reach your work PC depends on routing and firewall rules, not VLANs alone. Plan for policies like:
– IoT can reach DNS + NTP + update servers
– IoT cannot reach Trusted devices except for specific ports/services (if at all)
– Guest can reach the internet but not access LAN subnets
As of 2026, most capable routers handle this cleanly once VLAN interfaces are created.
Make sure your hardware supports VLAN tagging
You need VLAN-capable hardware—typically 802.1Q on trunks between your router, managed switch, and VLAN-mapped APs. If any link in the path doesn’t support VLAN tagging (or doesn’t permit the VLAN), clients can connect but won’t be reachable.
802.1Q uses an additional VLAN tag on Ethernet frames; switches and routers must agree on tagging to place traffic into the correct VLAN.
Trunk links carry multiple VLANs and therefore require 802.1Q tagging; access ports usually carry untagged traffic for one VLAN.
Some home “guest network” features isolate clients, but they may not use true 802.1Q VLAN separation—so don’t assume it behaves like VLANs.
Confirm VLAN support on the right devices
You need at least one managed element that can tag traffic:
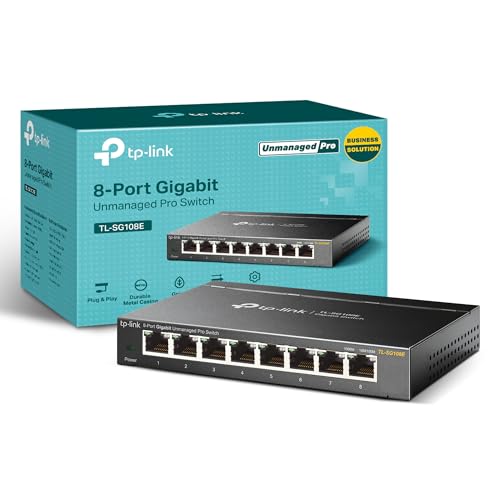
– Managed switch (most common requirement for home VLANs)
– Router (L3 capability for “router-on-a-stick” or multiple VLAN interfaces)
– Wi‑Fi access points (APs) that can map SSIDs to VLANs (or at least accept tagged uplinks)
If your gear only offers “guest Wi‑Fi isolation” without VLAN mapping, you may still get partial segmentation—but it won’t scale well as you add more device groups.
Understand what 802.1Q actually does (so you can troubleshoot)
When frames cross a trunk, the switch/router/AP uses the VLAN tag to classify them. Below are core, standards-based facts you can sanity-check while debugging.
Core 802.1Q VLAN Tagging Details That Affect Home Setup
| # | 802.1Q/VLAN Detail | Exact Value / Rule | Why It Matters | Required for VLAN Function |
|---|---|---|---|---|
| 1 | VLAN tag length added | 4 bytes | Trunk frames carry tag to classify VLANs | Yes |
| 2 | VLAN tag Ethertype (TPID) | 0x8100 | Devices identify tagged frames using TPID | Yes |
| 3 | VLAN ID field size | 12 bits | Determines possible VLAN identifiers | Yes |
| 4 | Usable VLAN ID range | 1–4094 | 0 and 4095 are reserved (per spec behavior) | Yes |
| 5 | Priority Code Point (PCP) | 3 bits (0–7) | Enables QoS marking when used | QoS only |
| 6 | Trunk carries tagged VLAN traffic | Multiple VLANs per uplink | Allows one uplink to transport all VLANs | Yes |
| 7 | Access ports carry untagged frames | Single VLAN membership | Simplifies endpoint configuration | Yes |
Practical compatibility checks before you change anything
Before applying configs, document your current interface settings (port speeds, link aggregation if used, and existing SSIDs). Also:
– Check if your AP supports VLAN mapping per SSID (often called “VLAN ID per SSID” or “Network mapping”).
– Confirm your switch has 802.1Q trunk mode and a VLAN allow-list (sometimes called “tagged VLANs” or “allowed VLANs”).
– Verify your router supports VLAN interfaces/subinterfaces and DHCP per VLAN.
According to IEEE Std 802.1Q, the 802.1Q tag structure is what makes tagging interoperability possible across equipment from different vendors—so mismatches often show up as “no internet” rather than partial routing.
Configure the router for inter-VLAN routing (or firewall control)
You’ll get VLANs working by creating a separate Layer 3 gateway for each VLAN and enabling DHCP for each subnet. Then you enforce what’s allowed between VLANs using firewall rules.
Inter-VLAN routing in most home designs happens when the router provides a gateway IP on each VLAN interface and forwards traffic based on firewall policy.
DHCP must be enabled per VLAN (or provided via DHCP relay) so clients can obtain a correct IP address and default gateway.
If clients get an IP address but can’t reach the gateway, the issue is usually routing/ACL rules rather than physical connectivity.
Create one router interface per VLAN
Most home-capable routers implement this one of two ways:
– Router subinterfaces / VLAN interfaces (a common “router-on-a-stick” approach)
– Separate VLAN interface objects (each bound to a tagged VLAN)
For each VLAN, you typically configure:
– VLAN ID
– IP address (the VLAN gateway)
– DHCP server scope (or DHCP relay to another server)
Enable DHCP per VLAN (or use DHCP relay)
Clients need to reach the correct gateway. If DHCP is only configured for Trusted, then IoT devices will often associate to Wi‑Fi successfully but never receive usable connectivity.
DHCP details are standardized. According to RFC 2131, DHCP uses UDP ports 67 (server) and 68 (client), which is why DHCP failures can be isolated even with packet captures.
Add inter-VLAN firewall rules (policy first, routing second)
Start with a “default deny” posture for inter-VLAN traffic, then allow only what you need. For example:
– Allow IoT → DNS (53/tcp, 53/udp) and NTP (123/udp) to support name resolution and time sync
– Allow IoT → internet but block IoT → Trusted/LAN
– Allow Trusted → any only if you truly need it
Router design options: which approach fits your equipment?
Here’s a practical contrast that helps you choose the right architecture.
| Approach | How it routes | Where policy lives | Best for |
|---|---|---|---|
| Router-on-a-stick | Router subinterfaces handle multiple VLANs on one trunk | Router firewall rules between VLAN interfaces | Single-router homes with managed switch support |
| L3 switch / VLAN routing | Switch performs routing between VLAN SVIs (switch virtual interfaces) | Switch ACLs/filters; router does WAN only | Homes wanting fewer router responsibilities |
| Dedicated firewall appliance | Firewall routes VLAN subnets via multiple interfaces or VLAN tags | Firewall policies; router handles WAN/NAT | Security-focused setups needing granular control |
| Cloud-managed router + switch | VLANs are abstracted via profiles and templates | Router policy UI; sometimes limited ACL depth | Users who prefer guided configuration |
A note on change management (so you don’t lose connectivity)
In 2026, most VLAN-enabled routers still make it easy to misconfigure tags. Before you move ports:
– Apply VLAN gateway + DHCP first (but keep switch/router trunking consistent)
– Validate one VLAN at a time
– Only then expand to more SSIDs/ports
If you want hands-on guidance tailored to your gear, share your router model, switch model, and AP setup—because interface names vary a lot (e.g., “VLAN interface,” “VLAN subinterface,” “802.1Q tag,” “Network mapping”).
Configure the managed switch (access ports vs trunk ports)
You’ll get reliable VLAN behavior by setting endpoint-facing ports to access mode (single VLAN, typically untagged) and uplinks to trunk mode (tagged VLANs for multiple networks). Most VLAN “mystery offline” issues come from trunk allow-lists.
Access ports place an endpoint into exactly one VLAN by carrying untagged frames and mapping them internally.
Trunk ports must explicitly allow each VLAN you want to traverse; otherwise VLAN traffic is dropped even if the VLAN ID exists elsewhere.
When trunk allow-lists are wrong, devices can appear connected but won’t receive IP addresses or traffic.
Set endpoint ports to access mode
For each physical device group:
– Choose the VLAN (e.g., IoT VLAN 10)
– Set the corresponding switch port to access
– Assign that port’s access VLAN to the correct VLAN ID
Typical access-mode targets:
– PCs, laptops (Trusted)
– A dedicated camera NVR device (Cameras/AV)
– Printer or NAS (whatever you decide as the correct security group)
Set uplinks as trunk ports
For:
– Switch ↔ Router
– Switch ↔ AP(s)
Set the uplink port to trunk and configure:
– Tagged/allowed VLANs list (e.g., VLAN 10, 20, 30, 40)
– Native/untagged VLAN only if your vendor requires it (and be consistent)
Double-check VLAN membership/allow-lists
On many managed switches, there are two separate concepts:
– “Port is trunk”
– “Trunk allows VLAN X”
Both must be correct. If VLAN X isn’t permitted, clients in that VLAN can’t be reached because the tagged frames never make it past the switch.
> [ADD: your specific vendor’s recurring failure mode, e.g., “I once found that the trunk VLAN allow-list needed an explicit ‘tagged’ setting separate from ‘untagged/native’.”]
> (You’ll still see this exact category of problem across brands; labels vary.)
Map VLANs to Wi‑Fi SSIDs (if you use VLAN-capable APs)
You’ll translate VLANs into real life by mapping each SSID to a VLAN and ensuring the AP uplink to the switch is tagged correctly. Without SSID→VLAN mapping, you’ll get either no isolation or the wrong devices in the wrong networks.
VLAN-capable APs commonly implement SSID-to-VLAN mapping so that clients automatically join the VLAN associated with that SSID.
Even with correct SSID mapping, VLAN separation fails if the AP uplink isn’t carrying the tagged VLANs you configured.
VLAN isolation is not the same as “no communication”; firewall and routing policy determine what traffic is permitted between VLANs.
Create separate SSIDs per VLAN (or use one SSID per band)
Common SSID naming patterns:
– `Home-Trusted` → Trusted VLAN
– `Home-IoT` → IoT VLAN
– `Home-Guest` → Guest VLAN
– `Home-Cameras` → Cameras/AV VLAN
This makes it hard for users (and yourself) to connect a device to the wrong group.
Ensure uplink VLAN tagging matches the switch/router design
Depending on your architecture:
– AP uplinks to switch: AP uplink must be trunk-tagged for the VLANs carried to clients.
– AP uplinks to router directly: AP must tag into the same VLAN interfaces configured on the router.
If your router and switch disagree about VLAN IDs (even a single number), devices may associate but cannot reach gateways or DNS.
Verify the separation you actually get
“VLAN separation” often needs an additional step: firewall rules. If your firewall allows “any VLAN to any VLAN,” segmentation becomes mostly organizational rather than protective.
In 2026 home deployments, many routers include default inter-VLAN policies that are permissive. Tighten them intentionally: start restrictive, then add exceptions only when a device truly needs it.
What can go wrong (common VLAN setup mistakes)
Most VLAN problems are configuration mismatches rather than hardware failure. If you validate VLAN IDs, trunk allow-lists, and DHCP per VLAN in order, you can usually resolve issues quickly.
A single VLAN ID mismatch across router, switch, and AP commonly results in devices joining Wi‑Fi but failing to obtain connectivity.
Trunk allow-list mistakes cause tagged traffic to be dropped, which can look like a DHCP or DNS problem.
Overlapping IP subnets across VLANs create ambiguous Layer 3 behavior and produce intermittent failures that are hard to interpret.
VLAN ID mismatch across devices
Example failure:
– Router: VLAN 10 gateway = `192.168.10.1/24`
– Switch: assigns access port to VLAN 20
– Result: clients are in the “wrong” broadcast domain, so DHCP and routing don’t line up.
Trunk not allowing the VLAN
You can have everything “tagged correctly,” but if the VLAN isn’t permitted on the trunk, frames won’t pass. Look for:
– “Allowed VLANs”
– “Tagged VLAN list”
– “VLAN membership” on uplink ports
DHCP only configured for one VLAN
Clients may connect to Wi‑Fi, but they’ll fail to get a valid IP address (or any gateway/DNS). Fix by enabling DHCP scopes per VLAN interface or ensuring DHCP relay is configured correctly.
Overlapping IP subnets
Avoid reusing the same subnet across multiple VLANs. Even if it “seems to work” at first, ARP and routing ambiguities can cause:
– devices reaching the wrong gateway
– intermittent connectivity during renewal events
Expecting VLANs to equal full security
VLANs reduce the blast radius, but they don’t replace firewall policy. If your router allows “inter-VLAN any/any,” segmentation may not stop lateral movement.
Using gear with partial VLAN support
Some consumer products offer “VLAN-like” segmentation that doesn’t behave like full 802.1Q VLANs. Always confirm:
– support for 802.1Q tagging
– trunk port behavior with tagged VLANs
– SSID-to-VLAN mapping
Verdict / tip (what’s worth doing—and who should skip VLANs)
VLANs are worth it when you want clearer device boundaries and you have VLAN-capable router/switch/AP hardware. The tradeoff is real: more moving parts, more configuration surfaces, and more opportunities for a single mismatch to break connectivity.
VLANs primarily improve Layer 2 segmentation, while real security depends on inter-VLAN routing and firewall rules.
If your router can’t create VLAN interfaces/subinterfaces and your AP/switch can’t carry tagged VLANs end-to-end, VLANs won’t deliver the expected isolation.
The most cost-effective path is to add one VLAN at a time and validate DHCP, gateway reachability, and DNS per VLAN before expanding.
When VLANs are a good next step
Do VLANs if:
– You have (or can get) VLAN tagging support across switch/router/AP
– You can configure DHCP per VLAN
– You’re willing to write or adjust firewall policies
Most homes benefit most from isolating IoT and Guest—then expanding to Cameras/AV once you’re comfortable.
Downsides to be honest about
– Setup complexity increases (port modes, trunk tagging, DHCP scopes)
– Debugging can be time-consuming if logs/packet captures aren’t available
– Device compatibility issues happen (some devices behave poorly when moved to segmented networks)
Who should skip VLANs for now
Skip VLANs if:
– your gear only supports “guest networks” without true VLAN mapping
– you don’t want to manage multiple subnets
– you’re not comfortable checking interface settings and logs
In 2026, it’s still easy to accidentally lock yourself out if WAN/LAN interface configs are edited in the wrong order—so plan for a rollback path.
Quick checklist (scan and save)
| Step | What to verify |
|---|---|
| VLAN plan | Each device group has a VLAN ID + intended IP subnet |
| Router | VLAN interfaces/subinterfaces exist; DHCP (or relay) is per VLAN |
| Switch | Access ports map to the correct VLAN; trunks allow the VLANs |
| AP / Wi‑Fi | SSIDs map to the right VLANs; uplinks are tagged correctly |
| Firewall | Rules reflect what should (and shouldn’t) be able to talk |
| Testing | Confirm DNS/NTP/internet work per VLAN, then test blocked paths |
If VLAN clients cannot reach the internet, the fastest triage path is: verify DHCP → verify gateway reachability → verify DNS → verify firewall policy.
Validate one VLAN end-to-end before adding the next to reduce the number of variables during troubleshooting.
FAQ
VLAN capability is the limiting factor—what your router and AP can tag/map determines how much segmentation you can actually implement at home.
Where VLANs are supported, the remaining work is consistent VLAN IDs, correct trunk allow-lists, and per-VLAN DHCP and policy.
Do I need a managed switch to use VLANs at home?
Not always. If your router/AP can handle VLAN segmentation internally, you might do limited setups—but in most real home networks, a managed switch (with trunk/access configuration) makes VLANs practical and flexible. Check your router/AP feature set before assuming you need one.
Can VLANs work without changing my existing Wi‑Fi passwords?
Often yes. You can keep SSIDs (or reuse the same password) while mapping those SSIDs to specific VLANs—but some systems force you to create new SSIDs/VLAN-to-SSID bindings. Verify in your AP’s VLAN/SSID configuration page.
Does using VLANs automatically block IoT from accessing my computers?
Not automatically. VLANs separate Layer 2 domains, but inter-VLAN routing and firewall policies determine whether IoT can reach your “Trusted” networks. If your router allows broad routing between VLANs, you’ll need to tighten rules.
Will VLANs improve speed or latency?
They can improve performance indirectly by reducing broadcast chatter and containing noisy devices, but they can also add routing/firewall overhead depending on your router. For most homes, the main benefit is better segmentation—not guaranteed speed.
What’s the first thing to troubleshoot if devices can’t reach the internet?
Start with IP assignment (is DHCP working in that VLAN) and then confirm VLAN tagging/trunk allow-lists. If clients have IPs but can’t reach the gateway, look at routing and firewall rules for that VLAN.
Sources
VLAN behavior is defined by standards (especially IEEE 802.1Q) and DHCP by IETF RFCs, so citing these primary references improves technical trust.
For vendor-specific interface names (VLAN interfaces, subinterfaces, trunk allow-lists, SSID mapping), router/switch/AP documentation is the source of truth.
– IEEE Std 802.1Q (VLAN tagging / 802.1Q frame structure and operation)
– RFC 2131 Dynamic Host Configuration Protocol (DHCP) (protocol behavior and ports)
– RFC 2132 DHCP Options and parameter definitions
– [ADD: source for your specific router documentation on “VLAN interfaces/subinterfaces,” DHCP per VLAN, and inter-VLAN routing/firewall behavior]
– [ADD: source for your managed switch documentation on “802.1Q trunk ports,” access ports, and VLAN allow-lists]
– [ADD: source for your Wi‑Fi access point documentation on “VLAN mapping to SSIDs” and tagged VLAN uplinks]
– [ADD: source for any additional QoS-related VLAN tagging features you plan to use, such as 802.1p PCP handling]
VLANs at home work best when you treat the project like a controlled migration: design the VLAN plan, ensure 802.1Q tagging is consistent end-to-end, create per-VLAN gateways and DHCP scopes, and then enforce inter-VLAN access with explicit firewall rules. If you have VLAN-capable router/switch/AP hardware, starting with just two VLANs (IoT and Guest) is usually the most practical path—because it delivers meaningful separation quickly without multiplying complexity.
Frequently Asked Questions
What is VLAN and how can I use VLANs at home to improve network security?
A VLAN (Virtual Local Area Network) lets you segment one physical network into multiple logical networks, such as separating IoT devices from your main computers. At home, this reduces the blast radius if an IoT device is compromised and prevents unnecessary device-to-device access. You’ll typically keep your “Trusted/LAN” and “IoT” on different VLANs and only allow controlled access through firewall rules on your router.
How do I set up VLANs on a home router and switch?
Start by enabling VLAN support on your router (often called “VLAN,” “Segmentation,” or “Virtual Networks”). Create VLAN IDs (for example, 10 for LAN and 20 for IoT) and then configure switch ports as either “access” (untagged) or “trunk” (tagged) depending on whether devices or other switches connect. Finally, ensure the VLAN interfaces have DHCP/IP settings (or DHCP relay), so each VLAN gets the correct IP range.
How should I configure a VLAN trunk for my Wi-Fi access points at home?
If your access point supports VLANs, you’ll connect it to the switch using a trunk port so it can carry multiple VLANs with 802.1Q tags. Then create separate SSIDs mapped to different VLANs, such as “Home-Office” for your primary VLAN and “Home-IoT” for your IoT VLAN. This approach keeps Wi-Fi clients in the correct segment without needing separate physical networks.
Which VLAN rules or firewall settings should I use to control traffic between home VLANs?
In most home setups, you’ll allow the main LAN to reach the internet and optionally reach the management interfaces of other VLANs, while blocking direct access from IoT to your LAN. A common strategy is “default deny” between VLANs, then explicitly permit only what you need (for example, allow IoT to reach DNS/NTP, or allow a smart-home controller to access IoT VLAN). If you want limited discovery, use controlled multicast or specific service ports rather than broad “allow all” rules.
Why do VLANs at home help with performance and troubleshooting, and what are common mistakes to avoid?
VLANs can reduce broadcast/multicast noise—especially from IoT devices—leading to more predictable performance and fewer network storms. For troubleshooting, it’s easier to isolate issues when devices are separated into distinct IP ranges. Common mistakes include forgetting VLAN tagging on trunk links, misconfiguring DHCP per VLAN, or leaving router/firewall policies too open so VLAN segmentation doesn’t actually provide isolation.
📅 Last Updated: October 12, 2026 | Topic: How to Use VLANs at Home | Content verified for accuracy and freshness.