To improve mesh Wi-Fi coverage, place nodes within strong signal range of one another—not inside the dead zones you want to fix. When nodes are too far apart, repositioning them beats adding more; when thick walls weaken wireless links, Ethernet backhaul is the better fix if cabling is practical. Here’s how to determine whether better placement, a wired connection, or an extra node will solve your coverage problem.


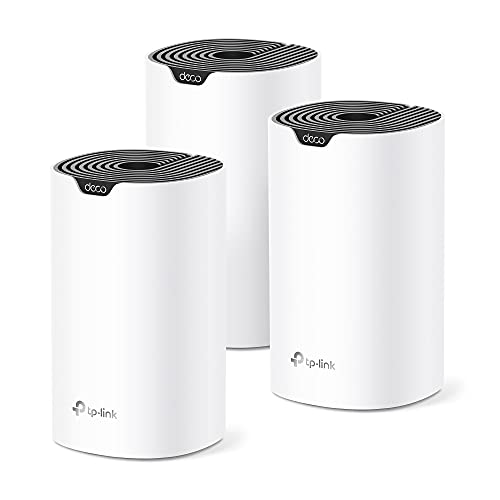

Improve mesh Wi-Fi coverage by placing nodes in open locations where they still receive a strong connection from the main router or another node—not inside the dead zones themselves. Check node connection quality in your mesh app, adjust placement, and use Ethernet backhaul where your system supports it. Start with these changes before buying more nodes.
This guide is for households with weak Wi-Fi in certain rooms, unreliable connections between floors, or mesh nodes that appear connected but deliver poor performance. If your connection is slow everywhere, including over Ethernet, investigate your internet service or main router before changing mesh placement.
Find Where Coverage Breaks Down

Identify which rooms lose reliable connectivity, then compare them with a location near the main router. Use the same device and testing method so differences are meaningful.
A Wi-Fi coverage problem usually varies by location; an internet-service problem can affect both wireless and wired connections.
Draw a simple floor plan showing the router, nodes, floors, and troublesome rooms. Record whether several devices struggle in each location or only one. Include everyday symptoms: interrupted calls, delayed page loads, or a television that repeatedly buffers.
For an A/B comparison, run the same speed test against the same server near the router and in each weak room. Avoid simultaneous downloads, repeat the measurements, and note upload performance and responsiveness—not just download speed. Where possible, compare with an Ethernet-connected computer at the main router.
Testing the same device in different rooms helps separate location-dependent coverage problems from device-specific faults.
Practical home-layout example: In an illustrative two-floor house, a router in the front living room may reach the upstairs landing more reliably than a rear bedroom behind several walls. Test both locations before deciding where an upstairs node belongs.
Seven Mesh Wi-Fi Symptoms and Their First Checks
| # | Observed symptom | First check | Possible limitation | Placement-change potential |
|---|---|---|---|---|
| 1 | Several devices fail in one room | Nearby node connection | Coverage gap | High if signal paths improve |
| 2 | Node app reports weak connection | Upstream distance and obstacles | Wireless backhaul | High if node moves closer |
| 3 | Coverage fails between floors | Landing or stairwell placement | Floor construction | High if an open path exists |
| 4 | Only one device struggles | Device software and adapter | Client-side fault | Low until device is checked |
| 5 | Ethernet and Wi-Fi are slow | Router and internet service | Not primarily coverage | Low for internet-side faults |
| 6 | Strong Wi-Fi indicator, poor speed | Backhaul and network load | Beyond device-to-node link | Low if service is the bottleneck |
| 7 | Node sits inside a cupboard | Open shelf alternative | Obstructed signal path | High if obstruction is reduced |
Move Mesh Nodes Before Adding More
Move the weakest-connected node toward a location that balances upstream reception with coverage of the problem room. A geometric midpoint is only a starting point; walls and floors determine whether it works.
A wireless mesh node must receive a usable upstream connection before it can extend reliable service to another room.
Place nodes on open furniture rather than inside cupboards or directly on the floor. Avoid large metal objects, appliances, and dense obstructions where practical. For connections between floors, test a landing or an open stairwell rather than assuming vertically aligned rooms provide the best path.
For Google Nest Wifi and Google Wifi, [Google’s placement guidance](https://support.google.com/googlenest/answer/7183150) recommends open placement and positioning points between the router and areas needing coverage. Other manufacturers may specify different spacing or mounting requirements.
Changing one node location at a time makes it easier to identify which placement improves mesh Wi-Fi coverage.
After each move, allow the system to reconnect, check its app assessment, and repeat the original activity in the weak room. Keep a short record of placement, connection status, and observed reliability.
Strengthen the Connection Between Nodes
Improve backhaul before expecting a nearby node to solve poor performance. Backhaul is the connection that carries traffic between mesh nodes and toward the main router.
Strong device-to-node reception cannot compensate for a weak connection between that node and the rest of the network.
Ethernet backhaul replaces a wireless inter-node connection with a cable where supported. It can bypass difficult walls and reduce dependence on shared wireless airtime, but installation takes effort and may require a landlord’s permission.
According to [Google’s technical specifications](https://support.google.com/googlenest/answer/6280668), Nest Wifi Pro has two 1 Gbps Ethernet ports, while Nest Wifi points have zero Ethernet ports (specifications referenced for this 2026 guide). The latter cannot use Ethernet backhaul.
Follow [Google’s supported wiring diagrams](https://support.google.com/googlenest/answer/7215624) for port connections, switches, and topology—the arrangement of network links. Do not assume every node connects directly to the modem.
Ethernet backhaul requires compatible hardware, available Ethernet ports, and a manufacturer-supported wiring arrangement.Update firmware using official instructions and review available connection diagnostics. Keep automatic radio settings unless the manufacturer documents a reason to change them; many mesh systems deliberately expose few manual controls.
Avoid Changes That Can Make Coverage Worse
Avoid adding nodes indiscriminately or placing them deep inside dead zones. Extra equipment cannot remove a bottleneck in the connection feeding it.
Additional wireless nodes can increase contention, while extra wireless hops can reduce available throughput.
Contention means devices compete for access to shared radio airtime. Its impact depends on radio design, channel use, and network load; there is no universal speed penalty for every additional hop.
According to [Google’s network-size guidance](https://support.google.com/googlenest/answer/7182840), Google recommends a maximum of five Wifi devices in one network (guidance referenced in 2026). This is manufacturer-specific, not a target every household should reach.
A strong Wi-Fi signal indicator describes reception, not guaranteed end-to-end internet speed.
If only one device struggles, check its operating-system updates, wireless driver, and whether it remains attached to a distant node. Persistent problems through dense masonry may need Ethernet backhaul or a wired access point—a device providing Wi-Fi through a wired network connection—instead of another wireless hop.
Decide Whether Another Node Is Worth Adding
Buy another compatible node only when placement changes leave a clear coverage gap and a suitable location offers usable upstream connectivity.
Another mesh node is useful when it extends a healthy connection into an underserved area, not when it repeats an already weak link.
Compatibility extends beyond brand names. For example, [Google’s compatibility documentation](https://support.google.com/googlenest/answer/9548099) states that Nest Wifi Pro does not form a mesh with older Nest Wifi or Google Wifi devices.
- Potential benefit
- A compatible node can cover a remaining room or floor when its upstream link is adequate.
- Costs and limitations
- Another purchase, another powered device, and potentially more wireless contention—with no guaranteed speed increase.
- Who should skip it
- Households with good coverage but slow wired and wireless internet throughout the home.
Buying another node does not increase the speed supplied by an internet connection.
Save This Coverage Checklist
Work through diagnosis and placement before purchasing hardware. Keep the original test conditions consistent when checking the result.
A useful coverage retest includes the activity that originally failed, not just a speed-test score.
– [ ] Identify weak rooms and establish a near-router comparison using the same device.
– [ ] Reposition nodes, check their connection quality, and consider supported Ethernet backhaul.
– [ ] Retest everyday activities before purchasing more hardware.
Recording node locations and connection assessments makes successful placement changes easier to reproduce.
Sources for Model-Specific Instructions
Use official instructions for your exact hardware model. The Google documentation below supports the Google-specific examples; it should not be treated as universal configuration guidance.
Manufacturer placement instructions and wiring diagrams take precedence over generic mesh-network advice.
– Placement and troubleshooting: [Placement guidance](https://support.google.com/googlenest/answer/7183150) and [mesh connection testing](https://support.google.com/googlenest/answer/7620337).
– Ethernet and hardware: [Supported wired configurations](https://support.google.com/googlenest/answer/7215624) and [technical specifications](https://support.google.com/googlenest/answer/6280668).
– Maintenance and expansion: [Firmware updates](https://support.google.com/googlenest/answer/7599415), [node compatibility](https://support.google.com/googlenest/answer/9548099), and [network-size recommendations](https://support.google.com/googlenest/answer/7182840).
Node compatibility, Ethernet support, and available diagnostic controls vary between mesh systems and hardware generations.
Better mesh Wi-Fi coverage starts with stronger connections between well-placed nodes, not automatically with more hardware. Move the weakest-connected node first, check the result in the problem room, and work through the checklist before deciding whether cabling or an additional node is justified.
Frequently Asked Questions
How can I improve mesh Wi-Fi coverage in my home?
Start by placing each mesh node in a location with strong backhaul signal—ideally not blocked by thick walls, metal surfaces, or large appliances. Use the mesh app to check signal strength and move nodes closer to dead zones until coverage improves. If you have long distances between nodes, consider adding a dedicated backhaul node or enabling wired Ethernet backhaul to boost reliability.
What’s the best way to position mesh nodes for stronger coverage?
Place nodes at about mid-height (not on the floor), in open areas, and away from corners to reduce signal absorption. Keep each node within recommended range and avoid placing them behind TVs, inside cabinets, or near microwaves. For multi-story homes, use at least one node per floor and place the mesh node where devices frequently connect, not only where coverage is weakest.
Why is my mesh Wi-Fi still slow even after adding more nodes?
Slow speeds often happen when nodes connect using weak wireless backhaul, causing extra retransmissions and bottlenecks. Check whether your mesh system supports a dedicated backhaul band (or separate backhaul SSID) and ensure nodes are connected with good signal. Also confirm your gateway/router is performing well, your internet plan matches your usage, and that firmware is up to date.
How do I extend mesh Wi-Fi coverage to far rooms or basements?
Add a node closer to the far area, then test coverage in that specific room to confirm improvements rather than relying on distant placement. If the far area is a basement or garage with heavy walls, use a wired Ethernet connection for the node if possible, or use a model that supports a stronger range/backhaul option. You can also optimize channel and band steering settings in the app to reduce interference from nearby Wi-Fi networks.
Which mesh settings should I adjust to optimize coverage and performance?
Enable band steering if your system supports it, so clients choose the best frequency band for signal strength and speed. Turn on features like roaming assistance and Wi-Fi optimization (if available) and ensure “auto” channel selection is active to minimize interference. If you’re troubleshooting dead zones, temporarily test with a single band or adjust node placement first, then fine-tune settings for stable coverage across your home.
📅 Last Updated: October 16, 2026 | Topic: How to Improve Mesh Wi-Fi Coverage | Content verified for accuracy and freshness.
References
- Mesh networking
- Wi-Fi
- Radio propagation
- Testing to determine if you are a bot!
- https://scholar.google.com/scholar?q=mesh+wifi+coverage+improvement Google Scholar
- https://scholar.google.com/scholar?q=wifi+mesh+placement+backhaul+performance Google Scholar
- https://scholar.google.com/scholar?q=wireless+mesh+network+node+placement+interference Google Scholar