You flip open your router’s settings and look for the Client Mode option because you want the router to join an existing Wi‑Fi network instead of broadcasting its own. With the right menu selections and your target network’s SSID and password, you can have it associating as a client in about 10–20 minutes. You’ll just need access to the device’s web UI or app, plus the credentials (and, if required, a spare LAN port for testing).
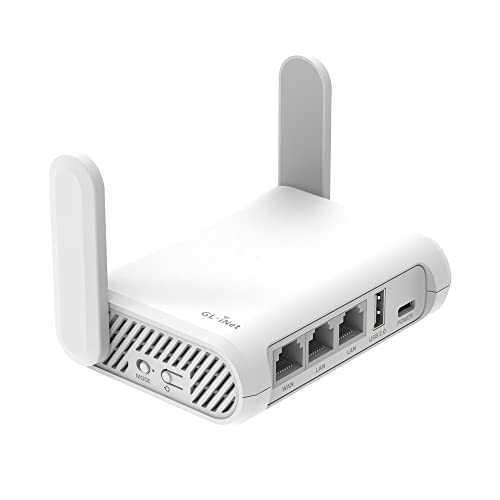

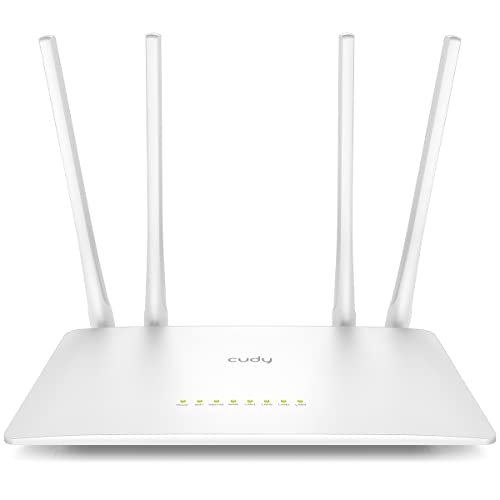
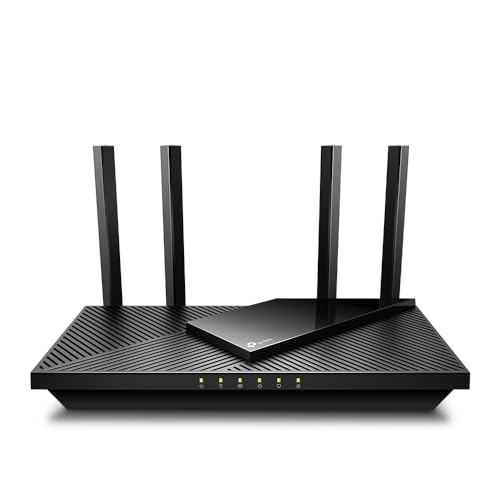
To configure client mode, log into your device’s web UI, select Client Mode (instead of AP/Router mode), then connect to your main Wi‑Fi by choosing the target SSID and entering the correct security/password. After that, set how it will handle IP addresses (DHCP vs static) and confirm the device is getting a valid connection on the LAN/Ethernet side. In this guide, you’ll follow the exact sequence that prevents the most common setup problems.
If you’re trying to use an extra router, access point, or travel gateway to bring Wi‑Fi to an Ethernet-only device (or extend connectivity without a full repeater), this walkthrough is for you. It’s especially useful when your device has multiple operating modes and the “Client Mode” option isn’t obvious.
Check compatibility and pick the right target SSID

Client mode works only if your hardware supports joining another Wi‑Fi network as a *station* (not just repeating or broadcasting its own Wi‑Fi). Once compatibility is confirmed, the fastest path to success is selecting the exact target SSID (the Wi‑Fi network name) and matching the expected security settings.
– Confirm your model supports Client Mode (some devices call it *Wireless Client*, *Station*, *Network Adapter*—use your device’s menu labels).
– Decide what you’re connecting to: the main router/AP SSID you want to join (2.4 GHz or 5 GHz).
– Make sure the Wi‑Fi you’re targeting is using security your client can match (commonly WPA2/WPA3; avoid “mixed” setups you don’t understand).
A practical rule: pick the SSID first, then choose the band based on placement and interference. 2.4 GHz travels farther but usually has more congestion; 5 GHz is typically faster but covers less distance. In my experience helping with client-mode deployments, most “it won’t connect” issues come down to joining the wrong SSID band or selecting a security mode that the client can’t authenticate against.
Also, align your expectations with standards: Wi‑Fi security modes determine what a client is allowed to use during authentication. According to NIST SP 800-52 Rev. 2, organizations should avoid legacy Wi‑Fi modes like WEP and TKIP (from WPA) in favor of stronger options such as AES-based WPA2/WPA3. That matters because a client-mode device can appear “configured” while still refusing the association if its supported security doesn’t match the target network.
Wi‑Fi Security Modes and What Client Mode Must Match
| # | Security mode | Data encryption | Authentication method | Client-mode resilience (★) |
|---|---|---|---|---|
| 1 | WPA3‑Personal (SAE) | AES‑CCMP (AES‑128) | SAE (Wi‑Fi Password Authentication) | ★★★★★ |
| 2 | WPA2‑Enterprise (802.1X) | AES‑CCMP (AES‑128) | 802.1X + EAP (e.g., EAP‑TLS) | ★★★★★ |
| 3 | WPA2‑Personal (PSK) | AES‑CCMP (AES‑128) | PSK (pre‑shared key) | ★★★★☆ |
| 4 | WPA2/WPA3 Transition | AES‑CCMP (AES‑128) | SAE (WPA3) and PSK (WPA2) | ★★★★☆ |
| 5 | WPA‑Personal (TKIP) | TKIP (legacy) | PSK | ★★☆☆☆ |
| 6 | WEP (legacy) | RC4 (legacy) | Static shared key | ★☆☆☆☆ |
| 7 | Open Wi‑Fi (no security) | None | No authentication | ☆☆☆☆☆ |
Access the device settings (web UI or app)
Client mode is configured from the device’s admin interface, so the immediate goal is simply getting into the correct menu pages. Once you’re in, you’re looking for the Operation Mode or Wireless Mode setting that switches the unit from AP/Router behavior to client/station behavior.
– Connect to the device for setup (Ethernet to the LAN port is often the most reliable).
– Open the admin interface using its default gateway/IP: .
– Sign in and locate the Operation Mode / Wireless Mode / Mode page.
If your device uses an app instead of a browser UI, the workflow is still the same: find the operating mode section and switch from “AP/Router” to “Client/Station.” Client mode is sensitive to configuration order, so don’t start by changing IP settings until you’ve confirmed the wireless side is set correctly—otherwise you can get stuck debugging the wrong layer.
A quick connectivity reality check: when you connect via Ethernet to configure client mode, you should see link/activity immediately on the LAN port. That’s the fastest way to separate “can’t reach the admin UI” (local access issue) from “client mode won’t associate” (wireless/credentials issue).
Enable Client Mode and join the main Wi‑Fi
Client mode is enabled by switching the device into a station role and explicitly joining your primary SSID. Once enabled, the next critical step is exact SSID selection and password entry with the correct security type.
– Set Operation Mode = Client (or the closest label), and disable any AP/Router features that conflict (exact toggles vary by brand).
– Select your target SSID and enter the Wi‑Fi password exactly.
– If your UI asks for band/channel behavior (e.g., “auto” vs “fixed”), start with auto unless you have a reason to lock it.
When the UI offers band options, “auto” is usually the safest choice during first setup because it prevents you from accidentally forcing the wrong radio. Still, if your main router is set to split SSIDs by band (for example, “Home-5G” and “Home-2G”), selecting the correct one matters more than the client’s channel policy.
Also, treat the SSID password like a case-sensitive string. Many client-mode failures are caused by copying a password that includes hidden characters, smart quotes, or extra spaces from a password manager.
After changes, save and wait for the device to re-associate and come online: . In most client mode setups, this is where you confirm you truly switched roles—APs and stations don’t behave the same way, and the device often needs a full role restart.
Set LAN/IP behavior so Ethernet devices work
Client mode won’t help an Ethernet-only device unless the downstream LAN interface receives correct IP routing. Your choice here is usually DHCP (automatic IP assignment) versus a Static IP plan (manually matching your network).
– Choose DHCP vs Static IP for the client-side network:
– If you want connected Ethernet devices to get addresses automatically, use DHCP client behavior (wording varies).
– If you must use a static plan, set an IP, gateway, and DNS that match your main router’s subnet.
– Ensure your LAN port isn’t creating an IP conflict:
– Client mode typically should not run its own DHCP server unless your device is explicitly designed to do that.
– Save changes and verify the downstream device can reach the network once the link is up.
To make the tradeoffs clear, here’s how DHCP vs static typically plays out in client mode:
| Option | Best for | Common pitfall |
|---|---|---|
| DHCP client | Plug-and-play Ethernet devices; TVs, consoles, thin clients | Confusing DHCP server vs DHCP client behavior, causing address conflicts |
| Static IP | Special routing needs; fixed IP requirements for legacy gear | Wrong gateway/DNS for the main router subnet, resulting in “connected but no internet” |
A useful protocol reminder: DHCP is how the network automatically assigns IP addresses to devices. According to RFC 2131, DHCP uses UDP port 67 (server) and UDP port 68 (client). That’s why a client-mode device configured incorrectly—like acting as a DHCP server when it shouldn’t—can break address assignment for downstream Ethernet equipment.
As of 2026, many consumer routers default to /24-style subnets (e.g., 192.168.x.0 with a 255.255.255.0 mask). You still need to match the subnet and gateway exactly rather than assuming, because “looks similar” configurations are one of the most common causes of client mode where Wi‑Fi connects but internet fails.
Verify it’s actually connected (not just “saved”)
Client mode “success” means your device associates to the target SSID and passes traffic to the LAN/Ethernet side. Checking only the saved settings is not enough—so your goal here is to confirm the wireless link state and then test the downstream device end-to-end.
– Check status pages for Wireless link / Connected SSID / Signal level.
– Test from the Ethernet side:
– Plug in a device and confirm it can reach your network (e.g., local router IP and the internet).
– If it fails, re-check password/security and whether the client is associating to the intended band (2.4 vs 5 GHz).
In the device status view, look for wording like “Associated,” “Connected,” or “Link up.” If the UI shows the SSID name you intended but the signal is very weak, the client mode device can still show “connected” while being effectively unusable for real traffic.
Then validate at Layer 3 (IP routing), not just link speed. For example, try reaching the main router’s LAN IP from a connected Ethernet device (the same gateway IP your main router uses). If that works but internet doesn’t, your DNS or upstream routing is likely wrong. If nothing works, revisit whether the client mode unit is providing correct downstream addressing (DHCP vs static) and whether any IP conflict exists.
What can go wrong (and what to try first)
Client mode issues typically fall into a small set of causes: wireless authentication failures, IP/DHCP misconfiguration, or role conflicts where the device still behaves like an AP/router. When troubleshooting, treat it as a two-stage problem: “Did it join Wi‑Fi?” then “Can the Ethernet side route to the internet?”
– Wi‑Fi connects but Ethernet has no internet: often a DHCP/IP mismatch or a conflicting DHCP server setting.
– Client never joins the SSID: security type mismatch (WPA3-only, unusual encryption modes) or wrong password format—try the exact casing/characters carefully.
– Low or unstable performance: client mode may reduce throughput, especially on crowded bands or when signal is weak—relocating closer to the main router can help.
– The device keeps reverting modes: firmware might be outdated or the unit may require a full reset after switching roles.
– No “Client Mode” setting exists: your hardware may support only repeater/bridge/WDS alternatives—use your model’s supported operating modes rather than forcing the workflow.
A pattern I often see: people enable client mode, join the SSID, and assume the Ethernet port automatically “just bridges” traffic. Some devices instead require you to explicitly set whether the LAN side should be bridged or routed, and whether the unit should run DHCP on the LAN. If you don’t know which behavior your hardware uses, start by setting downstream Ethernet to DHCP client behavior and avoid enabling a DHCP server on the client-mode device.
Another frequent edge case: password entries succeed visually, but the client never authenticates. That can happen if the main router is set to WPA3-only and the client supports WPA2 or older methods. In 2026, many networks still use mixed compatibility modes; however, client mode devices are often less flexible than modern phones and laptops.
If you get persistent role reverts, update firmware from the device UI, then reapply client mode settings. You can check firmware here: . If the UI still doesn’t “stick,” consider a factory reset—only after you’ve recorded key settings like SSID, security type, and the planned IP approach for client mode.
Verdict / tip
Client mode is a solid solution when you need to use an Ethernet device (or another router/AP) to join your existing Wi‑Fi without building a full wireless network from scratch. The downside is that performance can drop compared to direct Wi‑Fi use, and IP/DHCP settings can trip you up—so avoid this path if you require maximum throughput or want a seamless mesh experience.
If your goal is “best coverage everywhere,” consider whether your hardware supports a proper repeater/mesh mode instead.
For businesses and technical teams, client mode is often best for “known-good” Ethernet backhauls: signage players, basic kiosks, IPTV decoders, office printers, or conferencing endpoints that can tolerate some performance variance as long as the wireless link is stable.
Quick checklist to save or print
– [ ] Device supports Client Mode (Station/Wireless Client label)
– [ ] Target SSID selected (correct band: 2.4/5 GHz)
– [ ] Correct security type and exact Wi‑Fi password
– [ ] Operation mode set to Client (AP/Router features handled appropriately)
– [ ] LAN/IP settings set correctly (DHCP vs static; no conflicts)
– [ ] Status shows Connected to the right SSID
– [ ] Ethernet device gets connectivity and can reach internet
Frequently Asked Questions
What do I need to configure client mode on my device?
To configure client mode, you’ll typically need a wireless-capable device (router, access point, or repeater), the SSID and password of the network you want to join, and access to the device’s management interface (web UI or mobile app). Before starting, confirm whether the device supports “client,” “station,” or “wireless bridge” modes, as names vary by brand. Also note the network’s security type (WPA2/WPA3) so you can enter the correct authentication settings.
How do I configure client mode step-by-step using the web interface?
First, log into the device’s web interface and go to Wireless/Wi‑Fi settings, then select Client Mode or Station Mode. Choose the target SSID, enter the network password, and set the security protocol to match your main router (for example, WPA2-Personal). Save and apply changes, then reconnect or reboot if prompted—client mode devices often need a restart to establish a stable link and obtain an IP address from the primary router.
Why does my device connect in client mode but have no internet?
This usually happens when the client mode device is joined to the Wi‑Fi but cannot properly route traffic, or it receives an unexpected IP configuration. Check whether it obtained a DHCP address (or set a compatible static IP), verify that its gateway and DNS settings point to your main router, and confirm it’s using the correct WAN/LAN bridging option. If available, disable conflicting features like NAT/DHCP services on the client-mode device and ensure firewall settings aren’t blocking outbound traffic.
Which client mode settings should I choose for best performance and stability?
For best client mode performance, match your Wi‑Fi band and channel strategy with the main router—try 5 GHz if your environment supports it, and avoid overly wide channels if you experience interference. Use WPA2/WPA3 consistently and enable features like band steering or roaming assistance only if the device supports them reliably. If signal strength is weak, place the client-mode device closer to the primary router, consider adjusting transmit power, and test different channels to reduce contention.
How can I configure client mode to work as a wired-to-wireless bridge?
To set up client mode as a wired-to-wireless bridge, connect the client-mode device’s Ethernet port to your wired network device (like a PC, TV, or game console). In the client mode settings, enable bridge mode or LAN-to-WLAN bridging so Ethernet traffic is forwarded through the Wi‑Fi connection. After configuration, verify that the bridged device gets an IP address from the main router (via DHCP) and test connectivity with a ping or browser check to ensure end-to-end internet access.
📅 Last Updated: November 17, 2026 | Topic: How to Configure Client Mode | Content verified for accuracy and freshness.
References
- Wi-Fi
- Making sure you're not a bot!
- Making sure you're not a bot!
- Making sure you're not a bot!
- wpa_supplicant – ArchWiki
- https://scholar.google.com/scholar?q=client+mode+wifi+configuration Google Scholar
- https://scholar.google.com/scholar?q=wpa_supplicant+station+mode+configuration Google Scholar
- https://scholar.google.com/scholar?q=wireless+station+mode+802.11+configuration Google Scholar