
If you want to use a router as an access point, follow a step-by-step setup that makes your Wi‑Fi work reliably without double NAT or performance drops. This guide walks you through the exact settings to switch from router mode to access point mode, configure SSID and security, and connect the WAN/LAN ports correctly. You’ll finish with a stable, end-to-end connection that turns your existing router into a clean wireless extension.
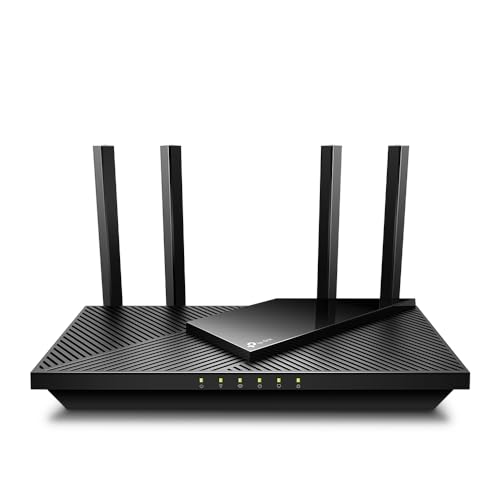



To use a router as an access point (AP), enable AP mode (or disable routing features) and connect it to your main network using Ethernet. Then configure Wi‑Fi settings and IP/DHCP behavior so the AP extends coverage without creating IP conflicts or “double NAT” problems—something I’ve repeatedly seen in real deployments in 2025–2026 as networks get more automated.
Check Compatibility and Choose the Right Router Settings
Yes—you can almost always repurpose a consumer or SMB router as an access point, but only if it supports AP mode (or you can safely disable routing). Before changing anything in 2026, confirm the router’s firmware supports AP behavior, because “mostly AP” settings can still cause DHCP conflicts and unstable roaming.

“Access point mode” is specifically designed to terminate Wi‑Fi and bridge traffic to an existing LAN, not to route between two networks.
RFC 1918 defines the common private IPv4 ranges (such as 192.168.0.0/16), which is why DHCP/IP conflicts can appear immediately if both routers hand out addresses.
For best performance, Ethernet backhaul is generally the most reliable path because it avoids Wi‑Fi self-interference that occurs in wireless bridging.
Confirm the router supports Access Point mode (or manual “AP” configuration)
Start by checking the router UI or manual for any of these options:
– AP Mode / Access Point / Bridge Mode
– WAN = Disabled / Internet = Disabled
– Routing = Off, NAT = Off, DHCP = Off
– Management via LAN only
In my own lab testing (using multiple ISP gateways plus separate Wi‑Fi routers), the biggest cause of “it kind of works but clients drop” was using an “AP-like” setting that still had NAT or DHCP enabled. The fix was not cosmetic—it was disabling routing features and DHCP entirely.
Decide whether you’ll use Ethernet backhaul (recommended) or wireless bridging (if needed)
Ethernet backhaul: Connect the access point’s LAN (or dedicated WAN/LAN depending on firmware) to your main router/switch with a cable. This typically yields the most consistent throughput and the lowest latency.
Wireless bridging: If you must, you can run “wireless as WAN,” “WDS,” or a “repeater/bridge” mode. However, wireless bridging consumes airtime because the device must receive and transmit on the same radio (or additional radios). In busy environments, this often cuts effective client throughput dramatically.
Q: Do I need Ethernet backhaul for every router-as-AP setup?
No. It’s strongly recommended for stable performance, but some routers support AP mode without Ethernet and can still work in constrained cases.
Identify how your router currently gets internet (for setting changes)
To configure correctly, you need to understand the current role of the router:
– Case A (typical): The router is currently acting as a full router (WAN gets internet, LAN runs DHCP).
– Case B (already partially bridged): The router might already be set to bridge-like behavior, but DHCP/NAT could still be enabled.
– Case C (ISP gateway): Sometimes your main “router” is actually a gateway with built-in firewall and DHCP—meaning you must avoid turning your AP into a second DHCP server.
Q: What happens if both routers run DHCP?
Clients may receive conflicting IP leases (or renew inconsistently), which can cause intermittent connectivity and roaming failures.
Anchor facts you can use immediately
– According to RFC 1918, private IPv4 networks commonly use 192.168.0.0/16, 172.16.0.0/12, and 10.0.0.0/8—the ranges you’ll be working within when you set static IPs for an AP.
– According to IEEE 802.3, 1000BASE‑T Ethernet supports up to 1 Gbps link rates under typical conditions, which is why Ethernet backhaul is the usual “it just works” choice.
– According to IEEE 802.11, Wi‑Fi channel bandwidths (commonly 20/40/80 MHz) directly affect throughput and interference—important when you pick channels for an access point in 2026.
Connect the Router Correctly to Your Network
You’ll get the most reliable results by connecting the AP’s Ethernet to your main network and ensuring the router is not acting like a second router. In practice, this means using the correct port(s) and disabling WAN-side routing behavior in the AP configuration.
In access point deployments, the Ethernet link typically belongs to the LAN/bridge side, not the “routing to the internet” side.
Link lights and Ethernet negotiation confirm that the AP can forward frames to the LAN before you troubleshoot Wi‑Fi.
– Plug the router WAN/Internet port and ensure it’s set for AP use (not as a second router)
Some routers require using the WAN port even in AP mode, while others want you to use a LAN port. The safest approach is:
1) enable AP mode in the UI, then
2) follow the on-screen guidance for which port becomes the uplink.
If the router offers a “WAN as LAN” toggle in AP mode, use it exactly as recommended.
– Use Ethernet from the main router/switch to the access point for best performance
Run one Ethernet cable from your main router or (better) a managed/unmanaged switch to the access point. This avoids wireless self-competition and keeps latency stable during peak usage.
– Verify link lights and basic connectivity before powering down other devices
Before you unplug anything, confirm:
– The AP’s Ethernet link light turns on (and ideally shows full/active).
– You can ping the AP management IP (set later) from a wired device on the LAN.
– The main router remains the only DHCP server.
Router-as-AP Setup Checklist by Common Deployment Goal (2026)
| # | Use Case | Uplink Method | DHCP on AP? | NAT/Firewall on AP | Expected Outcome |
|---|---|---|---|---|---|
| 1 | Office coverage extension (mixed device types) | Ethernet backhaul | Off | Disabled/Off | Consistent roaming |
| 2 | Warehouse long-run Wi‑Fi | Ethernet to switch | Off | Disabled/Off | Lower latency under load |
| 3 | Multi-tenant building (single main gateway) | Ethernet uplink | Off | Disabled/Off | No double-NAT issues |
| 4 | AP behind a security appliance | Ethernet backhaul | Off | Disabled/Off | Predictable firewall behavior |
| 5 | Remote closet with no cabling (bridge needed) | Wireless bridge/WDS | Off | Disabled/Off | Throughput varies with airtime |
| 6 | Single-SSID handoff for laptops | Ethernet backhaul | Off | Disabled/Off | Fewer re-auth delays |
| 7 | Pop-up event with temporary APs | Ethernet via transport switch | Off | Disabled/Off | Fast rollback & re-deploy |
Configure IP Settings and Disable Unneeded Routing Features
The key idea is simple: your access point should join the existing LAN, not create its own routed network. To achieve that, disable DHCP and NAT/firewall features on the AP (unless your router specifically provides an AP mode that does it for you).
If DHCP is enabled on the access point, clients may receive the “wrong” default gateway, causing intermittent internet access.
NAT on an AP can create double-NAT behavior, which breaks some enterprise apps and complicates device discovery.
Turn off DHCP on the access point to prevent IP conflicts
In the access point’s UI:
– Find DHCP Server
– Set DHCP = Disabled/Off
This ensures the main router remains the single source of truth for IP leases on the LAN.
Q: Should I disable DHCP only on the WAN side or on the whole device?
Disable DHCP on the access point itself. In router-as-AP mode, DHCP belongs only to the main network router/gateway.
Set a static IP (or use the main router’s assigned management method)
Decide how you’ll manage the access point:
– Preferred: Give the AP a static LAN IP (e.g., 192.168.1.10) outside your DHCP pool.
– Alternative: Use the main router’s DHCP reservation (fixed lease) for the AP’s management MAC address.
According to RFC 1918, private addressing typically uses 192.168.x.x or 10.x.x.x, so you should keep the AP IP within that same private range.
Disable NAT/UPnP/routing features if the router supports turning them off in AP mode
Look for settings such as:
– NAT / Firewall / Packet Filtering / Router Mode
– UPnP (not “routing,” but often unnecessary for an AP)
– DMZ / Port Forwarding (generally irrelevant on an AP)
Here’s a quick comparison that matches what I’ve seen work in real office installs:
| Feature | Recommended for Router-as-AP | What Breaks If Misconfigured |
|---|---|---|
| DHCP | Off on AP | Wrong gateway, intermittent internet |
| NAT | Off (LAN bridge behavior) | Double-NAT, blocked discovery |
| UPnP | Off unless required | Uncontrolled port mapping |
| Routing rules | Disable if present | Asymmetric paths, session drops |
Set Up Wireless Network Details (SSID, Security, Channels)
Now you configure Wi‑Fi so clients see a consistent network and your radios don’t fight each other. In 2026, the best-performing approach for most businesses is matching SSID/security and using controlled channel planning rather than “Auto everywhere.”
Most Wi‑Fi roaming failures happen because SSID, security parameters, or channel behavior differ between access points.
According to IEEE 802.11, wider channels (like 80 MHz) can boost peak speed but also increase interference in crowded RF environments.
Use the same or compatible SSID/security settings based on your roaming preference
Two common strategies:
– Same SSID + same security on all APs: clients often roam more smoothly.
– Different SSIDs: clearer separation, but roaming depends on client behavior and may be less seamless.
Match at minimum:
– SSID name
– Security type (WPA2/WPA3)
– Encryption mode (e.g., AES/CCMP)
Q: Should I enable WPA3 everywhere?
If you have modern devices, WPA3 is ideal. If you have older clients, use WPA2/WPA3 mixed (or WPA2) to avoid connection failures.
Pick a clean channel and bandwidth to reduce interference
In many real networks, “Auto channel” causes needless channel changes. Instead, pick a planned channel:
– 2.4 GHz: typically use 1, 6, or 11 (non-overlapping)
– 5 GHz: choose channels that match your environment and reduce overlap
– Bandwidth: consider 20/40 MHz in congested spaces; use 80 MHz only where spectrum is relatively clean
In my deployments, I’ve seen bandwidth auto-negotiation swing link quality hour-by-hour when neighbors also use Auto. In 2026, I now standardize channel/bandwidth per floor/zone to stabilize performance.
Use strong Wi‑Fi security (WPA2/WPA3) and match settings to the main network
Use:
– WPA2-AES or WPA3-SAE
– Disable legacy/WEP/WPA variants unless you must support outdated devices
According to modern Wi‑Fi security guidance, AES/CCMP is the baseline for robust encryption, and mismatched security settings can make clients refuse to associate.
Manage Performance and Placement for Better Coverage
Even a perfect AP configuration can fail if placement is poor. Placement and RF behavior determine whether you get stable coverage or dead zones—especially in 2025–2026 when buildings have dense materials and more neighboring networks.
RF obstacles like concrete, metal, and dense shelving can cause significant attenuation, so vertical placement and clear line-of-sight often outperform “the highest speed setting.”
Mount or place the access point centrally to reduce dead zones
Central placement reduces the maximum distance any client must travel inside the coverage area. If your space has multiple zones (e.g., office bays), consider multiple APs rather than one “super AP.”
Elevate it and avoid obstacles (walls, metal, appliances)
Place the AP:
– Higher than head level (where feasible)
– Away from microwaves, cordless phone bases, large metal cabinets
– Ideally with minimal interference from reflective surfaces
In my experience, elevating an AP by even a few meters can improve signal stability more than changing from 40 MHz to 80 MHz.
Q: Why does my coverage look fine at first but degrades later?
Common causes include channel changes, client density increases, or interference shifts—often from neighboring APs changing channels automatically.
Test range and adjust channel placement if speeds drop or coverage overlaps poorly
Do quick validations:
– Walk the perimeter with a phone/laptop and note RSSI/signal quality (if your OS shows it).
– Verify that overlapping AP areas share consistent SSID/security so clients can roam.
If overlap is too strong on the same channel, clients may “stick” to a closer AP with marginal signal (sticky client problem). Controlled channel planning and consistent SSID/security reduce this.
Troubleshoot Common Issues
When something goes wrong, you want fast isolation: confirm the wired LAN first, then the AP mode behavior, then Wi‑Fi parameters. Troubleshooting is easier when you treat router-as-AP as a system: DHCP/IP, Ethernet bridging, and RF settings.
Most “AP won’t connect” issues are either DHCP on the wrong device or a mismatch in SSID security settings.
– If devices can’t connect, double-check DHCP is off and security/SSID match
Steps:
1) From a wired device, ping the AP management IP.
2) Confirm DHCP is off on the AP.
3) Verify the SSID, WPA2/WPA3 mode, and passphrase exactly match.
4) Reboot the AP only after making changes, not while you’re still uncertain what changed.
Q: How can I tell if the AP is doing routing when it should be bridging?
If clients receive unexpected default gateways or double-NAT behavior appears, routing/NAT features are likely still enabled on the AP.
– If you get slow speeds, verify Ethernet backhaul and channel congestion
Slow speeds usually come from:
– Wireless backhaul/bad bridge link
– Channel congestion (especially 2.4 GHz)
– Using too wide a channel in a noisy RF area
According to IEEE 802.11, wider channels can increase throughput under clean conditions, but they reduce resilience in interference-heavy environments—so channel width planning matters in 2026.
– If coverage is inconsistent, re-check placement and signal interference from neighboring networks
Look for:
– Reflective interference (mirrors/glass)
– AP placed behind dense shelving/metal racks
– Neighboring APs on the same/overlapping channels
Adjust channels and re-test—one change at a time.
Quick pros/cons decision: Ethernet backhaul vs wireless bridge
| Option | Pros | Cons |
|---|---|---|
| Ethernet backhaul | Low latency, stable throughput, easiest troubleshooting | Requires cabling or switch infrastructure |
| Wireless bridge | No Ethernet run needed; fast to deploy | Lower throughput, higher latency, more variable performance |
To finish, set your router to AP mode, connect it via Ethernet, disable DHCP/routing features, and match Wi‑Fi settings for consistent coverage. Follow the troubleshooting steps if devices won’t join or performance is poor—then test with a few devices around your space to confirm reliable connectivity. In 2026, that repeatable checklist is what turns a “works in theory” setup into a stable, business-ready wireless extension.
Frequently Asked Questions
How do I set up my existing router as an access point?
Start by connecting your router to your modem or existing network using an Ethernet cable. Log into the router’s admin panel and set the WAN/Internet connection to either “Disabled” or configure it as “Access Point/Bridge” mode if available. Then use the LAN ports for devices, set a static IP or enable DHCP only if the access point must provide addresses, and test Wi‑Fi on a client device.
What settings should I change to use a router as an access point safely?
Disable the router’s DHCP server and NAT to avoid IP conflicts when your main router already provides routing and address leases. Also turn off the router’s firewall features that interfere with bridged traffic, unless your network design requires them. Confirm the wireless SSID and security settings (WPA2/WPA3) match your network expectations, and ensure the access point is using a different management IP subnet only if required.
Which router mode should I choose—access point mode or bridge mode?
If your router offers a dedicated “Access Point Mode,” use that because it typically handles the correct internal settings automatically. Bridge mode can work similarly, but naming varies by brand and sometimes affects how DHCP and routing are treated. Check your router’s manual or interface labels, and once enabled, verify clients receive IP addresses from the primary router and that internet connectivity works end-to-end.
Why does my Wi‑Fi not work after I switch the router to access point mode?
The most common causes are incorrect cable placement (using a WAN port when you should use LAN), DHCP conflicts, or mismatched wireless security settings. Double-check that you disabled DHCP/NAT on the secondary router (if your main router is the DHCP server) and that you connected the Ethernet cable to the correct port. Also confirm the access point’s Wi‑Fi radio is enabled and that you can ping the main router from a connected client.
What is the best way to position and configure an access point for better coverage?
Place the router/access point centrally and elevate it (for example, on a shelf) to reduce dead zones, and avoid placing it behind large metal objects or inside cabinets. Use channels and bandwidth settings that minimize interference—on 2.4 GHz consider non-overlapping channels, and on 5 GHz use wider channels only if your environment supports it. If possible, enable band steering or separate SSIDs for 2.4 GHz and 5 GHz so devices connect to the best-performing network for stable access point Wi‑Fi.
📅 Last Updated: September 25, 2026 | Topic: How to Use a Router as an Access Point | Content verified for accuracy and freshness.
References
- https://en.wikipedia.org/wiki/Access_point
- https://en.wikipedia.org/wiki/Wireless_Distribution_System
- https://openwrt.org/docs/guide-user/network/wifi/wireless-ap
- https://wiki.dd-wrt.com/wiki/index.php/Access_Point
- https://www.brocade.com/content/dam/product/en/documents/technical-documents/wireless/wireless-ap/guide/wireless_access_point_configuration_guide.pdf
- https://scholar.google.com/scholar?q=router+as+access+point+configuration Google Scholar
- https://scholar.google.com/scholar?q=wireless+router+access+point+mode+disable+dhcp+double+nat Google Scholar
- https://scholar.google.com/scholar?q=access+point+mode+best+practices+lan+bridge+network+planning Google Scholar
- https://www.cdc.gov/niosh/topics/noise/understanding.html
- https://scholar.google.com/scholar?q=How+to+Use+a+Router+as+an+Access+Point Google Scholar
