To use an Ethernet backhaul, connect your mesh Wi-Fi nodes to the main router with Ethernet cables and confirm that your system recognizes the wired links. Ethernet backhaul beats wireless backhaul when you can run cables, especially where walls or distance weaken connections between nodes. This guide explains how to make those connections and verify that your mesh network is using them.
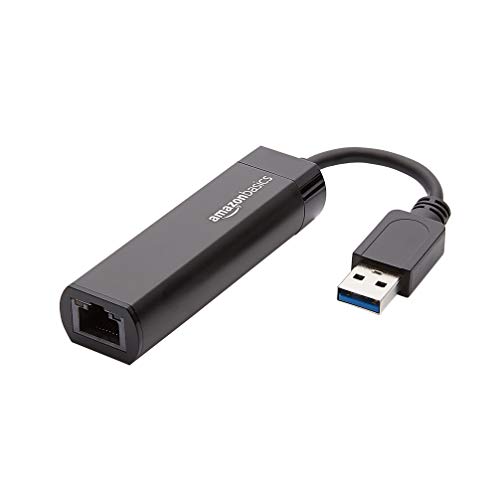
![BENFEI USB 3.0 to Ethernet Adapter, USB C to RJ45 Gigabit LAN (1000Mbps) Network Adapter, Compatible with MacBook/Pro/Air, Surface Pro, Windows 11/10/8/7, Mac OS [Aluminium Shell&Nylon Cable]](https://m.media-amazon.com/images/I/41fk9DHmdwL._SL500_.jpg)


To use an Ethernet backhaul, connect your mesh Wi-Fi nodes to the main mesh router using Ethernet cables, following your system’s supported wiring layout. Check the mesh app or administration page to confirm that each connected node is using a wired connection. Below, you’ll learn how to check compatibility, connect the equipment, and troubleshoot common problems.
This setup is for mesh Wi-Fi owners who have Ethernet wiring—or can install it—between the router and satellite nodes. It is especially useful when walls or distance weaken the wireless connection between nodes.
Check Whether Your Mesh System Supports Ethernet Backhaul

Confirm Ethernet backhaul support for your exact mesh model before connecting cables. Ethernet sockets alone do not establish which wiring layouts or operating modes the system supports.
Ethernet backhaul carries network traffic between mesh nodes and the main router; phones, laptops, and other clients can continue connecting over Wi-Fi.
This guide uses TP-Link Deco X55 as its connection example. According to [TP-Link’s Ethernet backhaul instructions](https://www.tp-link.com/us/support/faq/1794/), Deco units should first be added to the same mesh network through the Deco app, then connected by Ethernet. Check the documentation for your hardware revision and region, particularly when mixing models.
According to [TP-Link’s Deco X55 specifications](https://www.tp-link.com/us/home-networking/deco/deco-x55/#specifications), each X55 has three Gigabit Ethernet ports with WAN/LAN auto-sensing (2026 setup reference). WAN means the upstream network connection; LAN means the local network.
Port speed and Ethernet backhaul support are separate specifications: a supported wired connection still cannot exceed the capabilities of its ports.
The following manufacturer-listed configurations illustrate why model identification matters. These are port link rates, not promised application throughput.
Ethernet Ports on Seven TP-Link Deco Models
| # | Model | Ports per Unit | Fastest Port | Ethernet Backhaul |
|---|---|---|---|---|
| 1 | Deco M5 | 2 × Gigabit | 1 Gbps | Supported |
| 2 | Deco M9 Plus | 2 × Gigabit | 1 Gbps | Supported |
| 3 | Deco X20 | 2 × Gigabit | 1 Gbps | Supported |
| 4 | Deco X50 | 3 × Gigabit | 1 Gbps | Supported |
| 5 | Deco X55 | 3 × Gigabit | 1 Gbps | Supported |
| 6 | Deco XE75 | 3 × Gigabit | 1 Gbps | Supported |
| 7 | Deco XE75 Pro | 1 × 2.5 GbE; 2 × Gigabit | 2.5 Gbps | Supported |
Connect the Main Router and Satellite Nodes
Set the main mesh unit’s operating mode first, then connect one satellite using the manufacturer’s supported topology—the arrangement of cables and network equipment.
In router mode, the main Deco routes traffic and normally supplies local IP addresses through DHCP, the Dynamic Host Configuration Protocol. In access point mode, the existing router retains those responsibilities. TP-Link documents these differences in its [router-versus-access-point guidance](https://www.tp-link.com/us/support/faq/2399/). Other brands may call their equivalent setting bridge mode.
In Deco router mode, satellite Ethernet connections must be downstream of the main Deco, not connected alongside it on the upstream router.
For a Deco X55 router-mode example, connect the modem or upstream gateway to one auto-sensing port on the main X55. Connect another main-unit port to any Ethernet port on the satellite. If adding a switch, put it between the main Deco’s LAN connection and the satellites.
Modem / upstream gateway
|
Main Deco X55 — auto-sensing port used for WAN
|
Another X55 port used for LAN
|
Optional Ethernet switch
|
Wall cabling → satellite X55 Ethernet port
This illustrative diagram follows the router-mode arrangement in [TP-Link’s official wiring diagrams](https://www.tp-link.com/us/support/faq/1794/). Supported chained connections and access-point-mode layouts appear in the same document.
A satellite connected through a switch can use Ethernet backhaul when the switch placement and configuration match the mesh manufacturer’s requirements.
Confirm That the Wired Backhaul Is Active
Verify the connection type for every intended wired satellite in the mesh app. A working Wi-Fi connection does not prove that the cable is carrying backhaul traffic.
For Deco, open the Deco app → Network → network map → select the satellite, then inspect its connection details. TP-Link’s Ethernet backhaul FAQ illustrates Signal Source showing Ethernet. App navigation and wording can vary with firmware and app versions.
Connecting one satellite by Ethernet does not automatically give every satellite in the mesh a wired backhaul.
Use a controlled before-and-after comparison: keep the same client, location, test destination, and workload. Record connection interruptions, latency variation, and packet loss during comparable busy periods. A local transfer to a wired computer helps separate local-network performance from internet-service limitations.
A local-network test can help distinguish backhaul performance from an internet-plan bottleneck.
Fix Common Wiring and Connection Problems
If a satellite still reports wireless backhaul, test a direct cable connection before troubleshooting the entire building’s wiring.
1. Reseat both connectors and confirm the satellite has power.
2. Substitute a known-working Ethernet cable.
3. Bypass wall outlets, patch panels, and switches temporarily.
4. Verify the selected ports and network topology.
5. Reintroduce each component individually.
A direct main-router-to-satellite connection helps isolate faults in switches, patch panels, and installed Ethernet cabling.
TP-Link’s [Ethernet backhaul troubleshooting guidance](https://www.tp-link.com/us/support/faq/1794/) discusses switch compatibility and IEEE 1905.1 traffic used by Deco. Managed-switch VLAN settings, isolation features, or filtering can interfere with connectivity. Follow the manufacturer’s guidance rather than disabling unrelated protections indiscriminately.
Avoid redundant cable paths that create a network loop, where traffic circulates through repeated paths. Do not connect both the main router and a satellite to an upstream switch in Deco router mode.
Ethernet backhaul cannot raise an internet subscription’s speed limit or eliminate every weak Wi-Fi signal between a client and its nearest node.
Decide Whether Running Ethernet Is Worth It
Use Ethernet backhaul when compatible cabling already exists or the wireless connection between nodes is unreliable. Skip major installation work when the current mesh already meets your needs.
Existing Ethernet cabling makes wired backhaul more practical because it avoids much of the installation work.
- Advantages
- A wired node-to-node path avoids relying on radio propagation through walls and can provide more consistent connectivity.
- Downsides
- Cable routing requires time, consumes Ethernet ports, and may require a switch or professional installation.
- Who should wait
- Users with reliable wireless backhaul and impractical cable routes should try repositioning nodes before installing wiring.
According to [TP-Link’s Deco XE75 Pro specifications](https://www.tp-link.com/us/home-networking/deco/deco-xe75-pro/#specifications), each unit includes one 2.5 Gbps port and two Gigabit ports (2026 setup reference). That distinction matters: the chosen ports and intervening switch determine the available link rate.
A faster port on one device cannot make a slower port elsewhere in the same wired path operate faster.
Save This Ethernet Backhaul Checklist
Use this checklist to validate the installation before putting equipment out of reach.
– Before connecting: Confirm model compatibility, operating mode, supported ports, and the manufacturer’s wiring layout.
– After connecting: Verify that every intended satellite reports a wired connection and that devices can access the network.
– Before finishing: Label cables, record the working layout, and check coverage where the network is actually used.
A successful Ethernet backhaul installation requires both a reported wired connection and working network access for client devices.
Cable labels and a recorded wiring diagram make later network troubleshooting easier.
Sources for Your Specific Mesh System
Use official model documentation as the final authority, especially when firmware, hardware revisions, or regional specifications differ.
– Setup, supported topologies, status screenshots, and switch troubleshooting: [TP-Link Ethernet Backhaul FAQ](https://www.tp-link.com/us/support/faq/1794/).
– Operating modes: [TP-Link router-mode and access-point-mode comparison](https://www.tp-link.com/us/support/faq/2399/).
– Port specifications: TP-Link’s official pages for [M5](https://www.tp-link.com/us/home-networking/deco/deco-m5/#specifications), [M9 Plus](https://www.tp-link.com/us/home-networking/deco/deco-m9-plus/#specifications), [X20](https://www.tp-link.com/us/home-networking/deco/deco-x20/#specifications), [X50](https://www.tp-link.com/us/home-networking/deco/deco-x50/#specifications), [X55](https://www.tp-link.com/us/home-networking/deco/deco-x55/#specifications), [XE75](https://www.tp-link.com/us/home-networking/deco/deco-xe75/#specifications), and [XE75 Pro](https://www.tp-link.com/us/home-networking/deco/deco-xe75-pro/#specifications).
Manufacturer wiring diagrams take precedence over generic Ethernet backhaul instructions.
Model-specific port specifications describe hardware capabilities, not guaranteed real-world throughput.
Ethernet backhaul can make the connection between mesh nodes more consistent, but compatibility and correct wiring matter more than simply plugging in a cable. Start with your model’s official instructions, connect one satellite, and verify its wired status before extending the setup to the remaining nodes.
Frequently Asked Questions
How do I set up an Ethernet backhaul between two routers?
Connect the primary router’s Ethernet LAN port to the secondary router’s Ethernet WAN (or “uplink/backhaul”) port using a solid Ethernet cable. On the secondary router, disable Wi‑Fi for backhaul if it supports Ethernet backhaul mode, or select “backhaul via Ethernet” in the setup wizard. Then configure the two routers so the secondary operates as an access point/mesh node with the same network name and IP range, ensuring the backhaul uses the wired link rather than Wi‑Fi.
What’s the best Ethernet cable type for a stable backhaul link?
For most home and office distances, Cat5e is sufficient, but Cat6 or Cat6a is recommended for better shielding and performance over longer runs. Use Cat6 for typical backhaul distances under 55 meters and Cat6a for up to 100 meters to reduce interference in environments with lots of electrical noise. Also verify that you’re using the correct cable termination and consider a quality Ethernet patch panel or keystone jacks for reliable connectivity.
Which router ports should I use for Ethernet backhaul—LAN or WAN?
Use the primary router’s LAN port as the source for the backhaul, because the backhaul is typically carrying traffic to the secondary node within the same network. On the secondary router, choose the port labeled WAN/uplink/backhaul (if provided) so the device can treat that Ethernet link as the upstream connection. If you connect to the wrong port (like LAN when the device expects WAN), you may end up with double NAT, IP conflicts, or the backhaul link failing to pass traffic.
Why does my Ethernet backhaul show “no internet” even though the link light is on?
This usually happens when the secondary router can’t reach the upstream network due to incorrect WAN settings, DHCP/static IP mismatch, or VLAN/security settings. Check that the secondary router’s backhaul connection is configured to obtain an IP automatically (DHCP) or set the correct static IP gateway if you use static addressing. Also confirm that the primary router’s LAN is allowing forwarding to the secondary node and that any firewall or VLAN tagging on the backhaul path matches what the routers expect.
How can I optimize speed and reduce latency for an Ethernet backhaul connection?
Start by ensuring the Ethernet backhaul link negotiates at the highest possible speed (e.g., 1 Gbps) and avoid damaged cables or adapters that force lower speeds. Keep the backhaul wiring away from power cables and use shielded Ethernet (often Cat6a/STP) if your run passes through noisy electrical environments. Finally, place the primary router centrally, minimize unnecessary routing features on the secondary node, and test with a direct Ethernet throughput check to confirm the wired backhaul is performing correctly.
📅 Last Updated: October 16, 2026 | Topic: How to Use an Ethernet Backhaul | Content verified for accuracy and freshness.
References
- Backhaul
- Ethernet
- RFC 2475: An Architecture for Differentiated Services | RFC Editor
- IEEE SA – IEEE 802.1Q-2022
- IEEE SA – IEEE 802.1AX-2020
- IEEE SA – IEEE 1588-2019
- https://scholar.google.com/scholar?q=ethernet+backhaul+deployment+vlan+qos Google Scholar
- https://scholar.google.com/scholar?q=mobile+backhaul+ethernet+transport+implementation Google Scholar
- https://scholar.google.com/scholar?q=power+over+ethernet+backhaul+field+deployment Google Scholar


2 thoughts on “How to Use an Ethernet Backhaul”