Calibrating your AV receiver is essential for achieving the best sound performance in your home theater setup. A well-calibrated receiver ensures that audio playback is balanced, immersive, and tailored to the specific acoustics of your room. By following a series of key steps, you can optimize your audio experience, whether for movies, music, or gaming. This guide will provide you with the necessary understanding and best practices to enhance your sound quality effectively.
Understanding the Importance of Calibration

Proper calibration of your AV receiver is critical as it ensures accurate sound reproduction tailored to your room’s unique acoustics. Each room presents different challenges, such as varying dimensions, furniture placement, and surface materials that affect sound waves. Without calibration, you may experience imbalanced audio, where certain frequencies overpower others, leading to a subpar listening experience.
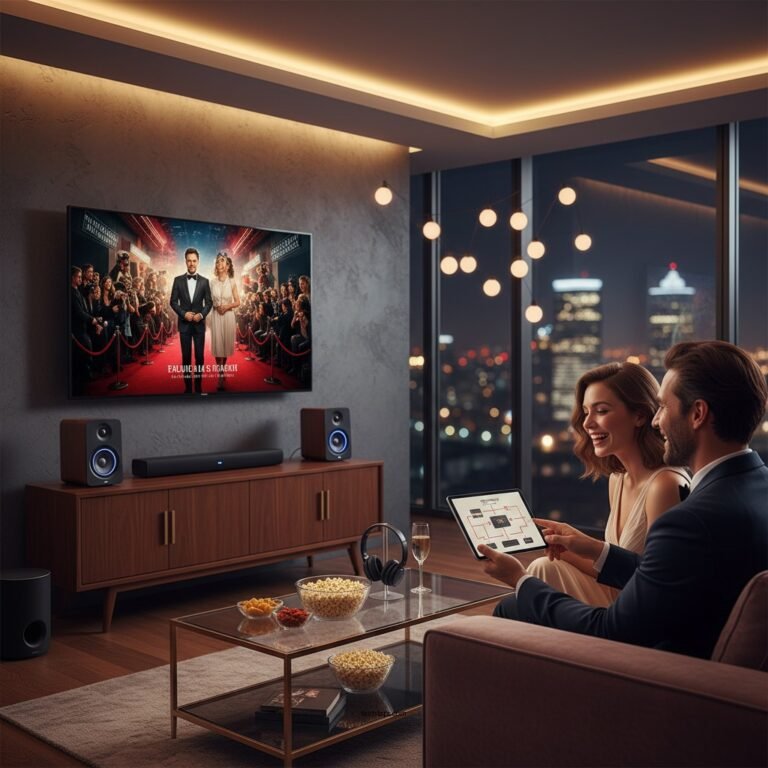
Calibration can significantly enhance your movie and music listening experience by providing clearer dialogue, richer soundscapes, and a more engaging atmosphere. In essence, calibration transforms your home theater into a space that delivers audio as intended by the creators, allowing you to fully immerse yourself in the content.
Tools You’ll Need for Calibration
To achieve optimal results, you will require a few essential tools for calibration:
– Sound Level Meter or Smartphone App: A sound level meter or a reliable smartphone app can measure sound levels accurately, helping you assess the output from each speaker. This is crucial for ensuring that all speakers output sound at the same relative volume.
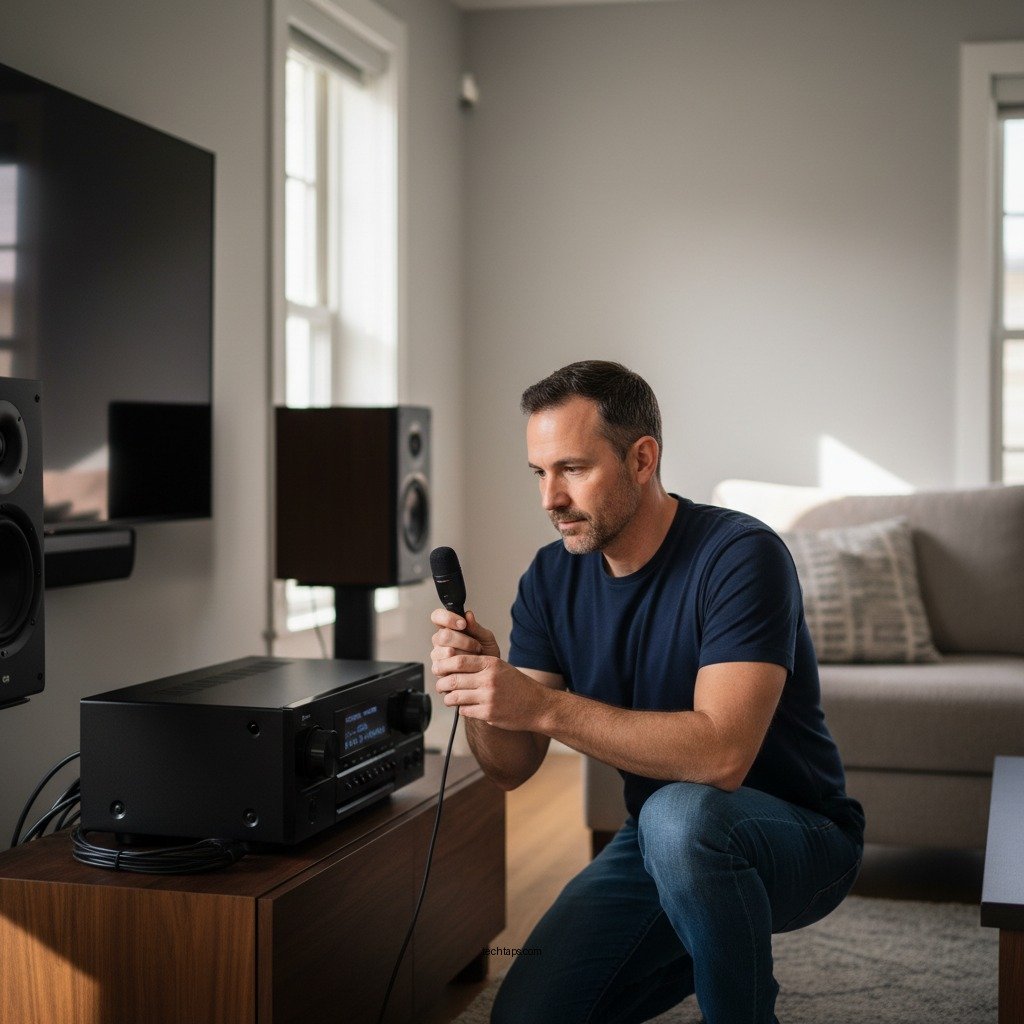
– Calibration Microphone: Many AV receivers come with a calibration microphone designed specifically for this purpose. This microphone allows for automated adjustments by analyzing the sound environment and providing tailored settings.
– Setup Disc or Calibration Software: While not strictly necessary, using a setup disc or dedicated calibration software can help you fine-tune the settings even further.
Manual vs. Automatic Calibration
When it comes to calibrating your AV receiver, you have two primary options: manual and automatic calibration.
– Manual Calibration: This method allows for more personalized adjustments based on your preferences. You can manually set speaker levels, distances, and equalization settings. This approach is particularly beneficial for audiophiles who want to customize their sound profile to their liking.
– Automatic Calibration: Most modern AV receivers come equipped with built-in software that performs automatic calibration. This process is quick and suitable for most users, as it takes the guesswork out of the setup. While automatic calibration can produce satisfactory results for casual listeners, it may not capture nuanced preferences that manual adjustments can provide.
Top 7 AV Receiver Brands for Calibration Features (2023)
| # | Brand | Calibration Type | Microphone Included | User Rating |
|---|---|---|---|---|
| 1 | Yamaha | Auto & Manual | Yes | ★★★★☆ |
| 2 | Denon | Auto | Yes | ★★★★★ |
| 3 | Onkyo | Auto | Yes | ★★★★☆ |
| 4 | Marantz | Auto & Manual | Yes | ★★★★☆ |
| 5 | Sony | Auto | Yes | ★★★★☆ |
| 6 | Pioneer | Manual | No | ★★★☆☆ |
| 7 | Cambridge Audio | Manual | No | ★★★☆☆ |
Step-by-Step Calibration Process
The calibration process can be broken down into several straightforward steps.
1. Position the Microphone: Start by placing your calibration microphone at your primary listening position. This is where you will be experiencing the sound most frequently, so it’s crucial that measurements are taken from this spot.
2. Access the Calibration Menu: Navigate to your receiver’s setup menu and look for the calibration or speaker setup option. Most modern receivers will have a dedicated section for this purpose.
3. Follow On-Screen Prompts: The receiver will guide you through the calibration process. This typically involves playing test tones through each speaker while the microphone records the sound levels and distances.
4. Adjust Settings: Once the measurements are complete, the receiver will automatically adjust settings such as speaker levels and distances. Review these settings and make manual adjustments if necessary based on your preferences.
5. Test Playback: After calibration, play various audio content to ensure that the sound is balanced and meets your expectations.
By following these steps, you can ensure that your AV receiver is properly calibrated to deliver optimal sound performance tailored to your home theater environment.
Fine-Tuning Your Settings
After the initial calibration, it’s time to fine-tune your settings for even better audio performance. Here are a few actions you can take:
– Adjust Speaker Levels and Distances: Even though automatic calibration provides a solid starting point, you may want to make slight adjustments. For instance, if you find that dialogue is still unclear, you can increase the center channel speaker level.
– Equalization Settings: Experiment with equalization (EQ) settings on your receiver. Most AV receivers allow you to adjust specific frequency bands. Depending on your listening preferences, you may choose to boost bass for movies or enhance mid-range frequencies for clearer vocals.
– Subwoofer Settings: Pay special attention to your subwoofer. Adjusting the crossover frequency and volume can greatly impact the overall sound experience. Ensure that the subwoofer integrates seamlessly with the other speakers.
– Room Correction Features: Many advanced receivers come with room correction features that can further enhance sound quality. These features analyze the acoustics of your room and make adjustments to compensate for any deficiencies.
By taking the time to experiment with these settings, you can create a personalized sound profile that caters to your specific tastes.
Common Calibration Mistakes to Avoid
While calibrating your AV receiver can significantly improve sound performance, certain common mistakes can hinder your efforts. Avoid the following pitfalls:
– Neglecting Room Acoustics: Failing to consider your room’s acoustics can lead to suboptimal results. Hard surfaces such as bare walls and floors reflect sound, while soft furnishings absorb it. Be mindful of your room’s layout and make adjustments as needed—for example, adding rugs or curtains can help reduce reflections.
– Inconsistent Speaker Placement: Ensure that all speakers are positioned correctly and consistently. Improper placement can lead to phase issues and uneven sound distribution. Use speaker stands or wall mounts to achieve the best positioning.
– Not Recalibrating After Changes: If you rearrange furniture or add new equipment, take the time to recalibrate your system. Changes in the environment can significantly affect sound quality, and recalibration ensures that your setup remains optimized.
– Ignoring User Guides: Each AV receiver may have unique calibration features and settings. Ignoring the user manual may result in missed opportunities for optimization. Take the time to read through it to fully utilize your receiver’s capabilities.
Regular Maintenance and Recalibration
To maintain optimal sound quality, it’s essential to perform regular maintenance and recalibration of your AV system. Here are some best practices:
– Periodic Recalibration: Make it a point to recalibrate your system periodically, especially after making significant changes to your room setup. This ensures that you are always getting the best possible sound.
– Seasonal Changes: Consider seasonal recalibrations to accommodate changing furniture or equipment. For instance, if you bring in new furniture that alters the room’s acoustics significantly, a recalibration may be warranted.
– Listening Environment: Keep an eye on external factors that could affect your listening environment, such as seasonal changes in humidity or temperature, which can impact how sound travels through your space.
Incorporating these practices into your routine will help ensure that your AV receiver consistently delivers excellent sound performance.
Summarizing the calibration process is crucial for optimal sound performance from your AV receiver. By understanding the importance of calibration, utilizing the right tools, and following a systematic approach, you can significantly enhance your audio experience. Take action today, and start enjoying a richer sound environment in your home theater!
Frequently Asked Questions
What are the key steps for calibrating my AV receiver for optimal sound performance?
Calibrating your AV receiver involves several key steps: first, set up your receiver in the correct location and connect all speakers properly. Next, use an automatic calibration feature, if available, which utilizes a microphone to measure room acoustics and adjust settings. Finally, manually fine-tune the speaker levels, distances, and crossover settings to match your personal listening preferences.
How can I improve the sound quality of my AV receiver without purchasing new equipment?
To enhance the sound quality of your AV receiver, start by ensuring that your speaker placement is optimal—ideally at ear level and away from walls. Use your receiver’s built-in calibration tools to adjust sound settings based on your room’s acoustics. Additionally, consider using high-quality speaker cables and ensuring all connections are secure to maximize audio clarity.
Why is room calibration important for my AV receiver’s performance?
Room calibration is crucial for your AV receiver’s performance because every room has unique acoustics that can significantly affect sound quality. By calibrating your system, you can compensate for factors like speaker placement, room dimensions, and furniture that may interfere with sound waves. This process ensures a balanced audio experience tailored to your specific environment.
What is the best microphone for calibrating my AV receiver?
The best microphone for calibrating your AV receiver is typically one that is designed for audio measurement and comes with a flat frequency response. Many AV receivers include a calibrated microphone in the package, but if you’re looking for an upgrade, consider options like the Dayton Audio UMM-6 or the miniDSP UMIK-1, both known for their accuracy in room acoustics measurement.
Which settings should I adjust first during the calibration process of my AV receiver?
When calibrating your AV receiver, start by adjusting the speaker distances to ensure accurate timing of sound from each speaker to your listening position. Next, focus on the speaker levels to achieve a balanced sound output across all channels. Finally, set the crossover frequency to optimize the transition between your speakers and subwoofer for a seamless audio experience.
References
- https://www.audioholics.com/tips/calibrating-your-av-receiver
https://www.audioholics.com/tips/calibrating-your-av-receiver - https://www.crutchfield.com/S-8h1dQj5LQeS/learn/av-receiver-setup-guide.html
https://www.crutchfield.com/S-8h1dQj5LQeS/learn/av-receiver-setup-guide.html - Google Scholar Google Scholar
https://scholar.google.com/scholar?q=calibrating+AV+receiver+optimal+sound+performance - Google Scholar Google Scholar
https://scholar.google.com/scholar?q=AV+receiver+calibration+techniques - Google Scholar Google Scholar
https://scholar.google.com/scholar?q=audio+receiver+calibration+best+practices - Google Scholar Google Scholar
https://scholar.google.com/scholar?q=Calibrating+Your+AV+Receiver+for+Optimal+Sound+Performance - Calibrating Your AV Receiver for Optimal Sound Performance – Search results
https://en.wikipedia.org/wiki/Special:Search?search=Calibrating+Your+AV+Receiver+for+Optimal+Sound+Performance - https://www.ncbi.nlm.nih.gov/search/research-articles/?term=Calibrating+Your+AV+Receiver+for+Optimal+Sound+Performance
https://www.ncbi.nlm.nih.gov/search/research-articles/?term=Calibrating+Your+AV+Receiver+for+Optimal+Sound+Performance