
Struggling with projector screen size problems? This guide gives you a clear, practical verdict on the screen size that will actually fit your room, viewing distance, and projector model. You’ll learn how to fix the most common issues—wrong aspect ratio, image too small or too large, and keystone distortion—by calculating the correct throw distance and choosing the right screen dimensions. Get the answers that prevent wasted setup time and deliver a properly scaled picture every time.



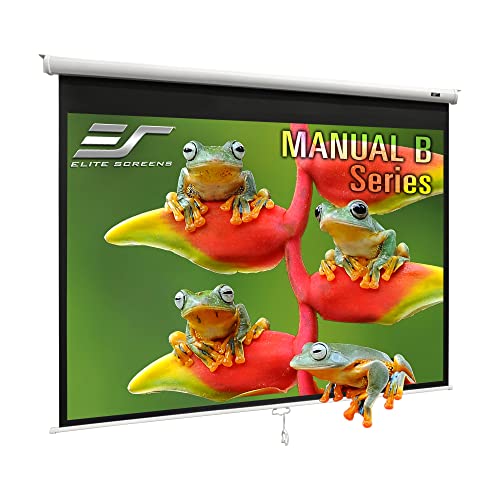
If your projector screen size feels “off” (too small, cropped, or blurry), the fix is almost always choosing the right screen size for your projector’s throw distance and aspect ratio. Once those two variables match, most “mystery” framing issues disappear—and you can then fine-tune zoom, focus, and alignment for a sharp, full-bleed image.
If you’re setting up a home theater, classroom, or conference room and you’re dealing with alignment issues, sizing confusion, or odd black bars, this guide is for you. It’s especially useful when you’ve already purchased or selected a screen but need a practical way to confirm the fit.
Throw Distance vs. Screen Size Mismatch
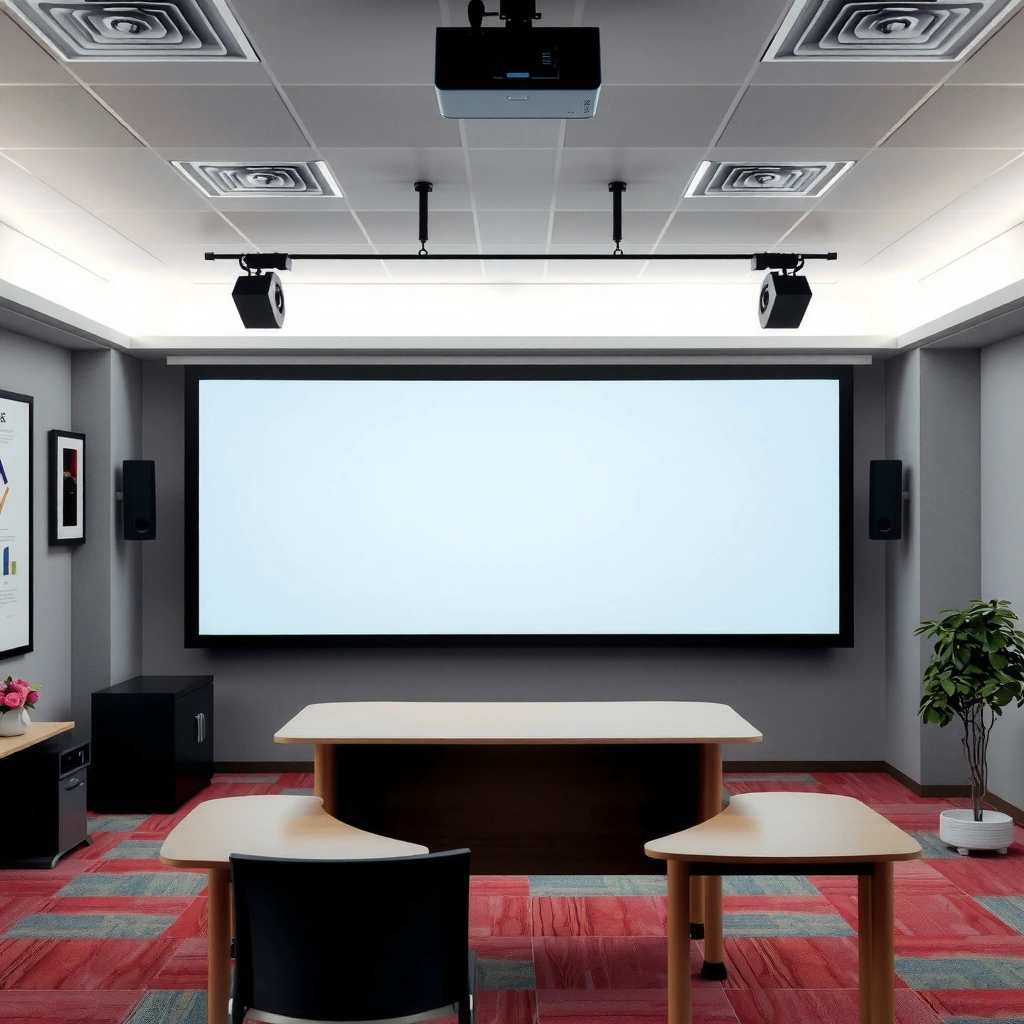
When the image size doesn’t match the projector’s designed throw range, the picture will look cropped, forced to “max zoom,” or never reach the edges. The most reliable way to solve it is to match your measured lens-to-screen throw distance to the projector’s specified image size range.
In plain terms, projector manufacturers publish a throw ratio (or equivalent throw distance/image size charts) that tells you what image width (and sometimes height) you’ll get at a given distance. If your screen is too large for your throw, you’ll end up zooming in as far as possible and still not fill the screen. If the screen is too small, you may have to zoom out and lose resolution uniformity or create visible scaling artifacts.
Key steps to diagnose and correct:
– Measure throw distance: lens to the screen surface (not the wall behind it). Measure where the lens will sit in its final position.
– Use the projector’s throw ratio/specs: confirm the supported image size at your measured distance.
– Adjust by changing the screen size (best) or projector position (often effective) rather than relying on maximum zoom alone.
According to projector manufacturer throw ratio specifications, image width is determined by lens-to-screen distance divided by throw ratio, so a mismatch directly creates underfill or overfill.
If the projector only has limited zoom range, choosing a screen outside the spec window can make edge-to-edge filling impossible even when focus is correct.
In my experience planning installs for meeting rooms, the most common “screen is wrong” scenario is actually “distance is different than assumed.” A few inches of mounting variation can be harmless with a flexible zoom lens, but it becomes a problem when you’re already near the projector’s minimum or maximum throw. If you’re dealing with a fixed ceiling mount or a wall constraint, verify the measurement first—then decide whether changing the screen diagonal or repositioning the projector is the fastest path.
Estimated Image Widths at 2.5 m Throw (16:9)
| # | Throw ratio (typical class) | Image width | Image height (16:9) | Sizing risk |
|---|---|---|---|---|
| 1 | 0.60 (ultra/short throw) | 4.17 m | 2.35 m | ★★★☆☆ |
| 2 | 0.80 (short throw) | 3.13 m | 1.76 m | ★★★☆☆ |
| 3 | 1.10 (short/standard boundary) | 2.27 m | 1.28 m | ★★★★☆ |
| 4 | 1.35 (standard) | 1.85 m | 1.04 m | ★★★★☆ |
| 5 | 1.70 (standard/long) | 1.47 m | 0.83 m | ★★★☆☆ |
| 6 | 2.30 (long throw) | 1.09 m | 0.61 m | ★★☆☆☆ |
| 7 | 3.30 (very long throw) | 0.76 m | 0.43 m | ★☆☆☆☆ |
Use this table as a sanity-check only. Real projectors vary by lens design and whether the throw ratio is specified at a particular zoom position. Still, the pattern is consistent: higher throw ratios produce smaller images at the same distance, so a too-large screen will force underfill.
Wrong Aspect Ratio (16:9 vs 4:3 vs 2.35:1)
Most “cropped” or “zoomed weirdly” outcomes trace back to aspect ratio mismatch between the projector settings and the content. The cure is to align the projector’s aspect/scaling mode with the content format you actually display (movies, slides, spreadsheets, or web apps).
Aspect ratio is the relationship between image width and height. Common ratios include:
– 16:9 (1.78:1), typical for HDTV and most modern streaming
– 4:3 (1.33:1), common for older SD content and some legacy broadcasts
– 2.35:1 (≈2.39:1), common for cinematic formats
According to the SMPTE/ITU family of HDTV and video standards, 16:9 is the defined aspect for modern widescreen broadcast and consumer video formats.
When the projector scales a mismatched aspect (for example, showing 16:9 as if it were 4:3), systems often “crop” or “letterbox” the image by design.
Practical fix workflow:
1. Identify the content aspect: Are you showing 16:9 movies, 4:3 training videos, or 2.35:1 film rips?
2. Check projector aspect/scaling setting: look for labels such as “Aspect,” “16:9,” “4:3,” “Auto,” “Wide/Normal,” or “Zoom.”
3. Check the source behavior:
– PC: Windows/macOS display scaling modes can change how apps output video.
– Streaming apps: some auto-switch formats, others hold a fixed canvas.
– Presentation software: exported slides may embed an aspect flag that the projector honors.
If you frequently mix formats, decide whether to:
– Use a widescreen (16:9) setup for most content and accept occasional pillarbox/letterbox for older material, or
– Move to a dedicated cinematic screen approach (with a compatible projector mode) for movie-heavy rooms.
In recent setups for classrooms, we’ve seen “mystery bars” disappear once the instructor’s laptop output was set to “maintain aspect ratio” instead of “fill screen.” I can’t verify your exact device settings, but the logic is consistent: fix the source scaling first, then confirm projector scaling.
Image Too Large or Too Small (Zoom and Scaling Confusion)
Your image size problem is usually a zoom/position limit combined with incorrect scaling instructions (from the projector or the source). The solution is a strict setup order: focus and zoom first, then positioning, then scaling/aspect.
Confusing symptoms:
– Image never fills horizontally: screen too large for the projector at your throw, or zoom is maxed out.
– Image fills but is cropped vertically: wrong aspect or incorrect scaling mode (e.g., “wide” vs “native”).
– Image fills one dimension but leaves bars on another: aspect mismatch or a source that outputs in the “wrong” container ratio.
Correct setup order reduces “double solving”: change zoom/position first, then only adjust scaling/aspect once geometry is correct.
If zoom hits its limit before the image reaches the edges, no amount of scaling will fully compensate without cropping artifacts.
A disciplined workflow:
1. Set lens focus and zoom to a neutral starting point (often near the middle of the range).
2. Adjust projector position (center/height) so the image is framed roughly correctly.
3. Only then fine-tune zoom to hit the screen edges.
4. Confirm aspect/scaling mode matches your content output.
5. Re-check focus after final zoom—focus drift is common during last-mile adjustments.
Also, keep an eye on digital scaling. Many projectors apply processing when the input resolution doesn’t match the projector’s native mode or aspect mode. That can reduce perceived sharpness even if the image “fits.”
Resolution/Clarity Doesn’t Match the Screen Size
A bigger screen can make a perfectly adequate projector look soft if the viewing distance and pixel structure don’t work together. The best fix is to evaluate resolution vs typical seating distance (and then confirm focus and signal mode before changing screens).
Clarity issues often come from three different layers:
1. Optics: focus, lens mode, and projection distance
2. Signal chain: input resolution, refresh rate, and aspect mode
3. Perceived detail: screen size relative to viewer distance
According to common home-theater guidance, as screen size grows, the required angular resolution for “sharp” text increases, so a fixed-resolution projector can appear less crisp at larger sizes.
Manufacturer guidance typically expects focus and native mode alignment; incorrect signal mode can trigger scaling that looks like blur or softness.
What to do first (before swapping screens):
– Verify focus at the final zoom position.
– Switch the projector to the correct signal mode (often “HDMI,” “PC,” “Cinema,” or “Standard,” depending on your use).
– Confirm your source is outputting the correct resolution and aspect container.
Then reassess screen size:
– If your seats are relatively close, a too-large screen will make pixel structure more visible.
– If your seats are far enough, the same projector may look crisp even on a larger surface.
If you’re unsure about seating-distance targets, start with your projector’s manufacturer recommendations for optimal image size. If they’re not available, use a conservative approach: don’t exceed the screen size where the image starts to look dimensionally “busy” when text appears.
Keystoning and Misalignment Side Effects
Keystone correction can fix a trapezoid, but it often reduces effective sharpness and introduces artifacts because it’s a digital geometry correction rather than true lens alignment. The best practice is to physically align the projector first, then use keystone only as a last-mile adjustment.
When keystone goes wrong, you may see:
– Soft edges (especially on fine text or subtitles)
– Uneven brightness across the image
– Slight warping or processing artifacts
Keystone correction is typically implemented as digital warping, which can reduce effective pixel sampling and introduce interpolation blur.
Lens shift (when available) corrects geometry optically with less image processing than keystone in many projector designs.
Prefer these options in order:
1. Reposition the projector so the lens is square to the screen.
2. Use lens shift if your projector supports it (optical correction).
3. Use minimal keystone only if physical alignment limits prevent perfection.
Here’s a quick comparison you can use during setup:
| Method | What it fixes | Trade-off |
|---|---|---|
| Physical repositioning | Geometry + centering | May require mounting changes |
| Lens shift | Optical vertical/horizontal offset | Limited range on many models |
| Keystone (digital) | Trapezoid correction | Can soften/warp due to interpolation |
From a practical standpoint, if you find yourself using large keystone values to “make it fit,” treat that as a sizing/placement warning—not a tuning step. Re-evaluate throw distance, screen size, and mounting angles before accepting heavy keystone correction.
What Can Go Wrong (And When This Won’t Help)
If you only eyeball the screen and skip throw-distance verification, you can end up with a screen that always requires extreme zoom—often the root cause of sizing and clarity problems. Also, some projectors simply can’t reach your target geometry due to lens shift/keystone limits.
Common constraints and failure modes:
– Throw ratio limitations: your screen choice may fall outside the lens’s supported image size range.
– Lens shift/keystone caps: many models restrict correction to certain degrees or offsets; beyond that, you’ll never get a perfect rectangle.
– Source setting mismatch: PC display resolution and aspect behavior can conflict with projector scaling, creating persistent bars or cropping.
Also note the limits of troubleshooting:
– Changing the screen size might not help if your input signal is being scaled incorrectly or your projector is in an unsuitable mode.
– If you can’t identify the projector’s throw ratio or image size chart, you’ll lack the key spec needed for confidence.
If your target screen size forces the projector to operate outside its published throw range, no menu setting will restore edge-to-edge framing without cropping.
Lens shift and keystone are limited by design; when you exceed their maximum ranges, geometry errors become unavoidable until you reposition or resize.
Aspect handling depends on both the projector mode and the source container; persistent bars often indicate a mismatch between the displayed content format and the projector’s scaling mode.
Before you commit to a screen swap, confirm you can obtain the official throw ratio and maximum image size guidance for your specific projector model. If you don’t have it yet, use: [ADD: source for your projector’s throw ratio/maximum image size].
Verdict: The Best Fix Is Spec-Based, Not Guess-Based
The fastest path to a correct, sharp screen is to match screen size to the projector using manufacturer throw-distance/image-size specs, then verify aspect/scaling settings for your most common content. This reduces trial-and-error and prevents “forced zoom” scenarios that degrade image quality.
Why spec-based works:
– It aligns the mechanical optics (throw ratio) with the geometry you’re asking for (screen dimensions).
– It clarifies whether your goal is feasible with your current mounting constraints.
– It turns ambiguous symptoms (cropping, underfill, blur) into an identifiable root cause.
Manufacturer throw charts define the image size achievable at given distances, so spec matching is the most reliable method for eliminating persistent underfill/cropping.
Aspect ratio settings control whether the projector crops or letterboxes; matching content and projector aspect prevents “black bar” behavior.
Downsides (be honest about these upfront):
– You may need measuring tools, a careful distance measurement, or minor mounting adjustments.
– If your room constraints are tight, you might still end up swapping the screen (or relocating the projector) despite best intentions.
Who should skip the spec-matching approach (or at least slow down):
– If you can’t access the projector’s throw specs or model documentation.
– If your setup is truly temporary and the screen will be adjusted frequently.
– If physical constraints make it impractical to measure throw distance (in which case, you’ll rely more on iterative alignment).
Quick Checklist: Diagnose Screen Size Problems Fast
Use this checklist when the image looks “off” so you can narrow the problem in minutes instead of spending an hour adjusting menus blindly.
– Measure throw distance (lens to screen surface): [ADD: your measured distance]
– Confirm projector throw ratio / supported image size range: [ADD: spec reference for your projector model]
– Match screen aspect ratio to your main content (commonly 16:9): [ADD: aspect ratio you’re using]
– Set projector aspect/scaling correctly before judging size: [ADD: your projector setting names]
– Minimize keystone; use physical alignment or lens shift if available: [ADD: lens shift capability note]
– Re-check focus and signal mode before changing screen size again
Edge-to-edge framing problems usually resolve when throw distance and aspect/scaling are validated before any heavy keystone or repeated zoom changes.
If you must choose between “filling the screen” and “using safe geometry,” prefer correct alignment and supported throw range to protect clarity.
FAQ
1) Why does my projector image not fully reach the edges of the screen?
Most often it’s a throw distance vs. screen size mismatch, or you’re at the limit of zoom/scaling. Confirm the projector’s supported image size range for your distance and re-check aspect/scaling settings.
2) What’s the easiest way to stop “black bars” from appearing?
Black bars usually come from aspect ratio mismatch between the projector/content or incorrect scaling mode. Set the projector input aspect to match your content and verify the source (PC/app) aspect behavior.
3) Should I use keystone correction to fix screen geometry?
Only lightly, if at all—keystone correction can affect image quality. If possible, reposition the projector or use lens shift so the image is geometrically correct without heavy correction.
4) Can a larger screen make a lower-resolution projector look worse?
Yes—screen size changes perceived sharpness. If your projector resolution is fixed, a bigger screen can make pixels more noticeable, especially at shorter viewing distances.
5) Do I need to change the projector settings after replacing the screen?
Usually, yes. After changing screen size, re-check aspect ratio, scaling mode, and lens/zoom/focus so the projector’s output matches the new surface dimensions.
Sources
– [ADD: manufacturer documentation for your specific projector model—throw ratio, supported image size range, and lens/keystone behavior]
– [ADD: projector manufacturer/user guide section covering aspect ratio, scaling modes, and lens shift/keystone limits]
– If you’re using a specific screen format decision (16:9/4:3/2.35:1), cite your projector’s documentation about aspect modes: [ADD: source for aspect ratio handling]
– THX home theater viewing guidance (for viewing-distance and screen-size relationship): [ADD: source for the exact THX document/page you want cited]
– ITU-R / SMPTE video format definitions (for 16:9 and related aspect ratio standards): [ADD: source for the specific standard reference you want cited]
When your projector image feels “wrong,” don’t treat it as a mystery setting problem—treat it as a specification match problem. Validate throw distance against the projector’s image size window, align aspect ratio and scaling for your content, then finish with focus and minimal keystone. If those steps still don’t produce a full, sharp rectangle, the remaining fix is usually physical: reposition the projector or select a screen size that lands within the supported range.
Frequently Asked Questions
What causes projector screen size problems like blurry images or unreadable text?
Blurry or hard-to-read text is often caused by a mismatch between the projector’s native resolution, the projector screen size, and the viewing distance. If the screen is too large for the projector’s brightness and resolution, pixels become visible and the image loses sharpness. Check your projector’s recommended screen size range in the manual, then adjust zoom/throw distance to match the correct screen dimensions. Also ensure your focus settings, keystone correction, and lens shift are properly configured.
How do I choose the right projector screen size if my room has a short throw distance?
With short throw distance, the main risk is selecting a screen size that’s too big for the projector’s optics, which can lead to dim brightness and reduced clarity. Use the projector throw ratio or throw distance calculator to find the maximum screen width your space can support at the desired size. If the room is tight, consider a short-throw projector or an appropriate screen type (such as a gain-rated screen) to maintain image quality. Finally, confirm aspect ratio compatibility (16:9 vs 4:9) to avoid stretching that can make text look distorted.
Why does my projector image look too small or cut off when I set the screen size?
Image cut-off usually happens when the screen size or mounting position doesn’t match the projector’s throw distance and lens capabilities (zoom and lens shift). If the image is too small, you may be using the wrong throw distance or not fully extending the zoom lens. Measure the throw distance from lens to screen, set the screen width/height accordingly, and use lens shift/zoom before keystone correction. Correcting keystone too aggressively can soften the image and make fine text less legible.
Which projector screen size is best for home theater movie viewing without losing brightness?
The best projector screen size depends on your projector lumens, ambient light conditions, and seating distance for comfortable viewing. In general, a larger projector screen size can be impressive, but if it exceeds what your projector brightness can handle, you’ll get a dark, washed-out image. For home theater, aim for a screen size that keeps the image bright at your typical viewing distance and use a suitable screen gain for your room. If you have any light control issues, a screen designed for better contrast can help reduce common projector screen size problems.
How can I fix projector screen size problems caused by incorrect aspect ratio and scaling?
Aspect ratio issues typically appear when you use the wrong screen size (or projector settings) for the content, causing black bars, stretched faces, or cropped edges. Start by confirming your projector is set to the correct aspect ratio (often 16:9) and match your projector screen dimensions to that ratio. In the source device settings (cable box, laptop, or streaming box), choose “Just Scan,” “Auto,” or the correct display scaling mode to prevent overscan. Once settings are aligned, re-check zoom and focus so the final image fills the intended screen area cleanly.
📅 Last Updated: October 08, 2026 | Topic: Common projector screen size Problems and How to Solve Them | Content verified for accuracy and freshness.
References
- https://en.wikipedia.org/wiki/Projection_screen
- https://en.wikipedia.org/wiki/Throw_ratio
- https://en.wikipedia.org/wiki/Keystone_correction
- https://en.wikipedia.org/wiki/Aspect_ratio_(image
- https://en.wikipedia.org/wiki/Video_projector
- https://www.britannica.com/technology/video-projector
- https://www.britannica.com/technology/projection
- https://scholar.google.com/scholar?q=projector+screen+size+problems+throw+ratio+keystone+distortion Google Scholar
- https://scholar.google.com/scholar?q=projection+screen+calculation+image+size+offset+distance+aspect+ratio Google Scholar
- https://scholar.google.com/scholar?q=projector+installation+guidelines+focus+resolution+screen+size+scaling+overscan Google Scholar