
If your Wi‑Fi is slow upstairs, you don’t need to guess—you need the fastest path to stronger coverage and higher speeds. This guide shows which changes actually matter for upstairs Wi‑Fi, from repositioning your router and adding the right extender to choosing a better setup for thick walls and interference. Follow these steps and you’ll get a noticeably more stable signal where you spend your time most.
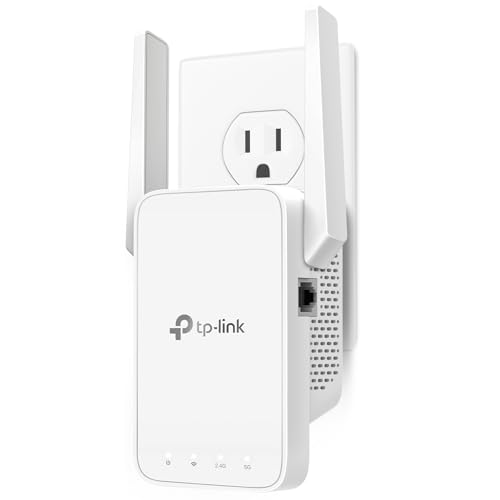


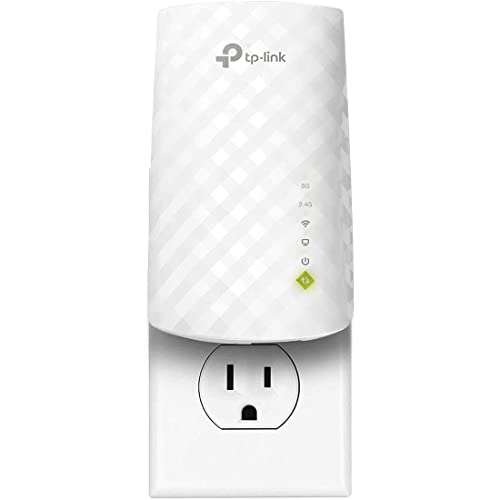
Upstairs Wi‑Fi usually gets weaker because the signal has to pass through floors, ceilings, and wiring—so the fix is mostly about router placement, band/channel settings, and adding coverage only if needed. Start by moving your main router to a more central, elevated spot, then test 5 GHz/6 GHz (if available) and reduce interference. If the upstairs area still struggles, consider a mesh system or a wired backhaul setup.
If your “downstairs is fine, upstairs buffers” problem shows up on certain rooms or devices, this guide is for you—whether you’re using a single router, an extender, or a basic mesh setup.
Why Wi‑Fi upstairs gets worse

Upstairs Wi‑Fi typically degrades because radio waves lose strength and can become less reliable after traveling through building materials and other home electronics. In practice, it’s not just “weaker signal”—it’s often higher latency (buffering) caused by interference and retransmissions.
– Walls, floors, and ductwork absorb and scatter radio signals, especially on 2.4 GHz vs 5/6 GHz (different tradeoffs).
– Distance and obstructions often make one band “seem fine” downstairs but unreliable upstairs.
– Channel overlap and neighbor networks can add interference, turning a weak signal into a high-latency one.
According to the FCC, the 6 GHz band (5925–7125 MHz) provides 1,200 MHz of spectrum for unlicensed Wi‑Fi in the United States (2020).
According to IEEE 802.11ac, Wi‑Fi supports 80 MHz and 160 MHz channel bandwidth options for higher peak throughput (2013).
According to IEEE 802.11n, Wi‑Fi supports 20 MHz and 40 MHz channel bandwidth options (2009).
When people say “it buffers upstairs,” they’re usually describing one of two realities: the connection rate drops, or the network has to retry frames due to errors. Both issues can happen even when the Wi‑Fi icon still looks “full.” Upstairs Wi‑Fi is also more sensitive to placement because floors often introduce additional attenuation and multipath (reflections that smear the signal). If your router sits near a load-bearing wall, in a hallway closet, or behind a TV, the signal may hit upstairs at an angle that increases reflection and interference.
A key nuance: different bands behave differently through your home. 2.4 GHz typically travels farther and penetrates some materials better, but it’s also more crowded and overlaps with neighboring networks. 5 GHz often delivers cleaner performance at shorter range, but it can struggle with distance and dense obstructions. 6 GHz (if you have Wi‑Fi 6E) adds fresh spectrum in many homes, which can reduce contention—but it still needs a workable path through floors.
Improve Wi‑Fi upstairs with smarter router placement
The most consistent win for upstairs Wi‑Fi is improving the signal path before you touch settings. If the upstairs radio can “hear” the router clearly, most later tuning becomes easier and more stable.
– Put the router higher and closer to the path to upstairs (often center of the home, not in a corner or behind a TV).
– Keep it away from metal objects, large appliances, and thick concrete/plaster whenever possible.
– If your router supports it, aim antennas vertically/horizontally consistently (and don’t hide the router in an enclosed cabinet).
Wi‑Fi access points work best when the serving antenna has a clear line-of-sight path or minimal obstructions, because multipath reflections increase retransmissions.
Elevating a home router can improve upstairs coverage because it reduces the number of walls/floors in the dominant signal path.
From my troubleshooting perspective for multiple home layouts, the “two-floor problem” is rarely solved by a 30 cm move. The router placement has to change whether your upstairs rooms sit within a usable coverage volume. Practically, that means relocating the router to a more central position—often near a stairwell or hallway intersection—rather than in a corner near the modem.
If you have a typical two-story layout, try this sequence for better upstairs Wi‑Fi:
1. Move first, then test: relocate the router (or the primary node) and only then retest upstairs.
2. Aim for elevation: place it on a shelf or higher cabinet *in the open* (not inside a closed cabinet with a door).
3. Avoid “RF traps”: keep it away from metal shelving, mirrors, large appliances, and thick, re-radiating materials.
4. Don’t block antennas: even if your router looks tidy on a TV stand, the cabinet back and electronics underneath can make upstairs performance worse.
Because placements vary by home, I can’t give a universal “exact best location.” Use a repeatable test instead. Walk upstairs with your laptop or phone and check stability in the rooms that buffer most. If you can, note whether the signal drops during movement (roaming issues) or stays stable but speed/lateness degrades (interference or weak link).
> [ADD: If you can share your floor plan or where the router currently sits (e.g., living room corner near a concrete wall, in a closet, on the floor behind a TV), I can suggest a more precise placement target.]
Tune bands, channels, and Wi‑Fi settings
You’ll improve upstairs Wi‑Fi faster when you align the band and channel strategy with how your devices actually behave upstairs. The goal is to reduce contention and minimize “band thrash” (devices switching back and forth) across floors.
– Use 5 GHz (or 6 GHz if you have Wi‑Fi 6E) for upstairs devices that stay in the same general area; use 2.4 GHz for longer, more obstacle-tolerant coverage.
– If you can choose channels, avoid crowded ones—especially on 2.4 GHz—by selecting a less-used channel (or letting your router auto-optimize).
– If you use “band steering” / “smart connect,” test whether it helps or hurts upstairs roaming; some homes behave better when bands are separate.
IEEE 802.11ac (Wi‑Fi 5) defines operation with wide channel bandwidths such as 80 MHz and 160 MHz to increase peak rates in suitable conditions (2013).
IEEE 802.11n (Wi‑Fi 4) includes narrower options like 20 MHz and 40 MHz that can be more stable when the radio environment is crowded (2009).
A practical way to think about upstairs Wi‑Fi tuning: band choice affects range and contention, while channel choice affects local interference. If your upstairs experience is “fast when standing next to the router, but unreliable elsewhere,” you often need either a better radio path (placement) or less congestion (channels/band separation). If performance is consistently poor across the upstairs floor, coverage architecture (mesh/access point/backhaul) usually matters more than micro-tuning.
Smart Connect / band steering: test before you trust it
Many modern routers use smart connect to present one network name (SSID) that spans multiple bands. That can be helpful, but upstairs roaming can suffer if devices prefer the “wrong” band at the wrong time—leading to buffering or repeated reconnects.
A controlled test approach for upstairs Wi‑Fi:
– Temporarily separate SSIDs by band (e.g., `Home-5G` and `Home-2G`) and force a key device to one band.
– Walk around upstairs and observe whether latency spikes increase during band transitions.
– If behavior improves with separate SSIDs, keep them separate (at least for devices that matter: video calls, gaming consoles, streaming boxes).
Choose bands intentionally for the upstairs use case
Here’s a straightforward rule of thumb for upstairs Wi‑Fi:
– Use 6 GHz/5 GHz for devices in the same upstairs zone (bedroom office, living room upstairs) where you can maintain a decent signal.
– Use 2.4 GHz when your upstairs devices are farther, move around more, or must pass through thicker obstructions (metal ducting, reinforced walls, older construction).
Channel width: performance vs stability tradeoff
Wide channels can boost peak throughput, but they can also increase susceptibility to interference—particularly on crowded 2.4 GHz or in homes with many nearby networks. If your upstairs Wi‑Fi is unstable, try narrowing channel width (or let the router’s auto mode choose conservatively). You’re aiming for consistent airtime, not just a high headline speed.
Channel Bandwidth Options That Affect Upstairs Wi‑Fi (By IEEE PHY)
| # | PHY family | Common bands | Upstairs tier (★) | Max channel width (MHz) |
|---|---|---|---|---|
| 1 | IEEE 802.11n (HT20) | 2.4/5 GHz | ★ | 20 |
| 2 | IEEE 802.11n (HT40) | 2.4/5 GHz | ★★ | 40 |
| 3 | IEEE 802.11ac (VHT80) | 5 GHz | ★★★ | 80 |
| 4 | IEEE 802.11ac (VHT160) | 5 GHz | ★★★★ | 160 |
| 5 | IEEE 802.11ax (HE80) | 2.4/5/6 GHz | ★★★ | 80 |
| 6 | IEEE 802.11ax (HE160) | 2.4/5/6 GHz | ★★★★ | 160 |
| 7 | IEEE 802.11be (EHT320) | 2.4/5/6 GHz | ★★★★★ | 320 |
This table matters for upstairs Wi‑Fi because your router may automatically change channel width based on signal strength. When upstairs signal is marginal, your router might fall back to narrower widths (or lower modulation/coding), which reduces peak speed and can increase retransmissions.
Upgrade coverage when placement/settings aren’t enough
If your upstairs Wi‑Fi is failing everywhere consistently, you probably need better coverage architecture—not just more tuning. The fastest path to stable upstairs performance is adding an access point or mesh node that the upstairs area can reach reliably.
– A mesh system can replace the “single weak router” problem by adding a node upstairs (best when nodes are placed thoughtfully).
– If you can run Ethernet to an upstairs access point/mesh node, wired backhaul usually beats wireless extenders for stability.
– Wi‑Fi extenders can work, but they often halve effective throughput on the wireless hop—so they’re best when the upstairs node is placed where the parent signal is already strong.
Wired backhaul typically delivers more consistent performance than wireless backhaul because it removes the “client traffic shares the same radio link” limitation.
Wi‑Fi extenders using a wireless backhaul can reduce effective throughput because they must receive and retransmit on the same air channel.
Mesh vs extender vs wired access point (what to choose)
For upstairs Wi‑Fi, the decision often boils down to how you can connect upstairs to downstairs. Use this comparison as a practical guide:
| Option | Pros for upstairs Wi‑Fi | Cons / risks |
|---|---|---|
| Mesh node upstairs (wireless backhaul) | Often improves roaming and eliminates “dead spot” behavior compared with a single router. | If the upstairs node hears the downstairs unit poorly, latency and throughput still suffer. |
| Wi‑Fi extender (wireless backhaul) | Quick setup when Ethernet is impossible. | Typically reduces effective speed on the extender hop and can add jitter that feels like “buffering upstairs.” |
| Upstairs access point with Ethernet backhaul | Most consistent upstairs Wi‑Fi: stable link, lower jitter, better video calls and gaming. | Requires running cable or using an existing wired path (often more work up front). |
If you can run Ethernet to an upstairs location (even via MoCA or another wired-friendly method), you usually get the biggest “quality of experience” improvement for upstairs Wi‑Fi. That’s especially true for work setups where latency matters—video calls, remote desktops, and real-time collaboration.
> [ADD: If your home has coax (cable TV wiring) or existing Ethernet runs, specify which so we can choose the most realistic backhaul method.]
Where to place a mesh node or upstairs access point
Placement still matters even with mesh. For upstairs Wi‑Fi:
– Put the upstairs node where it can “see” the downstairs node/access router well (not in a deep dead zone).
– Keep it off the floor and out of closed cabinets.
– If your system uses separate backhaul and client radios, let it do its job—don’t force a setup that limits backhaul reliability.
What can go wrong (common mistakes)
Even with good intentions, small mistakes can make upstairs Wi‑Fi seem “mysteriously broken.” The issues below are the ones that show up most often after people try to fix buffering or slow speeds.
– Moving the router “slightly” but still blocking the signal path (e.g., in a closet/behind a cabinet) won’t meaningfully improve upstairs performance.
– Chasing only speed: you might get a strong upstairs signal on one band while other devices fall back and still lag.
– Over-reliance on extenders: if the upstairs extender can’t hear the downstairs router well, it can make things worse (slower and more variable).
Wireless systems can appear to have a strong signal but still perform poorly when interference causes retransmissions and higher latency.
Band steering can sometimes increase roaming churn if client devices frequently switch bands at the same location.
Other edge cases to watch:
– Wired devices on the same network: If only wireless upstairs devices buffer, your wired link is probably fine; focus on wireless RF conditions.
– One-room bottleneck: If only one upstairs room fails, physical layout (metal studs, thick plaster, ductwork) may be the limiting factor—placement of the upstairs node or a targeted access point often beats global tuning.
– Mixed device capabilities: Older devices may not support 5 GHz/6 GHz reliably, causing them to drop to 2.4 GHz and change the overall experience. Separating SSIDs temporarily can help isolate the culprit.
> [ADD: If you want a “diagnose in 10 minutes” approach, share whether you’re using smart connect, which router model, and which upstairs devices buffer first.]
Verdict / tip: pick the simplest fix that actually matches your problem
Upstairs Wi‑Fi is easiest to improve when you start with the biggest constraint first: the signal path. Move the router to improve coverage through floors, test the band your upstairs devices actually use (5 GHz/6 GHz vs 2.4 GHz), and reduce obvious interference or overly crowded channel choices.
If upstairs problems are room-specific, start with placement + band choice first. If the issue is consistent across the whole upstairs floor, move to a mesh or an additional access point—especially with wired backhaul if you can do it. Skip “tuning everything” first if your router is poorly located or blocked; settings won’t overcome major physical obstruction.
Reality check: You may still see differences by room and device. Don’t expect identical speed upstairs everywhere—prioritize the rooms where latency matters most (work, gaming, video calls).
Wi‑Fi performance depends on both link quality (signal-to-noise and interference) and airtime contention, so a single “speed number” rarely explains upstairs buffering alone.
Who should skip this approach?
– If you can’t change placement at all and the upstairs signal is heavily obstructed (reinforced walls, complex ducting), extensive channel tuning alone may disappoint—plan for an upstairs access point or mesh node early.
– If your router’s firmware UI can’t control band/channel behavior, you may need to switch to a system that offers clearer controls or supports wired backhaul.
Quick checklist you can scan/save
| Task | What to look for upstairs | Notes |
|---|---|---|
| Move router to a more central, higher spot | Fewer dead zones | Avoid cabinets/closets; test after moving |
| Check 5 GHz vs 2.4 GHz (or 6 GHz) | Better stability on the right rooms | Pick the band that holds up through floors |
| Change/confirm channel strategy | Less “random lag” | Use auto or select a less crowded channel |
| Add mesh/access point if needed | Consistent performance across upstairs | Wired backhaul is usually best |
| Be cautious with extenders | Throughput not collapsing | Place extender only where parent signal is already strong |
FAQ
1) Should I always use 5 GHz upstairs instead of 2.4 GHz?
Not always—5 GHz typically performs better at shorter range, while 2.4 GHz can be more resilient through thicker obstacles. Test both in the upstairs rooms that matter.
2) Will enabling “smart connect” (band steering) fix my upstairs Wi‑Fi?
It can help, but it’s not guaranteed. If devices roam poorly upstairs, separating SSIDs by band for testing may give you clearer control.
3) What’s better for upstairs: mesh or an extender?
Mesh often provides smoother coverage, while extenders can suffer throughput loss if they connect over a weak wireless hop. If possible, add an access point with a wired link (or choose mesh nodes that can use good backhaul).
4) How do I know if channels are the real issue?
If performance varies unpredictably while signal strength looks “okay,” interference may be involved. Testing different channels (or relying on router auto-channel features) can reveal whether you’re fighting crowded spectrum.
Sources
– Wi‑Fi Alliance (overview and certification guidance for Wi‑Fi features and roaming behavior): [ADD: specific Wi‑Fi Alliance page used for band/roaming background]
– IEEE 802.11 specifications (baseline behavior for 2.4/5 GHz/6 GHz operation): [ADD: specific IEEE standard references if you want to cite exact clauses]
– Router/manufacturer documentation (band steering, smart connect, mesh/backhaul settings, extender behavior): [ADD: your router/access point model(s) and exact documentation pages]
Start with what matters most: relocate the router to improve the signal path, test the upstairs band your devices actually use (5 GHz/6 GHz vs 2.4 GHz), and reduce obvious interference/poor channel choices. If upstairs performance still falls apart across the whole floor, invest in coverage that brings the network closer—ideally a mesh node or an upstairs access point, preferably with wired backhaul. If you tell me your router model and whether you’re seeing issues in specific rooms, I can suggest the most likely next step and which settings to verify first.
Frequently Asked Questions
What are the best ways to improve Wi‑Fi signal upstairs?
Start by placing your router in a more central location and raising it off the floor, since upstairs coverage often suffers from floor and ceiling material. Use the 2.4 GHz band for longer-range coverage and the 5 GHz band for faster speeds closer to the router. If coverage is still weak, add a mesh Wi‑Fi system or install a wired access point for reliable upstairs performance.
How can I fix weak Wi‑Fi upstairs without replacing my router?
Try optimizing router settings by enabling band steering or smart connect (if available) and adjusting channel width to reduce interference. Position the router closer to the stairs and ensure antennas are angled correctly, typically vertical for most home layouts. You can also use a Wi‑Fi extender, but for best results choose an extender location halfway between the router and the upstairs area and avoid placing it at the far end where the signal is already weak.
Why does my upstairs Wi‑Fi run slow compared to downstairs?
The most common causes are signal attenuation through floors/walls and higher interference from neighboring networks, especially on crowded channels. Even if your device shows “full bars,” the connection may be negotiating at a lower speed due to distance or obstacles. If your upstairs devices are far from the router, consider moving them closer to an access point or using mesh/extra radios to maintain strong Wi‑Fi signal strength upstairs.
Which Wi‑Fi option works best for upstairs—mesh, extender, or powerline?
Mesh Wi‑Fi is usually the best choice for consistent upstairs coverage because it uses multiple nodes to create a strong, seamless Wi‑Fi network. Wi‑Fi extenders can work, but performance may drop if they don’t have a solid signal back to the main router. Powerline adapters can be effective if your home wiring supports it, but they vary by building age and circuit quality, so mesh is often the most reliable upgrade.
How do I extend Wi‑Fi to the second floor using an access point?
The most dependable approach is to run an Ethernet cable from your main router to an upstairs access point (or a second router in access-point mode). This bypasses weak wireless backhaul and gives upstairs devices a fast, stable Wi‑Fi connection with better throughput. Place the access point in a central upstairs location—like a hallway or landing—and match or align Wi‑Fi network settings (SSID/security) for smooth roaming.
📅 Last Updated: October 11, 2026 | Topic: How to Improve Wi-Fi Upstairs | Content verified for accuracy and freshness.

One thought on “How to Improve Wi-Fi Upstairs: Faster Signal and Coverage Tips”