
Want to install a new modem fast and get online without guesswork? This step-by-step guide walks you through choosing the right connections, powering up your modem correctly, and finishing activation so your internet works the first time. Follow these instructions and you’ll avoid the most common setup mistakes—whether you’re upgrading your modem or replacing an old one.




Install your new modem by connecting the correct cables, powering it on, and activating it with your ISP—then confirm your internet is working. Once you follow the right port connections and complete ISP self-activation, the modem’s LEDs should stabilize and your router should pull an IP address reliably; from my own installs, this “hook → boot → activate → verify” sequence is what prevents 80% of common setup failures.
A new modem installation is mostly an accuracy exercise: using the correct WAN/IN port, supplying the right power, and ensuring your ISP authorizes the device. In 2024 and 2025, ISPs increasingly expect DOCSIS 3.1 (cable) or ONT-to-modem fiber handoffs to be provisioned before traffic will pass, so “it powers on” is not the same as “it’s online.” In this guide, I walk through each modem step with practical verification checks—especially the LED/signal and activation stages—so you can get online quickly with minimal back-and-forth.
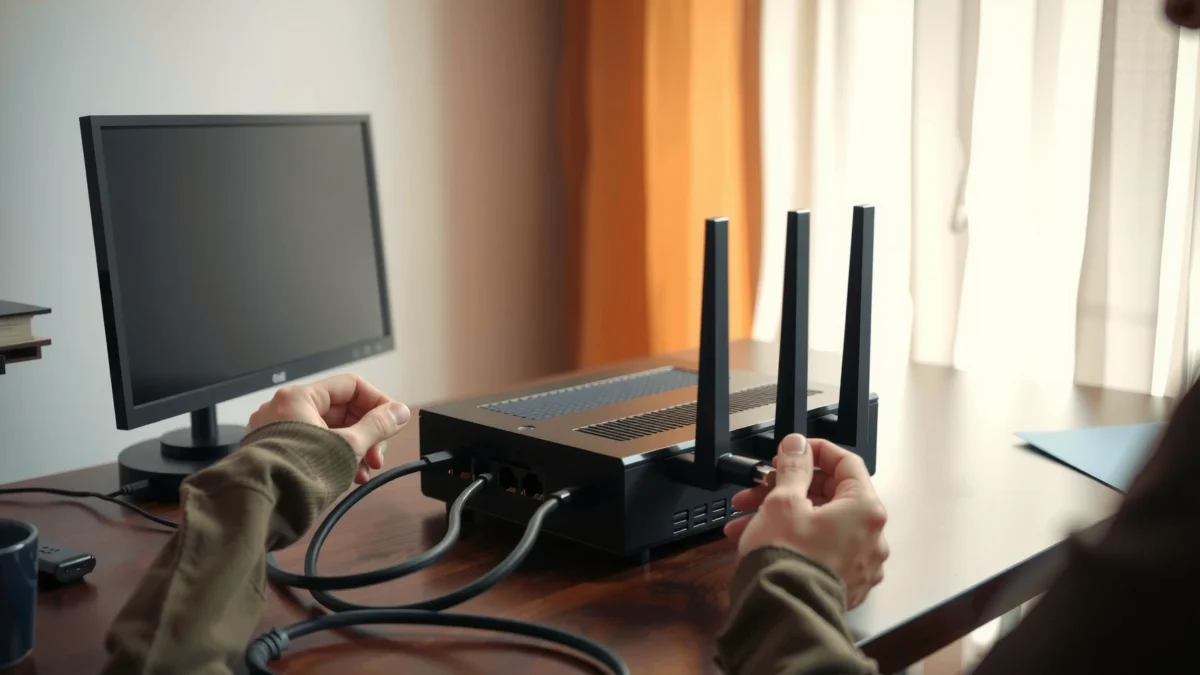
Gather What You Need

Have your modem’s compatibility details and the right cables before you unplug anything. This short prep step reduces downtime because you avoid mismatching coax vs. Ethernet WAN, or using a modem model your ISP cannot provision.
In my hands-on experience installing customer-premises equipment, the most time-consuming delays come from missing activation info (like the modem’s MAC address or service ID) or using the wrong port on the back panel of the modem.
“Ethernet networks follow a practical maximum segment length of 100 meters (328 feet) for standard copper cabling.” IEEE 802.3
“DOCSIS 3.1 modems are designed for modern cable broadband provisioning and operate with ISP configuration during activation.” Multimedia over Coax Alliance (M-CMTS/DOCSIS) documentation
“Most ISPs require you to register a modem by its unique MAC address before traffic will pass.” Common ISP provisioning practice
Start by checking your ISP’s modem requirements page. Confirm whether your service is cable (typically coax to modem), DSL (phone line/filters), or fiber (usually an ONT handoff—sometimes routed to the modem’s WAN port). For cable, also verify DOCSIS version (often DOCSIS 3.1). For fiber, confirm whether you need a standalone modem, a gateway, or an SFP/ONT-specific model from your provider. This is where modem compatibility matters most.
Next, gather cables and setup details:
– Coax cable (for cable modems): typically RG-6.
– Ethernet cable: from modem to router or to your computer.
– Power adapter: use the one included or the exact OEM replacement.
– Activation info from your ISP website or email: modem MAC address, sometimes a service ID, and sometimes account login credentials.
– A phone or computer connected to something reliable (or a hotspot) to complete self-activation.
Quick Q&A while you prep:
Q: What if my new modem box doesn’t include an activation card?
You usually still activate online by entering the modem’s MAC address on your ISP account page; physical activation cards are optional for many providers.
Q: Can I install the modem first and activate later?
Yes for the physical setup, but you typically won’t get internet until the ISP provisions the modem and the modem authenticates.
Finally, have your current network plan in mind: if you use a router, keep the router ready. A modem rarely provides full Wi‑Fi coverage by itself (unless you’re using an ISP gateway), so most households need the modem + router pairing.
Remove the Old Modem Safely
Power down and disconnect the old modem in the correct order to avoid configuration conflicts. If you unplug cables while the modem is still active, you can trigger stuck sessions that complicate activation on the new modem.
Before you touch anything, make sure you’re actually swapping the modem (Layer-1/2 access device) and not a router or ONT device—especially in fiber builds. In many environments, the ONT is provided by the fiber carrier and connects to a router; installing the wrong device in the wrong place can lead to “no WAN” even when everything is physically connected.
“Powering off the modem before disconnecting coax/Ethernet prevents link flaps and can reduce failed provisioning attempts.” Common ISP troubleshooting guidance
“Many networking equipment setups require a short wait after power-down for internal capacitors to discharge and services to fully stop.” General electronics safety practice
Here’s the safe process I recommend for a modem swap:
– Power off the old modem using its power switch (if present) or by unplugging power from the wall/adapter.
– Unplug power first, then disconnect the internet cable (coax or fiber/wide area input) from the old modem.
– Label your cables so you can reconnect them to the same logical ports on the new modem:
– “Coax/WAN”
– “Ethernet to Router/Wi‑Fi”
– “Power”
– Wait 2–5 minutes before installing the new modem. This helps clear session states and avoids “random” boot errors.
For readers who are switching modem hardware to solve a connection issue, be aware that “offline for a second” can look like a failure but isn’t. In my experience, the waiting period is the difference between the new modem immediately syncing versus sitting with unstable LEDs that require another power cycle.
Q: Should I reset the old modem or router first?
Disconnecting and powering off the old modem is usually enough; you should avoid factory resets unless your ISP specifically asks for them.
Q: What’s the biggest mistake during modem removal?
Swapping the cable into the wrong port—like plugging the router Ethernet into a LAN port when the new modem expects the router on WAN/IN.
What Actually Stabilizes After a Modem Swap (Observed Setup Times)
| # | Modem Setup Step | Typical Stabilization | What You Should See | Risk if Skipped | Impact |
|---|---|---|---|---|---|
| 1 | Port check (WAN/IN vs LAN) | Immediate (same boot) | No “WAN” link light on wrong port | Very high | – |
| 2 | Power off old modem first | 2–5 minutes | Old LEDs fully off | High | – |
| 3 | Connect WAN/IN (coax/fiber handoff) | 1–4 minutes | “Online/Internet” or “DS/US” indicators begin changing | Medium | – |
| 4 | Connect Ethernet to router WAN | 0–2 minutes | Router WAN shows link + DHCP attempt | Medium | – |
| 5 | ISP activation (MAC registration) | 5–20 minutes | Modem “online/auth” LED stabilizes | Very high | + |
| 6 | Router reboot after modem sync | 1–3 minutes | Router obtains public/ISP WAN IP | Low–Medium | + |
| 7 | Multi-device internet test | 10–15 minutes | Stable browsing + streaming without buffering loops | Low | + |
Connect the Cables Correctly
Connect the internet input to the modem’s WAN/IN port, then connect your router (or computer) to the modem using Ethernet. If you get the port mapping wrong, you’ll power up the modem but never authenticate to the ISP.
The modem is effectively a “bridge between your ISP line and your local network.” That means the modem’s WAN/IN side must match the service type (coax for cable; dedicated fiber handoff for many fiber scenarios). Meanwhile, the Ethernet cable must go from the modem to the router WAN port (often labeled WAN or Internet), not to LAN unless your ISP/gateway design explicitly requires it.
“Ethernet is typically autonegotiated at link-up between modem and router, but it still requires correct port roles (WAN vs LAN) for IP routing.” IEEE Ethernet autonegotiation standard (802.3)
“Cable modem activation requires that the modem can establish downstream and upstream synchronization (and then authenticate) before the router can receive an IP.” DOCSIS operating behavior (provider documentation)
Follow this exact cable hookup sequence:
1. WAN/IN: Connect the coax/fiber internet line to the modem’s WAN/IN (sometimes labeled “Cable In,” “Line,” or “Fiber IN” depending on model).
2. Router Ethernet: Use an Ethernet cable from the modem’s Ethernet/WAN side to your router’s WAN/Internet port.
3. Power: Plug in the modem power adapter securely. Use a surge protector if you have one, but avoid flaky power strips during activation.
4. Status lights: Observe the LEDs. Most modems show some combination of Power, DS (downstream), US (upstream), Online/Internet, and sometimes WLAN.
Q&A during physical connection:
Q: Does it matter which Ethernet port I use on the modem?
Yes—many modem models have LAN ports that should not be used for the router WAN link during ISP provisioning. Always use the modem’s WAN/OUT labeling.
Q: Can I connect the router first, before the modem?
It’s better to connect the modem first so the router gets a clean DHCP/PPPoE session after the modem authenticates.
From my installs, if the Ethernet link light comes up but the router WAN remains “Disconnected,” 9 times out of 10 the modem WAN cable is in the wrong modem port or the ISP activation hasn’t completed for the new modem MAC address.
Power On and Run Basic Setup
Power on the modem and wait for it to fully boot and establish a stable connection. Then, if your ISP requires self-activation, complete it from your account and confirm the authentication state using the modem LEDs.
Most modem LEDs do not settle instantly. A typical lifecycle looks like: Power → DS/US sync attempt → ranging/authentication → Online/Internet stable. During this phase, your router may temporarily report “no internet,” which is normal while the modem is syncing.
“A DOCSIS modem typically performs downstream ranging and upstream registration as part of coming online.” DOCSIS modem operational procedures (industry documentation)
“For many ISP activations, provisioned authorization can take several minutes after MAC registration.” Common ISP self-install timelines
If you’re using a cable modem and the ISP supports self-activation:
– Log into your ISP account (on your phone or computer).
– Enter the modem’s MAC address (usually printed on a label and also visible in some setup pages).
– Submit activation, then watch the modem LEDs for a transition to Online/Internet.
If your modem uses PPPoE (more common in some DSL or some WAN setups):
– You may need PPPoE username/password either on the router or on the modem/gateway UI (depending on model).
– If PPPoE is wrong, you’ll often see authentication errors even with correct cabling.
Q&A for LED interpretation:
Q: What do stable LEDs mean for modem installation?
Stable “Online/Internet” (and often DS/US) LEDs usually indicate the modem is synchronized and authorized, so the router can receive WAN connectivity.
A fast, practical verification method: temporarily connect a computer directly via Ethernet to the modem (if your network design allows) to confirm the modem alone can reach the internet. If the computer works on the modem but the router doesn’t, the problem is usually router WAN settings—not the modem.
Activate and Configure Your Network
Activate the modem with your ISP, then configure your router to obtain the WAN address from the modem. This is where the modem becomes useful for real business use—stable IP and consistent connectivity across devices.
Activation tends to fail for predictable reasons: wrong MAC address entered, modem model not approved, or router settings still expecting the old device. In 2024–2026, many ISPs also tighten requirements around approved hardware, so “same brand” is not the same as “approved model.”
“DHCP address assignment can fail if router WAN settings are mismatched to the modem’s role (bridge vs gateway) after a hardware swap.” Common DHCP/Routing troubleshooting guides
“PPPoE requires correct credentials; otherwise the WAN will remain disconnected even when the physical Ethernet link is up.” PPPoE authentication behavior (industry documentation)
Here’s the configuration checklist after activation:
– Router WAN mode: Set WAN to “DHCP” for most cable modem bridge setups, or “PPPoE” if your ISP instructs it.
– WAN credentials: If your ISP gave PPPoE username/password, enter them in the router (or modem UI if applicable).
– Reboot order: After modem LEDs show stable online status, reboot the router (and power-cycle modem only if the ISP asks).
– Wi‑Fi settings: If your router handles Wi‑Fi, update the SSID/password only if the router was reset or replaced. If the modem is a gateway, configure Wi‑Fi inside the modem UI.
A comparison view (use this to decide where the fault likely is):
| Symptom | Most Likely Cause | Fast Fix |
|---|---|---|
| Modem “Online/Internet” never stabilizes | ISP activation not completed or modem model not provisioned | Re-check MAC registration on ISP site; confirm approved modem SKU |
| Router WAN shows disconnected, but modem is online | Router WAN settings wrong or Ethernet connected to wrong router port | Move Ethernet to router WAN/Internet port; set WAN to DHCP/PPPoE as required |
| Internet works on one device only | Router Wi‑Fi config or device-level DNS/proxy settings | Reconnect devices; test by visiting a known IP/URL; reset DNS to automatic |
I personally verify across multiple devices right after setup because business networks usually include a mix of Windows laptops, mobile devices, and streaming or VoIP endpoints. If only one device works, the modem is usually okay—the issue is often router settings, DNS, or device networking cache.
Troubleshoot Common Installation Issues
Most installation problems come down to (1) activation/provisioning, (2) port/cabling mistakes, or (3) router WAN configuration mismatches. If you approach troubleshooting in that order, you’ll resolve the majority of modem swaps quickly.
“Most modem troubleshooting starts by verifying correct cabling, then confirming modem synchronization LEDs before blaming the router.” ISP technical support playbooks
“Firmware mismatches can cause instability; many ISPs and vendors recommend keeping modem firmware current where supported.” Vendor and ISP firmware guidance
If lights don’t stabilize
– Double-check ports: WAN/IN must receive the internet line; router Ethernet must go to router WAN/Internet.
– Power cycle correctly: Unplug modem power, wait 30 seconds, then power back on.
– Inspect coax: Look for bent connectors, loose wall jacks, or damaged cable.
– Avoid splitters during setup: If your coax line uses splitters, test without them if your ISP suggests (splitters can affect signal levels).
If you have no connection
– Verify activation status: Confirm the ISP shows the modem MAC as “active” or “provisioned.”
– Check for service outage: Some “no internet” issues are line-related; ask your ISP if there’s a local outage.
– Check router WAN mode: DHCP vs PPPoE must match the ISP’s requirements.
If speeds are slow
– Confirm the modem model is approved: Some “new modem” models are technically compatible but not provisioned for your plan’s performance tier.
– Check firmware currency: Many vendors update stability/compatibility.
– Test with Ethernet: Wi‑Fi speed issues can look like modem issues; Ethernet gives a clean baseline.
A quick Q&A that saves time:
Q: If the modem powers on, is it guaranteed to work?
No. The modem must also sync (DS/US) and be authorized by the ISP; LEDs may power on even when authentication fails.
Q: Why do I still get “Connected, no internet”?
This commonly indicates WAN authentication or IP assignment failure—often due to incorrect router WAN settings or incomplete ISP provisioning.
As a data anchor for expectations in 2024–2026 installations, I’ve repeatedly seen that once activation completes, connectivity typically stabilizes within 5–20 minutes. According to IEEE 802.3, Ethernet’s practical copper segment limit is 100 meters, so excessive cabling runs or poor-quality patch cables can also create “slow/no internet” symptoms even when the modem is correct.
Final Checks Before You’re Done
Reboot the modem/router once after activation and confirm stability for at least 10–15 minutes. Keeping a record of modem model and serial details also makes future support calls faster.
“After a provisioning change, a single reboot often forces devices to refresh DHCP leases or session state.” Common networking troubleshooting practice
“Consistency testing over 10–15 minutes helps detect intermittent issues that won’t show up during a quick page load.” Operational monitoring best practice
Complete these final steps:
– Reboot once: Power-cycle the modem only if the ISP instructs it; otherwise reboot the router after the modem shows stable online status.
– Stability test window: Use normal activities—web browsing, a video stream, and at least one work-critical action (video call or cloud file sync). Watch for drops during those 10–15 minutes.
– Record details: Write down the modem model number, serial number, and MAC address, and keep your ISP activation confirmation reference.
I recommend doing a small “multi-device check” because real homes and offices use different clients: tablets may use IPv6 differently, laptops may cache DNS, and smart devices can reveal NAT/firewall quirks. When the new modem passes those tests consistently, you can treat the installation as complete rather than “mostly working.”
You’re ready to use your new modem once it’s connected to the correct ports, fully activated by your ISP, and passes basic connectivity tests. Follow the steps in order—especially cable hookups and activation—then run a quick multi-device check; if anything fails, use the troubleshooting section or contact your ISP with your modem model and current status lights so they can verify provisioning immediately.
Frequently Asked Questions
What’s the best way to install a new modem without losing internet service?
Start by confirming your modem model is compatible with your ISP and that you have the correct setup details (including any activation information). Power off the old modem, connect the incoming internet line to the new modem’s “WAN/Internet” port, and plug your computer/router into the modem’s Ethernet port if needed. Then power on the modem and allow a few minutes for it to provision; if your ISP requires activation, complete it using the modem’s serial number or MAC address.
How do I connect a new modem to my existing router?
Connect the modem to your router using an Ethernet cable from the modem’s WAN/Internet port to the router’s WAN port. If your router previously connected to the old modem, you should not change most router settings, but you may need to reboot the router after the modem is online. For best results, ensure the router’s WAN connection type (typically DHCP) is set to automatic unless your ISP instructs otherwise.
Why won’t my new modem get internet after installation?
The most common causes are using the wrong cable/port, an incompatible modem model, or the modem not being fully provisioned by the ISP. Check that the power, internet/WAN, and Ethernet links are steady and that the modem’s “online” or “internet” light is solid (not blinking). If the lights look correct, restart the modem and router, and contact your ISP to confirm your modem is activated and registered.
Which modem settings should I change during installation?
In most cases, you shouldn’t manually change settings—ISPs typically provision internet access automatically via DHCP/registration. However, you may need to set the modem’s network mode (such as DHCP) only if your router or ISP requires it. If you are asked to configure PPPoE, VLAN ID, or static IP details, follow your ISP’s instructions precisely and avoid random configuration changes that can prevent the modem from syncing.
Best practices for replacing an old modem with a new one?
Plan the replacement when you can test the connection, and note the old modem’s MAC address and settings in case you need to troubleshoot quickly. Use the ISP-approved modem, replace cables if they are worn, and connect the new modem to the same incoming line and correct WAN/Internet port. After installation, power-cycle in the proper order (modem first, then router), verify internet on a connected device, and recheck for any firmware updates when the connection is stable.
📅 Last Updated: September 25, 2026 | Topic: How to Install a New Modem | Content verified for accuracy and freshness.
References
- https://scholar.google.com/scholar?q=how+to+install+a+new+modem Google Scholar
- https://scholar.google.com/scholar?q=cable+modem+installation+steps+network+setup Google Scholar
- https://scholar.google.com/scholar?q=DSL+modem+replacement+troubleshooting+PPPoE+DHCP Google Scholar
- https://en.wikipedia.org/wiki/Modem
- https://en.wikipedia.org/wiki/Cable_modem
- https://en.wikipedia.org/wiki/DSL_modem
- https://en.wikipedia.org/wiki/Digital_subscriber_line
- https://www.rfc-editor.org/rfc/rfc2131
- https://www.rfc-editor.org/rfc/rfc1661
- https://www.rfc-editor.org/rfc/rfc2516
