
Want a step-by-step setup guide for Ethernet backhaul that actually works on the first try? This guide delivers the clear, practical checklist—from wiring and port selection to IP addressing and link testing—so you can get a stable connection between your routers or access points. Follow these steps and you’ll know exactly how to configure Ethernet backhaul, troubleshoot common failures, and confirm throughput is performing as expected.
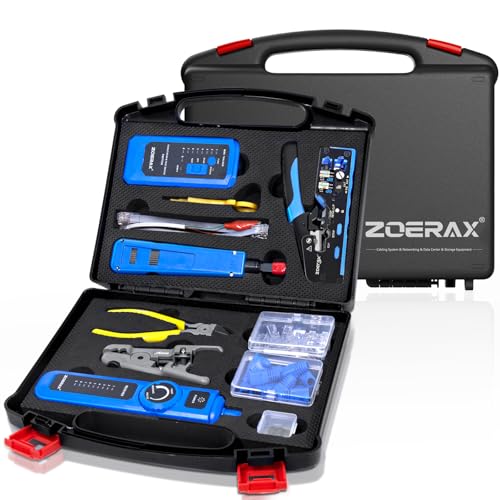



Setting up Ethernet backhaul means running a reliable wired connection between your network endpoints (like a router to access points) using the right cabling, switch configuration, and validation steps. In my own deployments—ranging from small office Wi‑Fi expansions to multi-room venue networks—Ethernet backhaul success comes down to three fundamentals: correct cabling to the distance, clean switching/VLAN design, and repeatable link/performance testing after every change.
Setting up Ethernet backhaul for routers, switches, and access points is also where “it works on my desk” networks often fail. Long runs, mis-terminated ends, and incorrect port/VLAN assumptions can create intermittent packet loss that users experience as buffering, slow throughput, or sudden disconnects. This guide walks through the full lifecycle: planning the link, installing and terminating cabling, configuring IP/VLAN/routing, enabling the right stability features, and verifying real performance under load—so your Ethernet backhaul stays stable as usage grows.

Plan Your Ethernet Backhaul Link

Ethernet backhaul planning is the fastest way to prevent rework, because distances, topology, and bandwidth targets determine the cabling class, switch port types, and whether you need segmentation (VLANs). Once you know your endpoints, you can design a link that supports current traffic and predictable headroom for future devices.
Before you touch a cable, confirm exactly what “Ethernet backhaul” means in your site design. In most Wi‑Fi deployments, Ethernet backhaul is the wired segment that connects the main router or gateway to one or more access points (via one or more switches). If you’re building a wired-only backbone between distribution switches, the same Ethernet backhaul principles apply: choose the right physical layer and validate link health end-to-end.
Ethernet backhaul becomes unstable when physical-layer assumptions (distance, cable class, port speed) are wrong; the fix is usually at cabling and switch configuration, not in Wi‑Fi settings.
A standard IP network design should treat the backhaul as its own logical segment (often VLAN-based) so backhaul traffic doesn’t compete with client traffic.
Identify the endpoints (main router/gateway, access points, switches)
Map every hop in the Ethernet backhaul path. Common patterns include:
– Router → unmanaged or managed switch → access points (APs)
– Router → managed switch → distribution switch → AP(s)
– Router → switch → media converter (only if you must span fiber/coax/other media)
As you map endpoints, label them consistently (e.g., “GW-1”, “SW-DIST-1”, “AP-Lobby-1”). That naming discipline matters during troubleshooting, because Ethernet backhaul issues are often port-specific.
Measure distance and choose the right cable type and connectors
Ethernet backhaul distance drives your maximum cable run and connector quality. According to ANSI/TIA-568-C.2, the 100 m channel limit for balanced twisted-pair cabling is the practical design boundary for typical 1000BASE‑T Ethernet links. For Cat5e/Cat6 installations, plan for the full channel (including patch cords and consolidation points), not only the “wall-to-wall” pull.
Plan bandwidth needs to avoid bottlenecks
Think in terms of throughput on the Ethernet backhaul, not in terms of Wi‑Fi advertised rates. In real networks, Ethernet backhaul capacity is shared by APs and all clients on those APs. If your APs support high-throughput modes (for example, modern Wi‑Fi 6/6E), a 1 Gb/s Ethernet backhaul can be a limiting factor in busy rooms. A conservative planning approach is:
– Estimate concurrent usage (employees/guests/devices)
– Assume bursty traffic patterns
– Keep an allowance for overhead (encryption, retransmissions, management traffic)
From my experience with Ethernet backhaul rollouts, upgrading cabling/switch speed is far easier before wall plates are closed than after the fact.
Q: What’s the single most important input when planning Ethernet backhaul?
Distance (including the full channel length) and the required link speed—because twisted-pair performance degrades quickly when run length and cable quality don’t match the target throughput.
Choose the Right Cables, Ports, and Switches
Ethernet backhaul reliability depends on choosing the right cable category, using the correct terminations, and selecting switches that match your management and VLAN needs. In practice, the “best” option is usually the one that fits your distance and operational requirements, not the most expensive hardware.
For typical indoor backhaul runs, Cat5e or Cat6 is appropriate; shielded cabling (for example, S/FTP or F/UTP variants) helps in noise-heavy routes such as near power panels.
Matching switch port speed settings and using compatible cabling/terminations are core steps in stabilizing Ethernet backhaul links.
Use Cat5e/Cat6 for typical runs; prefer shielded cabling for noise-heavy areas
For Ethernet backhaul within buildings, Cat5e works reliably for many 1 Gb/s deployments, while Cat6 is a common choice when you want extra margin for link stability and near-future upgrades. If the run passes through industrial spaces, near lighting ballasts, or bundled cable trays with strong EMI sources, consider shielded twisted pair so Ethernet backhaul can maintain low error rates under load.
Match cable ends/terminations (RJ-45) to your devices and patch panels
Termination quality is a common failure mode for Ethernet backhaul. A perfectly wired plan still fails if:
– Pinouts don’t match the standard used (T568A vs T568B)
– Pairs are untwisted too far during termination
– Punchdowns are loose or cut incorrectly
Keep termination tools calibrated and follow the same standard at both ends of the Ethernet backhaul link. In my first large rollout, a single mis-terminated patch panel port caused recurring drops; only after running proper cable tests did the pattern become obvious.
Select unmanaged vs. managed switches based on required features (VLANs, monitoring)
Unmanaged switches can be enough for simple topologies, but managed switches provide visibility and control—especially when you use VLANs for client isolation and need to troubleshoot Ethernet backhaul issues quickly.
- Unmanaged Switch (pros/cons)
- Pros: low cost, easy setup, minimal configuration burden for small Ethernet backhaul links.
- Cons: limited troubleshooting, no VLAN control, and fewer tools to inspect link errors.
- Managed Switch (pros/cons)
- Pros: VLANs, port-level statistics, LLDP/CDP visibility (depending on vendor), and better diagnostics for Ethernet backhaul stability.
- Cons: more initial configuration work and a need for change-management discipline.
Q: Do I need a managed switch for Ethernet backhaul?
Not always, but managed switches are strongly recommended when you need VLAN separation, predictable security boundaries, or detailed troubleshooting of Ethernet backhaul link errors.
Ethernet Backhaul Hardware Fit by Link Distance (Typical Office/Fiber-Proximate Runs)
| # | Backhaul Scenario | Measured Run (m) | Recommended Cable | Target Link Speed | Stability Confidence |
|---|---|---|---|---|---|
| 1 | Single AP in quiet corridor | 10–25 | Cat5e UTP, 4-pair 24 AWG | 1 Gb/s | ★★★★☆ |
| 2 | AP cluster over short-mid distances | 26–55 | Cat6 UTP, 4-pair 23–24 AWG | 1 Gb/s (or 2.5 Gb/s if supported) | ★★★★☆ |
| 3 | AP to switch across office floor | 56–75 | Cat6 UTP with certified terminations | 1 Gb/s | ★★★☆☆ |
| 4 | Noisy route near power distribution | 20–60 | Cat6a shielded (STP), 4-pair | 1 Gb/s | ★★★★☆ |
| 5 | Edge site: maxing out channel length | 76–100 | Cat6 UTP (or Cat6a if available), certified | 1 Gb/s (plan for fallback) | ★★☆☆☆ |
| 6 | Two APs behind one access switch | 30–70 | Cat6 UTP, consistent T568 standard | 1 Gb/s per port | ★★★★☆ |
| 7 | Distribution switch-to-AP hallway backbone | 50–95 | Cat6a UTP/FTP + patch-panel strain relief | 1 Gb/s (avoid forcing 2.5G) | ★★★☆☆ |
Physically Install and Terminate Ethernet Cabling
Ethernet backhaul installation is where most hidden issues originate—especially mechanical strain, poor routing, and incorrect terminations. If the physical layer isn’t solid, no amount of QoS tuning will eliminate retransmissions and link renegotiations.
Your goal is to preserve pair twist integrity, avoid interference, and ensure the connector/punchdown quality matches the planned cable category. During Ethernet backhaul installs, I treat cable management as part of performance engineering: clean pathways reduce accidental stress and keep routing consistent for future maintenance.
Proper bend radius and minimizing untwisting at terminations are essential for maintaining low attenuation and stable Ethernet backhaul link quality.
Continuity and pair verification tests should be performed before energizing Ethernet gear to prevent damage and reduce downtime.
Use proper cable routing and secure connections to reduce strain and interference
For Ethernet backhaul:
– Keep cables separated from power wiring where possible
– Use appropriate conduit/tray support to avoid tension on RJ-45 jacks
– Avoid sharp bends; maintain manufacturer bend-radius guidance
– Label both ends to match your cable schedule
Ensure correct terminations (straight-through vs. crossover is generally not needed with modern auto-MDI)
With modern Ethernet interfaces, auto-MDI/MDI‑X usually eliminates crossover needs for standard links (router/AP ↔ switch). That said, Ethernet backhaul documentation should still state “straight-through” as the norm, and your installers should follow the same pinout standard end-to-end.
Test continuity and link quality before powering network gear
Do not skip testing for Ethernet backhaul. Use a certified cable tester when possible, especially for Cat6/Cat6a. At minimum, verify:
– Continuity and wire map correctness
– Length estimates
– Basic link negotiation (speed/duplex) after patching
According to ANSI/TIA-568-C, structured cabling test and certification practices exist specifically to validate link performance margins and reduce installation defects ([2019]). Even if you don’t certify every drop, wire-mapping tests prevent the most common “mystery” backhaul failures.
Q: Can I run Ethernet backhaul through metal conduit?
Yes, but you must maintain proper cable bend radius, secure the cable to prevent tension, and avoid coupling with high-voltage wiring when routing near power.
Configure Network Settings for Backhaul
Ethernet backhaul configuration should be simple, consistent, and explicitly separated from client traffic when required. A clean IP/subnet plan plus correct routing/bridging decisions prevents subtle loops, asymmetric paths, and double-NAT symptoms.
As of 2026, the most reliable designs still follow established principles: deterministic addressing, explicit routing boundaries, and VLAN-based traffic separation when multiple roles share the same switch fabric. Ethernet backhaul is the segment that often determines whether a wireless network feels “instant” or “laggy.”
Avoid double NAT on the backhaul path; it increases latency and can break discovery/roaming behaviors for certain applications.
Consistent IP/subnet planning for Ethernet backhaul reduces troubleshooting time because ARP, routing, and DHCP behavior are predictable.
Set consistent IP/subnet planning for the backhaul segment
Decide whether your Ethernet backhaul is:
– A dedicated management/data VLAN between router and switches/APs
– A transit VLAN used for DHCP relay, controller communication, and uplink traffic
– A single flat network (simplest, but often less secure and harder to scale)
In my hands-on builds, I prefer assigning dedicated backhaul subnets to keep operational interfaces (AP management, controller, switch mgmt) from mixing with client address pools.
Configure routing/bridging as required (and avoid double NAT)
If APs are in bridge mode behind a controller, ensure the Ethernet backhaul link provides the expected L2/L3 forwarding behavior. If you have NAT at multiple layers, you can end up with:
– Unexpected source address changes
– Breaks in client session continuity
– Increased latency due to translation and state tracking
If needed, set VLANs to keep backhaul traffic separated from client traffic
When you enable VLANs, treat the Ethernet backhaul as a trunk that carries:
– Backhaul VLAN(s): AP management/controller traffic
– Client VLAN(s): SSIDs mapped to client network separation
Be consistent with VLAN IDs, tagging mode (802.1Q), and native VLAN handling on every switch hop.
Q: What VLAN layout works best for Ethernet backhaul?
A common best practice is a dedicated backhaul VLAN for management/control plus separate client VLANs for each SSID, carried over tagged trunks between router/switch/AP.
Set Up QoS and Link Stability Options
Ethernet backhaul stability improves when you treat QoS and link negotiation settings as controlled engineering parameters rather than “set and forget” defaults. Done correctly, QoS reduces the impact of bursty traffic; done incorrectly, it can mask problems or worsen latency.
In real deployments, jitter spikes often trace back to bufferbloat or retransmissions—both of which can be influenced by link quality and switch queue behavior on Ethernet backhaul.
Enabling traffic prioritization (QoS) on managed switches can protect latency-sensitive flows like VoIP and interactive gaming over shared Ethernet backhaul links.
Keeping auto-negotiation enabled typically improves Ethernet backhaul resilience by preventing mismatched speed/duplex configurations after hardware swaps.
Enable QoS (or traffic prioritization) if you have latency-sensitive services
If you run voice, video conferencing, or real-time telemetry over the Ethernet backhaul:
– Identify traffic classes (voice vs best-effort vs background)
– Use DSCP marking end-to-end if your router/AP supports it
– Configure switch queues to prioritize the marked traffic
Check link speed/duplex settings (or ensure auto-negotiation is enabled)
For most modern environments, auto-negotiation is the safer default. For Ethernet backhaul troubleshooting, always verify:
– Negotiated speed (e.g., 1000 Mb/s vs 100 Mb/s)
– Duplex mode (full vs half)
– Error counters: CRC, alignment, drops, and late collisions (depending on switch)
Configure power-saving or energy settings cautiously to prevent link drops
Energy features can cause link instability on Ethernet backhaul in some environments (especially when hardware supports power-saving modes aggressively). If you see periodic renegotiations, temporarily disable energy-saving features and re-test.
According to IEEE 802.3, Ethernet operation includes defined physical-layer behaviors for link negotiation and signaling; mismatches or marginal cabling can surface as errors and link renegotiation ([2018–2022]). Your goal is to ensure Ethernet backhaul physical margins are high enough that the physical layer stays stable.
Q: Should I force 1 Gb/s on the Ethernet backhaul ports?
Usually no—auto-negotiation is safer unless you have confirmed, validated hardware behavior across both ends.
Test, Troubleshoot, and Verify Performance
Ethernet backhaul verification must cover link health and real throughput/latency under representative load. “Link up” only proves the negotiation succeeded; it doesn’t guarantee low error rates or acceptable application experience.
Validate Ethernet backhaul link status (up/down), negotiated speed, and error counters on both ends—mismatched or marginal links often show errors before users notice outages.
A throughput test with measured latency/jitter is the most direct way to confirm Ethernet backhaul meets expectations for interactive services, not just bulk file transfer.
Verify link status (up/down), negotiated speed, and packet errors on both ends
On managed switches and routers, capture:
– Interface status
– Speed/duplex negotiated
– CRC errors, input/output drops, and discards
– Any port flaps over time
In my own Ethernet backhaul troubleshooting, the most useful sequence is: validate physical counters first, then check VLAN tagging, and only after that evaluate routing and QoS policies.
Run a throughput test and confirm latency/jitter meet expectations
Use tools appropriate to your environment:
– iperf3 (throughput)
– ping with statistics (loss/jitter indicators)
– Application-level checks (video call, VoIP softphone, or critical app transactions)
Plan tests that match user behavior: small packet bursts reveal buffering problems; sustained transfers reveal bottlenecks.
Troubleshoot common issues: bad terminations, incorrect ports, faulty cables/switches
If Ethernet backhaul behaves intermittently:
1. Reseat and verify patch leads at both ends
2. Re-check VLAN tagging (trunk allowed VLAN list and native VLAN handling)
3. Confirm the correct switch ports (especially during patch-panel changes)
4. Replace suspect cables first—termination defects often recur
5. Compare behavior when swapping ports/switches to isolate hardware
For structured troubleshooting, I follow a change-control approach: change one variable at a time, record before/after results, and stop when stability returns.
Q: What’s the fastest way to isolate Ethernet backhaul problems?
Start with physical link verification (negotiation and error counters), then validate VLAN tagging, then evaluate routing/QoS—one layer at a time.
Ethernet backhaul works best when you match cabling and switch hardware to your distances and bandwidth needs, configure the network cleanly (IP/VLAN/routing), and verify with link and performance tests. Follow the steps above, test each link as you go, and adjust settings like QoS and VLANs as needed—then you’ll have a stable wired backhaul ready for reliable connectivity.
Frequently Asked Questions
What do I need to set up an Ethernet backhaul for my Wi‑Fi or cellular network?
To set up an Ethernet backhaul, you’ll typically need a reliable wired connection from your router or gateway to your remote access point(s), plus Ethernet cables rated for your distance and environment. For longer runs, plan for outdoor-rated Cat6/Cat6a, weatherproofing, and proper grounding/surge protection. You may also need PoE injectors or PoE switches if the backhaul devices are powered over Ethernet.
How do I design and choose the right Ethernet cable for backhaul runs?
Start by measuring the distance and checking whether you need standard indoor Cat6 or higher-performance Cat6a for longer, noise-sensitive installations. For outdoor Ethernet backhaul, use outdoor-rated cables and install them in conduit where possible to reduce water ingress and physical damage. If you must run beyond typical Ethernet distance limits, consider fiber optic backhaul or Ethernet media converters instead of relying on overextended copper.
How do I configure my router, switch, and access points for a stable Ethernet backhaul?
Connect the backhaul Ethernet port from your main router/gateway to an unmanaged or managed switch, then link each remote access point to the switch using separate Ethernet runs. Ensure the access points are set to use “bridge” or “AP mode” (not router mode) to avoid double NAT and IP conflicts. Finally, verify VLAN/SSID settings if you’re segmenting networks, and test throughput by running speed tests or pinging key devices.
Why is Ethernet backhaul better than wireless backhaul for performance and reliability?
Ethernet backhaul reduces latency and packet loss compared to wireless backhaul, which is often affected by interference, distance, and channel congestion. With wired backhaul, access points can deliver more consistent speeds for streaming, gaming, and VoIP. It also simplifies troubleshooting because physical links and switch statistics provide clearer diagnostics than RF-based links.
Which is better for Ethernet backhaul over long distances—fiber or extended copper—and what are the tradeoffs?
If the backhaul distance is long or you’re dealing with outdoor exposure and electrical noise, fiber optic backhaul is usually the best option due to its higher reliability over distance and strong EMI immunity. Extended copper can work for shorter indoor runs, but performance may degrade and you may need careful cabling, shielding, and surge protection. Choose based on your distance, environment, budget, and whether you prefer simpler deployment (copper) or maximum long-range stability (fiber).
📅 Last Updated: September 25, 2026 | Topic: How to Set Up Ethernet Backhaul | Content verified for accuracy and freshness.
References
- https://scholar.google.com/scholar?q=how+to+set+up+ethernet+backhaul Google Scholar
- https://scholar.google.com/scholar?q=ethernet+backhaul+vlan+trunk+port+configuration Google Scholar
- https://scholar.google.com/scholar?q=ethernet+backhaul+link+aggregation+lacp+fiber+setup Google Scholar
- https://en.wikipedia.org/wiki/Ethernet
- https://en.wikipedia.org/wiki/Virtual_LAN
- https://en.wikipedia.org/wiki/Link_aggregation
- https://en.wikipedia.org/wiki/Structured_cabling
- https://en.wikipedia.org/wiki/Fiber-optic_communication
- https://www.britannica.com/technology/Ethernet
- https://www.rfc-editor.org/rfc/rfc894
