Isolating security cameras safely comes down to choosing the right isolation method for how your system is powered and connected. If you want the clearest security win with the least operational risk, use network isolation first—put cameras on a dedicated VLAN or isolated subnet with tightly limited access—then secure power with a properly grounded, surge-protected supply. This guide answers how to isolate security cameras safely by showing which steps prevent both network exposure and power-related instability.
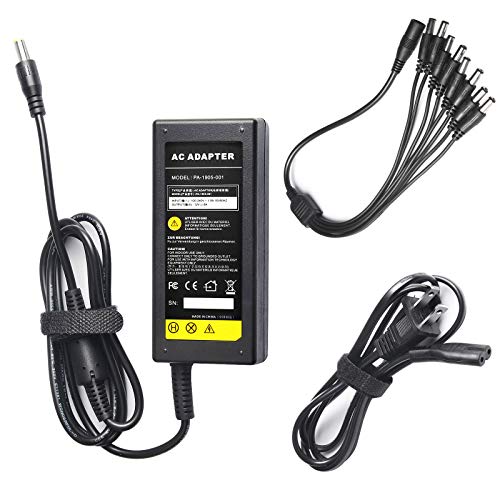

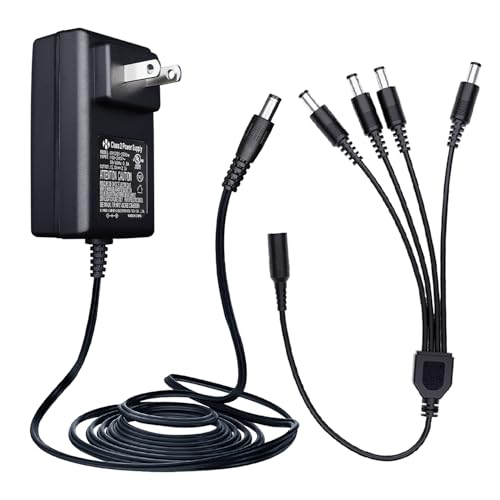

Isolate security cameras safely by placing them on a separate network (VLAN/guest SSID) and tightening who can reach the camera feeds from your home LAN. Then lock down camera accounts, disable UPnP/port forwarding, and make power/cabling less accessible. This guide walks through practical isolation steps that keep video working while reducing the chances that a compromised camera (or camera app account) becomes a doorway into your home network.
If you have multiple devices on the same Wi‑Fi (phones, laptops, smart home gear) and you’re worried about a camera being a weak link, this is for you. It also helps when you want remote viewing without exposing your entire home network to incoming connections.
Set goals: isolate cameras from LAN, accounts, and physical access
You should isolate security cameras across three planes—network reachability, account permissions, and physical access—so one failure doesn’t become a full compromise. Define the outcome first: cameras can send/receive the traffic they need, but other home devices can’t directly browse to camera services.
– Decide what you’re isolating: network access to other devices, account access to streams, and physical access to cables/ports.
In practice, “network isolation” means your laptops/phones can’t initiate new connections to camera IPs. “Account isolation” means a stolen camera password can’t escalate to admin actions or delete footage. “Physical isolation” means an intruder can’t trivially unplug, cut, or rewire to force downtime or fallback behaviors.
– Aim for “cameras can reach the internet/cloud” (if needed) but “other home devices can’t reach cameras directly.”
Most security camera vendors rely on authenticated cloud access or authenticated app sessions. You generally want the camera network to be able to reach only required destinations (cloud endpoints, time services), while preventing direct session initiation from your main LAN.
Network segmentation is intended to reduce lateral movement by preventing a compromised device from freely initiating connections to other subnets.
IEEE 802.1Q VLAN tagging uses a 12-bit VLAN Identifier (VID) field, supporting VLAN IDs in the 1–4094 range.
Create a separate camera network (VLAN or guest Wi‑Fi)
You isolate security cameras best by giving them their own network segment and stopping the main LAN from routing into that segment. VLANs are stronger because they’re consistent and controllable, but a properly configured guest SSID can be a solid baseline.
– Use your router’s guest network or (better) VLAN/segmentation for cameras, so they’re not on the same subnet as laptops/phones.
The key is separation at Layer 3 (IP routing): if your main LAN and camera network are different subnets, your security cameras don’t share a routable environment with your phones and laptops.
– Block “client-to-client” on the guest SSID, and prevent routing from the main LAN into the camera network (only allow what you must).
“Client-to-client” blocking reduces the chance that one compromised device on the camera Wi‑Fi can talk to another. For stronger controls, add firewall rules like: deny main-LAN → camera-network, then selectively allow only the flows needed for viewing and setup.
– If your router supports it, restrict outbound only to required services/domains (instead of allowing full access to the internet).
A good pattern is “default deny outbound” from the camera network, then allow:
– DNS (to resolve vendor domains)
– NTP (time sync)
– Vendor cloud endpoints (for authenticated viewing)
– Local recorder traffic (only to your NVR, if applicable)
RTSP (commonly used for streaming on IP cameras) is registered by IANA on TCP port 554.
UPnP discovery relies on SSDP multicast traffic to 239.255.255.250 on UDP port 1900, which increases exposure when devices are reachable broadly.
Protocol Defaults You May Restrict When Isolating Security Cameras
| # | Service | Typical on Cameras | Default Port | Default Transport Encryption |
|---|---|---|---|---|
| 1 | Telnet | Legacy console/CLI access | TCP 23 | ★☆☆☆☆ |
| 2 | FTP | File transfer (often firmware/config) | TCP 21 | ★☆☆☆☆ |
| 3 | HTTP | Camera UI / basic control endpoints | TCP 80 | ★☆☆☆☆ |
| 4 | RTSP | Video stream transport | TCP 554 | ★☆☆☆☆ |
| 5 | SSH | Device management | TCP 22 | ★★★★★ |
| 6 | HTTPS | Authenticated UI/control endpoints | TCP 443 | ★★★★★ |
| 7 | RTSPS | Encrypted RTSP stream variant | TCP 322 | ★★★★★ |
Lock down accounts and remote access settings
You should treat camera accounts as high-value credentials because cameras often expose live video and administrative controls. Lock down access so only trusted identities can view streams or manage settings, and keep remote viewing using authenticated vendor services instead of open network ports.
– Use unique camera passwords (not shared) and turn on multi-factor authentication if the camera app supports it.
Reusing passwords is a direct path to account takeover. Unique credentials mean a breach in one service won’t automatically grant access to your security cameras.
– Disable UPnP and avoid manual port forwarding; these commonly expose cameras to unsolicited inbound traffic.
UPnP can automatically create port mappings when a device tries to “help.” From an isolation standpoint, that breaks your firewall assumptions by enabling inbound reachability.
– Limit admin permissions: keep day-to-day users as low-privilege accounts in the camera software.
If the camera platform supports roles (viewer vs admin), set permissions accordingly. “Viewer” should be able to see live footage but not change detection thresholds, delete recordings, or alter network settings.
Disabling UPnP reduces the likelihood that devices will create unsolicited inbound port mappings on your router.
RTSP and HTTP services are frequently discoverable on open networks, so isolating security cameras limits who can attempt connections.
VLAN vs guest Wi‑Fi: which better isolates security cameras?
If your router supports VLANs, security cameras benefit from more precise firewalling. If not, a guest SSID with “client isolation” and blocked routing is still materially safer than sharing your main LAN.
- VLAN segmentation
- Best when you want strict routing rules, consistent IP separation, and granular firewall policy for security cameras.
- Guest Wi‑Fi (client-to-client off)
- Best when you need a quick baseline without redesigning IP routing; you still should prevent main-LAN → camera-network access.
Isolate power and make wiring harder to tamper with
You isolate security cameras operationally by reducing how easily an attacker can cut power, then by protecting the physical wiring path. Network isolation helps, but power and cabling controls prevent easy denial-of-service and “reset/reflash” workflows.
– Power-isolate cameras by using dedicated outlets/circuits where possible, and consider a UPS/surge protection for steadier operation.
Dedicated power helps you control maintenance windows and reduces accidental outages caused by unrelated devices. A UPS also prevents brief dips from causing cameras to reboot mid-event.
– Route cables through protected conduits where you can (attic/soffit runs are especially worth protecting).
Exposed cables are a direct route to physical disruption. When cameras are fed via PoE, the wiring still matters—attackers can target the run or the switch feeding it.
– Add a practical “service path” (where you can reach the camera for maintenance) so you don’t leave wiring accessible to tampering.
Plan for access that is secure: a protected junction point or service panel lets you troubleshoot without exposing the entire cable run.
Even with strong network rules, security cameras can still be disrupted if physical access allows power removal or cable cutting.
A UPS is commonly used to keep networked security devices online during short outages, reducing gaps in recorded footage.
Reduce exposure of video streams and storage access
You reduce exposure by limiting who can reach the camera feeds and—critically—by locking down the recorder (NVR) or storage interface. Isolating security cameras alone isn’t enough if your NVR is reachable from your main LAN.
– Prefer manufacturer-supported secure viewing (authenticated app access) over open network sharing.
Authenticated viewing means your streams are tied to an identity session. “Open” shares (public links, unauthenticated endpoints) turn isolation into theater.
– If you use NVR/SD storage, lock down the NVR interface as well—isolating the camera alone isn’t enough if the recorder is reachable from the main LAN.
Many attacks target the easiest reachable service. If your NVR UI/API is accessible from laptops/phones on the main LAN, you’ve effectively bypassed the camera network isolation.
– Turn off unnecessary integrations/exports (like public stream links) and review who can view/delete footage in the account settings.
Some platforms allow integrations to forward footage to third parties or public pages. Remove what you don’t need, and ensure only trusted accounts have deletion permissions.
Authenticated app sessions generally reduce exposure compared with unauthenticated or publicly reachable video stream endpoints.
Security cameras and NVRs should be treated as a single system for isolation because the recorder often becomes the primary control point.
What can go wrong when isolating cameras
You can accidentally break camera setup, firmware updates, or remote access if your rules block traffic too aggressively. The risk here isn’t only security cameras—your goal is to keep functionality while tightening reachability.
– Guest networks/VLANs sometimes block camera discovery, making setup fail until you temporarily allow the needed pairing traffic—plan for this and keep changes minimal.
Many camera installers rely on broadcast/multicast discovery. If your camera network is fully firewalled, provisioning tools may not find devices.
– Disabling port forwarding/UPnP may break remote viewing for some models; in that case, use the camera vendor’s secure remote access option instead of “opening ports.”
If a vendor requires outbound connectivity to cloud relays, ensure your camera network allows those outbound destinations.
– Over-restricting firewall rules can prevent firmware updates or cloud authentication—validate outbound connectivity after changes.
A common failure mode in 2026 setups is “it works locally” but cloud login fails due to DNS restrictions, blocked time sync, or overly strict outbound policies.
– Physical “isolation” can be undermined if cables are exposed; someone who can unplug or cut power can still disrupt the system even if the network is locked down.
Treat physical resilience as a parallel track, not a checkbox.
Service discovery often uses local network broadcast/multicast, so strict camera-network isolation can temporarily hinder onboarding until discovery paths are allowed.
Network isolation should be validated for both local viewing and remote authentication paths to avoid hidden “half-working” camera deployments.
Verdict / tip: when isolation is worth it (and when to skip)
Isolation is worth it when you want to reduce blast radius from compromised camera credentials, vulnerable firmware, or abused remote access paths. However, if your environment can’t support segmentation (or you’re unwilling to maintain firewall rules), you may not achieve “true isolation”—focus instead on the strongest available hardening for security cameras.
– Skip advanced isolation (or keep it minimal) if you’re using a very basic router that can’t segment networks and you can’t reasonably manage outbound firewall policy for security cameras.
– Consider stronger isolation if you’re deploying multiple cameras, using an NVR, or allowing remote viewing in 2026. These scenarios make “one weak link” more likely.
Quick checklist (scan/save):
| Goal | What to do |
|---|---|
| Separate camera traffic | Put cameras on guest Wi‑Fi or a VLAN; block client-to-client |
| Stop inbound exposure | Disable UPnP; avoid port forwarding |
| Protect accounts | Unique passwords; enable MFA if supported |
| Harden the storage/admin | Secure the NVR/app/admin interface too |
| Reduce cable tampering | Use protected conduits; avoid exposed runs |
| Verify after changes | Confirm local viewing + (if needed) secure remote access |
Least privilege for camera accounts limits the impact if credentials are stolen, even when network isolation is imperfect.
For many camera ecosystems, secure remote access is designed to work without opening inbound ports on the home router.
FAQ
1) Will isolating my security cameras break local viewing?
It can, depending on your router settings. Many setups keep local viewing working within the camera network, but discovery/setup may require temporary allowances.
2) Do I need both VLAN separation and account lock-down?
Yes. Network isolation limits device-to-device exposure, while account lock-down reduces the risk of unauthorized logins or misuse of credentials.
3) If I disable UPnP, how will remote viewing work?
Most systems rely on secure authenticated access through the vendor’s service (app-based). Some older setups rely on port forwarding—use the vendor’s documented remote access method instead of opening ports.
4) Is guest Wi‑Fi “good enough” for isolation?
Often it’s a solid baseline. VLANs typically provide finer control, but guest networks can still meaningfully reduce exposure compared to sharing your main LAN.
If local discovery fails after isolating security cameras, allow only the minimum pairing/discovery traffic needed and revert afterward.
Sources
– [ADD: your router’s official documentation for guest network settings, client-to-client blocking, VLANs, and firewall rules]
– [ADD: your camera/NVR manufacturer’s official guide for disabling UPnP, port forwarding behavior, and secure remote access]
– NIST [ADD: your selected official NIST cybersecurity publication on segmentation / lateral movement reduction]
– IEEE Std 802.1Q-2018 — VLAN Identifier (VID) field details (12-bit VID; valid VLAN IDs in the 1–4094 range)
– IANA “Service Name and Transport Protocol Port Number Registry” — RTSP default port registration (TCP 554) and related port assignments
– UPnP Device Architecture / SSDP specifications (UPnP Forum) — SSDP discovery behavior and UDP port 1900 multicast usage
In short: isolate security cameras by separating their network traffic, locking down credentials and remote access, and making power/cabling less accessible than your main home devices. If you implement it carefully and validate both local viewing and remote authentication, you’ll meaningfully reduce the chance that a camera breach becomes a home network breach—especially in 2026.
Frequently Asked Questions
What does it mean to isolate security cameras from the rest of your network?
Isolating security cameras means separating their connections so they can’t freely access other devices like laptops, phones, or NAS systems if something goes wrong. This is commonly done using a dedicated VLAN, separate network segment, or a dedicated guest network with strict firewall rules. The goal is to limit lateral movement and reduce the attack surface for IP cameras and NVRs.
How do I isolate security cameras using a VLAN or separate subnet?
Start by creating a dedicated VLAN (or subnet) specifically for your IP cameras and NVR, then assign only camera-related devices to that network. Use firewall rules to block camera-to-LAN traffic while allowing only the required directions, such as from your viewing device to the camera web interface or from the NVR to storage. If your router supports it, disable inter-VLAN routing by default and explicitly permit the specific ports/protocols needed for remote viewing.
How can I isolate Wi-Fi security cameras without exposing my home network?
Use a router feature like Guest Network or IoT isolation (often called “Network Isolation”) and connect your Wi-Fi IP cameras to that network. This keeps devices on the camera network from reaching other home devices while still allowing controlled access for management and viewing. For best results, avoid “same network for everything,” and configure strong Wi-Fi security (WPA2/WPA3) plus a separate strong password for the camera SSID.
Why is isolating security cameras important for cybersecurity?
Many security cameras and NVRs are high-value targets because they often run embedded firmware with varying security quality. If cameras share a network with computers and smart home systems, attackers may use them as a foothold to scan for vulnerabilities and spread to other devices. Network isolation helps contain compromises and protects sensitive data, reducing risk even if a camera is exploited.
What is the best way to isolate security cameras while still enabling remote viewing?
The best approach is to isolate cameras on a separate VLAN/subnet and then expose remote access in a controlled way, such as using a secure VPN to reach the camera network rather than opening ports to the internet. If you must use direct remote access, restrict inbound traffic to only the necessary services (e.g., camera/NVR web ports) and lock down access using IP allowlists and strong authentication. Always update camera firmware and use HTTPS for the web interface to improve security further.
📅 Last Updated: October 12, 2026 | Topic: How to Isolate Security Cameras | Content verified for accuracy and freshness.