
The biggest mesh Wi-Fi setup mistakes are placing nodes inside dead zones, adding more units than your home needs, and leaving competing router networks active. For homes with Ethernet available, wired backhaul is the clear winner for consistent performance; wireless nodes need a strong connection to one another, not just proximity to struggling devices. Which setup choices actually fix weak coverage—and which make it worse?
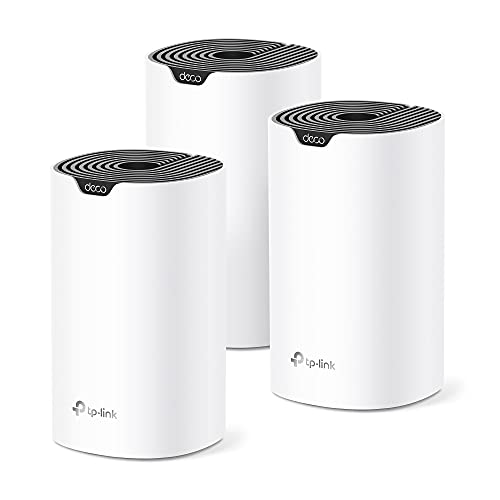



The most common mesh Wi-Fi setup mistakes are placing nodes where the signal is already weak, using an unsuitable router configuration, and adding more nodes without checking whether they help. Start with placement and network settings, then test coverage before expanding the system. This article explains what to check, what can go wrong, and when mesh may not be the right solution.
This guide is for people installing a mesh system or troubleshooting dead zones, dropped connections, or inconsistent speeds after setup. Available settings vary by model, so check your manufacturer’s instructions before changing network modes or wiring nodes.
Placing Nodes in Dead Zones or Behind Obstructions

Place wireless mesh nodes where they can still maintain a usable connection to the rest of the system—not at the deepest point of a dead zone.
A wireless mesh node needs both a usable upstream connection and sufficient coverage for nearby devices.
Placing a mesh node inside a cabinet can weaken its connection to both clients and other nodes.
A node cannot reliably extend bandwidth it barely receives. Start between the main unit and the problem room, then use the manufacturer’s placement test to refine its position. An open shelf generally offers a better starting point than a cupboard, floor-level corner, or position behind a television. Concrete walls, metal surfaces, and large appliances can obstruct radio signals; their effects make universal spacing rules unreliable.
Google’s [placement guidance](https://support.google.com/googlenest/answer/7183150) recommends positioning points to maintain a strong mesh connection. Treat an app’s placement result as a starting point, then test actual devices in the rooms that matter.
Choosing the Wrong Router Mode or Incompatible Equipment
Decide which device will handle routing before changing network settings. Either let the mesh system manage the home network or use its supported access-point or bridge mode behind an existing router.
Access-point mode generally leaves routing and address assignment to the existing router.
Double NAT can complicate inbound connections without noticeably affecting ordinary browsing or streaming.
Network address translation, or NAT, allows devices to share an internet-facing address. Double NAT occurs when two routers perform translation in sequence. Some gaming, port-forwarding, and remote-access arrangements become harder to configure, but double NAT does not automatically cause poor Wi-Fi. Google’s [double-NAT documentation](https://support.google.com/googlenest/answer/6277579) explains the distinction.
Do not assume “bridge mode” preserves every mesh feature. Google’s [bridge-mode instructions](https://support.google.com/googlenest/answer/6240987), for example, limit that configuration to a single Wi-Fi device rather than a multi-device Google mesh.
Compatibility is equally specific. Matching brands, Wi-Fi generations, or Ethernet sockets do not guarantee interoperable mesh operation. The following Google Nest Wifi Pro specifications illustrate why checking the exact product matters; this is not a product ranking.
Google Nest Wifi Pro: Seven Setup-Relevant Specifications
| # | Feature | Documented Specification | Setup Benefit or Limitation |
|---|---|---|---|
| 1 | Wi-Fi standard | Wi-Fi 6E | Supports compatible 6 GHz clients |
| 2 | Radio bands | 2.4, 5, and 6 GHz | Three-band operation |
| 3 | Ethernet ports | Two per unit | Wired connections available |
| 4 | Ethernet port rate | 1 Gbps per port | No multi-gigabit Ethernet ports |
| 5 | Ethernet backhaul | Supported | Nodes can use wired links |
| 6 | Earlier Google mesh products | Not mesh-compatible with Google Wifi or Nest Wifi | Cannot reuse them as Pro mesh nodes |
| 7 | Multi-device bridge mode | Not supported | Not a multi-node access-point-mode option |
For a 2026 installation, verify these details against the current documentation. According to Google’s [Nest Wifi Pro specifications](https://store.google.com/product/nest_wifi_pro_specs), each unit has two Ethernet ports. According to the same specifications, those ports support 1 Gbps. According to Google’s specifications, the system operates across three bands: 2.4, 5, and 6 GHz. These are hardware specifications, not measured household speeds.
Overlooking Backhaul, Updates, and Device Settings
Check the connection between nodes before blaming the connection between a device and its nearest node. Backhaul is the link that carries traffic between mesh units.
Strong Wi-Fi reception at a device does not prove that its mesh node has a strong backhaul connection.
Ethernet backhaul can bypass a weak wireless inter-node link when the mesh system supports the wiring arrangement.
A laptop may show full signal beside a satellite while that satellite struggles to communicate upstream. Ethernet backhaul can help, but follow the manufacturer’s wiring diagrams: connecting everything to an upstream switch is not universally valid. Google’s [wired-network guidance](https://support.google.com/googlenest/answer/7215624) describes supported arrangements.
Check firmware and complete updates before evaluating stability. Google publishes [software release information](https://support.google.com/googlenest/answer/9411916); other manufacturers may require different update procedures.
For smart-home onboarding, consult the exact device manual. Some devices support only 2.4 GHz or require particular pairing steps. Do not disable security or split network names merely because a generic troubleshooting guide suggests it.
Misdiagnosing Slow Speeds and Dropped Connections
Compare performance near the main unit with performance in affected rooms under similar conditions. If both locations perform poorly, investigate the internet connection before expanding Wi-Fi coverage.
A wired test at the main router helps distinguish internet-service limitations from wireless coverage problems.
A client device can remain connected to a less suitable mesh node even when another node is closer.
Use controlled A/B testing: keep the same device, test service, and background traffic conditions, then change only one variable. Record location, connected node when visible, throughput, latency, and disconnections. Repeat tests rather than treating one speed-test result as decisive. A wired comparison is useful where available, although cable, port, and client limitations also affect results.
Roaming decisions depend partly on the client. Interference can change with neighboring networks and household activity, while unnecessary nodes can increase overlap and airtime contention. Temporarily removing a node is therefore a legitimate diagnostic step.
When to Adjust the Setup—and When to Skip Mesh
Correct placement and configuration before buying more nodes. Skip mesh when one router already provides adequate coverage or when the real bottleneck is the internet service.
Adding mesh nodes does not increase the bandwidth supplied by an internet service provider.
Wireless backhaul consumes radio resources, while wired backhaul requires suitable cabling and supported network topology.
Consider the trade-offs rather than assuming mesh is always the upgrade:
- Wireless mesh
- Convenient where cabling is impractical, but performance depends on inter-node signal quality and available radio capacity.
- Wired-backhaul mesh
- Reduces dependence on wireless inter-node links, but requires cabling, suitable ports, and correct wiring.
- One well-positioned router
- Simpler and often sufficient for an adequately covered household, but may struggle across obstructed or extended layouts.
In 2026, advertised Wi-Fi generation still does not override building layout, client capabilities, or service limitations.
A Mesh Setup Checklist to Save
Verify placement, configuration, and real-world performance before purchasing additional equipment.
Mesh setup verification should include problem rooms and essential devices, not just a speed test beside the main router.
Recording each configuration change makes troubleshooting results easier to interpret.
– Placement: Nodes have a usable upstream connection, sit away from major obstructions, and follow the manufacturer’s placement guidance.
– Configuration: Routing mode, node compatibility, firmware, and any Ethernet backhaul wiring have been checked.
– Verification: Problem rooms and essential devices have been tested, with changes recorded before adding more equipment.
Sources to Verify Before Making Changes
Use the documentation for the exact model and hardware revision. The Google references below support the examples in this article, not universal instructions for every mesh system.
Manufacturer operating-mode documentation determines whether a mesh system supports access-point mode without losing mesh functionality.
Product specifications describe capabilities; household testing establishes performance in a particular installation.
– Placement: [Google Nest Wifi placement guidance](https://support.google.com/googlenest/answer/7183150).
– Specifications and compatibility: [Google Nest Wifi Pro specifications](https://store.google.com/product/nest_wifi_pro_specs).
– Operating modes: [Google bridge-mode documentation](https://support.google.com/googlenest/answer/6240987).
– Gateway configuration: [Google double-NAT guidance](https://support.google.com/googlenest/answer/6277579).
– Ethernet backhaul: [Google wired-network configurations](https://support.google.com/googlenest/answer/7215624).
– Updates: [Google Nest Wifi software release notes](https://support.google.com/googlenest/answer/9411916).
– Client requirements:
Author observations, separate from manufacturer references:
A reliable mesh setup starts with sensible node placement, the right network configuration, and testing—not automatically more hardware. Check the manufacturer’s instructions, work through the checklist, and change one thing at a time. If coverage is already adequate or the bottleneck is your internet service, address that issue instead of expanding the mesh.
Frequently Asked Questions
What are the most common mesh Wi-Fi setup mistakes that cause slow speeds?
One of the biggest issues is placing mesh nodes too far apart, which forces devices to hop over a weak backhaul and reduces throughput. Another common mistake is using Wi‑Fi for backhaul when the environment has interference, instead of an Ethernet backhaul if available. Finally, forgetting to update firmware or leaving “default” settings can lead to unstable connections and poor roaming performance.
How do I set up mesh Wi‑Fi so the nodes actually communicate (backhaul) reliably?
Start by placing each node within a strong signal radius and avoid walls, mirrors, or large appliances between nodes. If you can, use Ethernet backhaul by connecting at least one node to your router via cable, then let the other nodes connect from there. After setup, confirm that the mesh network is forming correctly in the app—if the backhaul shows as weak or unstable, move nodes closer or reduce interference.
Why does my mesh Wi‑Fi keep dropping or switching networks between nodes?
Frequent drops often happen when the mesh is deployed across too many obstacles or when nodes are positioned near sources of interference like microwaves, cordless phones, or neighboring dense Wi‑Fi. You can also see instability if you manually change channel settings or disable features the system uses for band steering and roaming. The fix is usually to improve node placement, avoid manual router tweaks, and run firmware updates through the mesh app.
Which mesh placement strategy is best for eliminating dead zones and buffering?
Use a “coverage-first” layout: put nodes to cover the areas with the weakest Wi‑Fi, not just to evenly space them across the home. For multi-story houses, install nodes on different floors only if their signal can clearly pass through—otherwise use a dedicated node per floor. Test with your phone in each room after setup and adjust node locations until performance is consistent, especially in bedrooms, basements, and long hallways.
Best practices: should I use the same Wi‑Fi name and disable router features during mesh setup?
In most mesh Wi‑Fi setups, using a single SSID for all nodes helps seamless roaming and reduces connection issues during handoffs. During installation, avoid disabling important functions like automatic band steering unless the app specifically recommends it. If your main router offers “guest” networks or extra SSIDs, keep them separate and don’t create conflicting settings that can cause devices to bounce between networks.
📅 Last Updated: October 16, 2026 | Topic: Mesh Wi-Fi Setup Mistakes | Content verified for accuracy and freshness.
References
- Wireless mesh network
- IEEE 802.11s
- IEEE 802.11r-2008
- IEEE 802.11k-2008
- Wi-Fi Protected Access
- Electromagnetic interference
- SP 800-153, Guidelines for Securing Wireless Local Area Networks (WLANs) | CSRC
- https://scholar.google.com/scholar?q=mesh+Wi-Fi+deployment+mistakes+node+placement+backhaul+interference Google Scholar
- https://scholar.google.com/scholar?q=wireless+mesh+network+deployment+considerations+performance+interference Google Scholar
- https://scholar.google.com/scholar?q=mesh+Wi-Fi+setup+best+practices+roaming+handover+802.11k+802.11v Google Scholar



One thought on “Mesh Wi-Fi Setup Mistakes to Avoid”