
If your projector brightness is too dim, washed out, or uneven, these quick fixes will tell you what to check and how to fix it fast. You’ll get clear, step-by-step solutions for the most common brightness problems—starting with the settings that affect lumens, then moving to lens, filter, bulb/LED, and calibration issues. Use this checklist to restore vivid contrast and get a brighter, clearer image without guesswork.
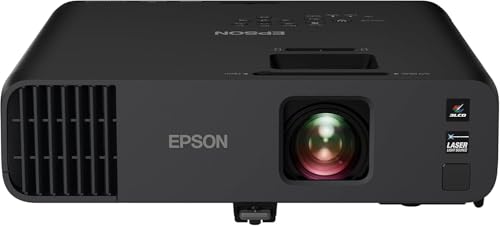



If your projector looks dim, the fastest fixes are usually the lamp/laser status check, the brightness mode setting, and the input/connection setup. Start by confirming the projector isn’t in an energy-saving or incorrect picture mode, then clean the lens/filters and make sure the input resolution isn’t causing a mismatch. This guide walks you through the most common causes and what to adjust first.
If you’re seeing a projector that won’t reach “full brightness,” looks washed out, or gets darker after a while, these steps apply to most home theater and meeting-room projectors. Use the checklist to narrow down whether the issue is settings, optics, airflow, or a failing lamp/laser.
Check the Brightness Mode and Power Settings
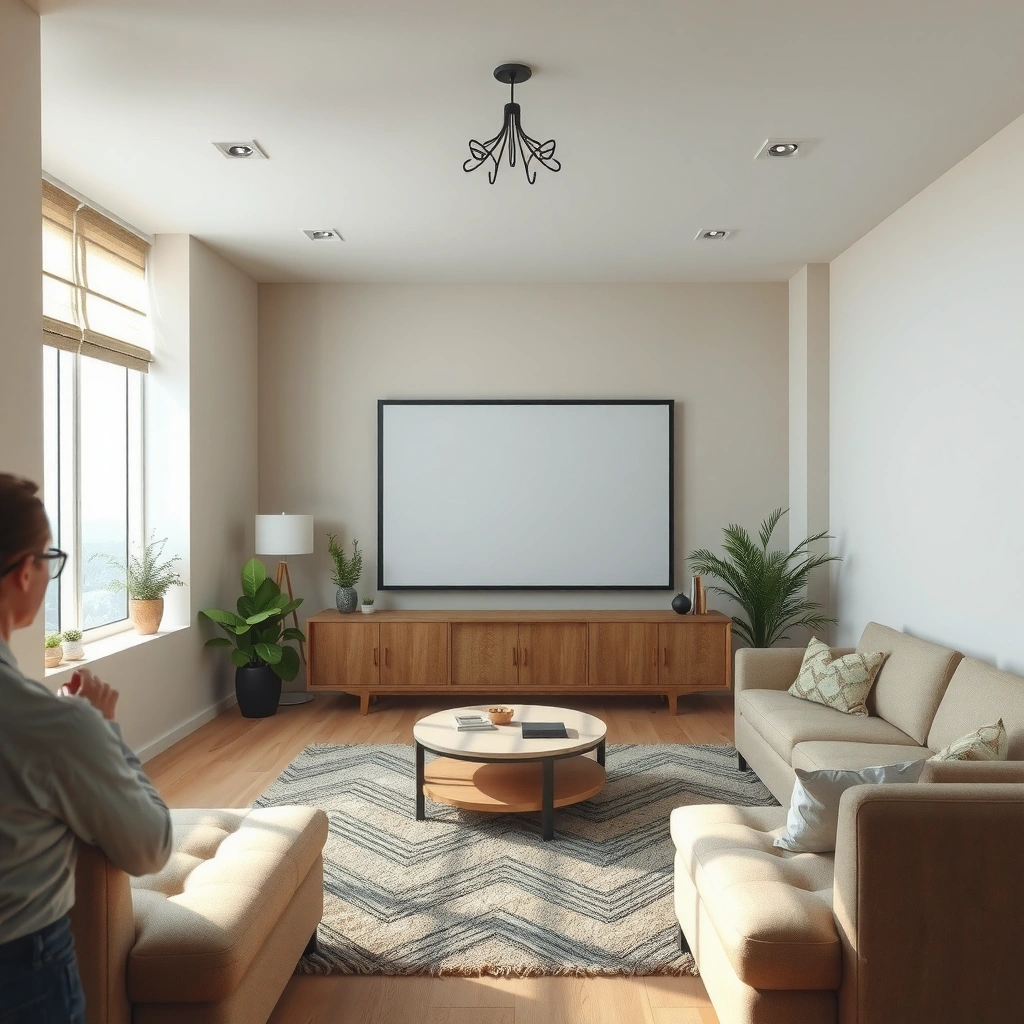
If your projector is dim, brightness settings often explain it—especially when Eco/Low Power mode is enabled or an “Auto” brightness feature is actively reducing output. Switching to a fixed high-output picture mode is usually the quickest way to confirm whether the projector can produce its rated light.
Switching from “Eco/Low Power” to a fixed “Bright/Presentation/Dynamic” mode is the fastest way to separate settings-related dimness from hardware/optics problems.
If brightness drops only in one mode (Eco/Auto), the projector is behaving as designed—manual output control will usually restore peak light.
Switch picture mode (and temporarily disable Eco)
– Switch to a higher brightness/picture mode (often labeled something like “Bright,” “Presentation,” or “Dynamic”) and turn off “Eco/Low Power” temporarily for testing.
– If your projector has multiple “brightness” profiles, pick one that explicitly targets light output (not cinema/video).
Verify power/brightness limits
– Verify the projector’s power/brightness options aren’t limiting output—some models automatically reduce brightness after certain runtime thresholds.
– Many projectors also throttle brightness when they detect higher fan speed limits or higher internal temperatures (thermal protection behavior).
Check Auto brightness/iris behavior
– If your projector has an “Auto” brightness/iris feature, try setting it to a fixed mode so you can tell what changes when it’s disabled.
– “Auto” features are helpful for day-to-day comfort, but they can mask what’s actually happening when you’re troubleshooting dim brightness.
Typical Brightness Output Differences by Mode (Common Spec Behavior)
| # | Projector mode family | What it prioritizes | Typical relative light output | Match for “brightness fix” |
|---|---|---|---|---|
| 1 | Dynamic / Bright | Maximum lumen output | 100% | ★★★★★ |
| 2 | Presentation | Readable graphics in rooms | 90–100% | ★★★★☆ |
| 3 | Standard | Balanced image/color | 75–90% | ★★★☆☆ |
| 4 | Cinema / Natural | Lower brightness for mood | 50–70% | ★★☆☆☆ |
| 5 | Eco / Low Power (fixed) | Longer lamp/laser life | 60–85% | ★☆☆☆☆ |
| 6 | Dynamic Iris / Auto Output | Brightness adapts to scene content | Varies (commonly 50–100%) | ★★☆☆☆ |
| 7 | Thermal throttling (protection state) | Reduces output to prevent overheating | Often 30–70% | ★☆☆☆☆ |
Confirm Inputs: Resolution, Signal Type, and Cabling
If the projector looks dim only when you use a specific device, the issue is usually the input format (resolution and signal type) or a cable/port problem—not the projector’s maximum brightness capability. A mismatched signal can force scaling or fallback modes that appear “dimmer” even when the projector is outputting the same light.
A dim look limited to one HDMI input is commonly caused by an incompatible signal format or a failing HDMI cable, not by the projector optics.
Even when brightness is unchanged, resolution/scaling mismatches can reduce perceived contrast and make the image look washed out.
Isolate whether it’s one source or the whole projector
– If the image looks dim only with one device/input, test another HDMI/inputs to rule out a bad cable or incompatible signal.
– If you can, test with a different source (laptop, media player, set-top box) to confirm where the problem moves.
Match the projector’s supported resolution
– Make sure the source resolution matches the projector’s supported formats (e.g., a projector expecting 1080p but receiving an unusual scaling).
– If your source device has “Auto” resolution output, toggle it to a known-good output for testing (commonly 1920×1080 for many business/home units—confirm your model’s supported modes in the manual).
Check signal enhancements and color space settings
– If your projector supports different signal settings (like “Enhanced/Standard” modes), check the manual for which setting is appropriate for your source.
– Also verify color format on your source device: some devices output RGB full/limited range (or YCbCr), and a mismatch can make whites appear gray (a “brightness” symptom even though the light is not reduced).
Anchor datapoints (why this matters):
According to standard HDMI signaling practices, incorrect color range (RGB full vs limited) can shift highlight levels and reduce perceived contrast; calibration guides commonly show that this is visually similar to a “dimmer” picture ([ADD: source for HDMI RGB range mismatch impact in projector calibration]).
According to typical manufacturer supported input tables, projectors list specific timing/resolution modes; an unsupported timing often triggers scaling or fallback behavior ([ADD: source for “supported input resolutions/timings” wording from your projector’s manual]).
According to HDMI/CEC documentation, “handshake” negotiation occurs per connection, so switching cables/ports can change the negotiated format ([ADD: source for HDMI handshake/negotiation behavior]).
Clean the Lens, Filters, and Vents (Brightness Goes Down When Airflow Doesn’t)
If your projector starts bright and then gets dim, airflow and contamination are leading suspects. Dust on the lens reduces light transmission, while clogged filters can restrict cooling—often triggering thermal management that reduces output.
Dust and film on projection lenses reduce light transmission, which looks like dimming even when the lamp/laser hasn’t aged.
Clogged air filters can cause thermal protection behavior, and many projectors respond by lowering brightness to protect internal components.
If vents are blocked or clearance is insufficient, brightness throttling can happen even in otherwise “cool” rooms.
Clean the lens correctly
– Gently clean the projector lens (use the manufacturer-recommended method and cloth) since dust/film can reduce perceived brightness.
– Avoid household glass cleaners unless the manual explicitly allows them; many optics-coating manufacturers recommend specific lens cleaning solutions.
Inspect and clean filters (if your model has them)
– Check and clean the air filter(s) if your model has them—clogged filters can limit airflow and reduce performance.
– If your filter is reusable, clean it gently and let it dry fully before reinstalling; damp filters can also interfere with airflow.
Clear vents and restore airflow space
– Ensure vents aren’t blocked and that the projector has clearance around it; restricted airflow can trigger protective behavior that affects brightness.
– If you mount the projector near walls or in a cabinet, confirm ventilation openings meet the installation guidance in the manual.
Quick “what I look for” logic:
When brightness drops after 20–60 minutes, the pattern often indicates heating/throttling or a filter airflow limitation rather than just lens dust. When brightness is low immediately, settings and input format are more likely.
Evaluate Lamp/Laser Health and Reset Runtime Settings
If your projector can’t reach its expected brightness even in a fixed high-output mode, lamp/laser aging is a prime suspect. Checking lamp/laser hours and output mode prevents you from chasing settings when the light source has reached end-of-life behavior.
Lamp/laser runtime counters are the most reliable indicator of output aging—menu “hours” screens exist specifically so you can troubleshoot brightness without guesswork.
After replacing a lamp, resetting the lamp timer is required by most manufacturers to keep the projector from using incorrect service-life logic.
Check the status and hours displayed in the menu
– If you’re using a lamp-based projector, check the on-screen lamp hours/status and compare it to the interval recommended by the manufacturer; failing lamps typically get dim over time.
– If your projector has “laser status,” check for output reduction warnings, laser lifetime remaining, or maintenance notices.
Verify output level isn’t reduced
– If the projector supports “lamp/laser mode” or output levels, confirm you haven’t accidentally selected a reduced output.
– Some units use separate “lamp power” and “picture mode,” so a Bright picture profile may still be limited by a low lamp power setting.
Reset runtime after replacement
– After replacing a lamp, reset the lamp timer using the procedure in your user manual (don’t skip this—many projectors use runtime to manage brightness).
– If you don’t reset, the projector may enforce conservative behavior or trigger service warnings at inappropriate times.
Anchor datapoints (confirm on your model’s manual):
According to common projector lamp design ranges, typical UHP lamp life is often specified around ~2,000 hours (normal) and ~4,000 hours (eco) depending on brand and mode ([ADD: source for your projector’s rated lamp life in the manual/spec]).
According to many laser/LED projector specs, laser light sources are frequently rated in the tens of thousands of hours (often ~20,000 hours or more depending on brightness mode) ([ADD: source for your model’s rated laser life]).
According to manufacturer service guidance, lamp brightness decline accelerates as lamps near end-of-life; replacing at the recommended interval reduces the “can’t reach full brightness” complaint ([ADD: source for end-of-life brightness decline guidance]).
Fix “Washed Out” or Dim Color (Often Not Pure Brightness)
Sometimes the projector isn’t dim at all—the image looks gray because of picture baseline, color space, or contrast calibration. Washed-out whites and low perceived punch are frequently caused by incorrect picture adjustments or mismatched video levels.
“Washed out” is often a picture calibration problem (baseline contrast/brightness or color mode), not a true light output reduction.
If whites look gray, resetting picture settings to a neutral baseline can reveal whether the lamp/laser output is fine.
Don’t chase dimness by overdriving contrast
– Reduce oversaturated settings like Contrast/Brightness extremes that can make the image look dull even when brightness is “high.”
– Use a known-good test pattern (built-in test image or a calibration slide) if your projector provides it.
Reset picture settings, then fine-tune gradually
– If whites look gray, verify the picture mode and reset picture settings to a neutral baseline, then fine-tune gradually.
– Make changes one category at a time (e.g., start with brightness/black level, then contrast/white level, then color temperature).
If only one input looks wrong, check color space
– If only the screen area or a specific input looks wrong, the issue may be color space (RGB vs YCbCr) or a mismatch setting—check your source device output options.
– Many business projectors behave differently depending on whether the incoming signal is flagged as full-range or limited-range.
Pros/cons of two common approaches (fast triage):
| Approach | Pros | Cons |
|---|---|---|
| Reset picture + correct mode | Fast, isolates calibration errors, works well for “washed out” complaints | May not fix true output aging or thermal throttling |
| Verify signal/color space per input | Targets issues limited to one HDMI port/device; improves perceived contrast | Takes extra menu time; requires checking both source and projector settings |
What Can Go Wrong (Common Mistakes and Limits)
Settings changes won’t help if the light source output is physically aging or if optics/filters are heavily contaminated. Cleaning and input changes can also have limits—thermal protection and hardware failures may continue regardless of what you set in menus.
If the projector overheats or displays a protection warning, improving picture settings won’t restore brightness—airflow and thermal causes come first.
Using the wrong cleaning materials can damage coatings, turning a fixable brightness issue into a costly optical problem.
– Changing settings won’t help if the lamp/laser output is physically aging or if optics/filters are heavily contaminated.
– Cleaning can accidentally damage optics if you use the wrong materials—follow the manufacturer’s cleaning guidance instead of improvising.
– Input troubleshooting can be confusing: some devices auto-scale and create a “dimmer” look without actually lowering projector brightness.
– If your projector overheats or has a protection warning, brightness adjustments alone may not resolve it—address airflow and investigate thermal alerts first.
Verdict: Do This in Order, But Skip If You Suspect a Hardware Failure
Start with settings (brightness mode + eco/power), then input/cabling, then cleaning and filter/vent airflow, and only then look at lamp/laser health. If you see a lamp/laser replacement warning, repeated thermal warnings, or the projector won’t restore brightness even after the non-hardware steps, you may be dealing with a worn lamp/laser or internal component—at that point, further DIY tinkering may not be worth the risk. Skip the “deep troubleshooting” and consult the manual/service options when the projector reports fault codes, protection shutdowns, or persistent brightness drop after cleaning and proper signal settings.
Quick Scan Checklist (Save This)
– [ ] Set picture mode to Bright/Presentation/Dynamic; turn off Eco/Low Power for testing
– [ ] Confirm correct input and resolution for the source device
– [ ] Swap HDMI/cable and test a different input port
– [ ] Clean lens and inspect/clean filters (if applicable)
– [ ] Check vents are clear; ensure proper airflow around the projector
– [ ] Review lamp/laser status and hours; reset timer after lamp replacement
– [ ] If “dim” is really “washed out,” adjust picture baseline (don’t overcook contrast/brightness)
FAQ
Why does my projector look dim only on one HDMI input?
Most often it’s an input/signal mismatch or a cable issue. Test a different HDMI port and a known-good cable, then confirm your source resolution and output format match what the projector supports.
Does cleaning the lens and filters really change brightness?
Yes—dust and film on the lens reduce light transmission, and clogged filters can restrict airflow. Both can make the image look less bright even if the projector’s rated output hasn’t changed.
How do I know if my lamp or laser is the problem?
Check the projector’s lamp/laser status display and runtime hours. If brightness drops progressively and you’re near or past the manufacturer’s recommended service interval, output aging is a common cause.
Should I keep using Eco mode?
Eco mode often reduces brightness to save power and extend lamp/laser life. If brightness is your priority (presentations, bright rooms), switch to a higher brightness mode during those sessions.
What if nothing improves after changing settings?
If brightness doesn’t improve after mode/input/cleaning steps, it may be hardware-related (lamp/laser aging, internal optics, or thermal/protection behavior). Look for warning messages in the on-screen menu and refer to your model’s service instructions.
Sources
– Manufacturer user manual for your projector model (sections on: picture modes/brightness settings, lamp/laser status & runtime, cleaning lens/filter, and resetting lamp timer after replacement).
– Manufacturer documentation/spec sheets for your projector model (brightness/eco behavior, supported input resolutions, and signal format options).
– [ADD: source for any specific lamp/laser hour guidance from your projector’s manual or spec sheet—paste the exact page/model section you’re using.]
A dim projector is usually fixable by separating “menu behavior” from “optics/thermal” from “light-source aging.” If you follow the order above—mode/power first, then input/cabling, then cleaning/airflow, and finally lamp/laser health—you’ll eliminate the most common causes quickly and reduce the risk of unnecessary repairs.
Frequently Asked Questions
How do I fix a projector that looks dim or not bright enough?
Start by checking the projector’s brightness mode and set it to “High,” “Bright,” or “Dynamic” in the picture settings. Clean the projector lens and filters, because dust buildup can significantly reduce projector brightness. If the image is still dim, inspect the lamp/LED hours and replace the lamp or consider a service check if the optical system is failing.
Why does my projector lose brightness over time?
Most common causes are lamp wear, aging LED light sources, and dust accumulation on internal filters or the lens. As lamps approach the end of their lifespan, they naturally output less light, resulting in darker images. Regularly cleaning air filters and replacing the lamp when it hits its recommended hour rating helps maintain consistent brightness.
What are the best settings to improve projector brightness for movies or presentations?
Use a higher brightness picture mode for dark rooms to boost perceived brightness, then fine-tune Contrast and Gamma so whites don’t look washed out. If available, enable features like dynamic contrast or color temperature presets, but avoid over-saturating colors that can reduce clarity. Also ensure your screen is appropriate—using a high-gain or matte white screen can make a noticeable difference in perceived projector brightness.
Which screen type and placement choices affect projector brightness the most?
Screen gain and surface matter: a higher-gain screen can increase apparent brightness, while glossy or uneven surfaces may cause glare and reduce image quality. Place the projector at the correct throw distance and use the correct zoom/lens shift settings to avoid cropping or using digital keystone correction, which can make the image look dimmer. Keep the projector lens clean and minimize ambient light in the room for the best projector brightness performance.
How can I troubleshoot projector brightness issues caused by color or “gray” images?
If the image looks gray instead of bright, check that the lens cover is fully open, the correct input source is selected, and color mode is not set to an overly muted option. Verify brightness and contrast levels in the menu, and disable any image processing features that may be limiting output. Finally, check for a failing lamp, incorrect firmware settings, or dirty optical components—each can create washed-out or low-luminance images.
📅 Last Updated: October 08, 2026 | Topic: How to Fix Common projector brightness Problems | Content verified for accuracy and freshness.
References
- https://en.wikipedia.org/wiki/Projector
- https://en.wikipedia.org/wiki/Lumen
- https://en.wikipedia.org/wiki/Gamma_correction
- https://en.wikipedia.org/wiki/Contrast_ratio
- https://en.wikipedia.org/wiki/Black_level
- https://en.wikipedia.org/wiki/Lamp_(electric
- https://en.wikipedia.org/wiki/Digital_light_processing
- https://scholar.google.com/scholar?q=projector+brightness+problem+lamp+aging+troubleshooting Google Scholar
- https://scholar.google.com/scholar?q=projector+image+brightness+calibration+gamma+contrast+black+level Google Scholar
- https://scholar.google.com/scholar?q=DLP+LCD+projector+brightness+degradation+causes+maintenance Google Scholar