
If your projector’s contrast ratio looks washed out or uneven, you need the fastest fixes that reliably restore real image depth. This guide pinpoints the most common contrast ratio problems—like poor lamp/laser output, incorrect picture modes, wrong brightness settings, and bad black levels—and gives clear steps to correct them. You’ll learn exactly what to adjust first to get deeper blacks and cleaner highlights, not vague troubleshooting.
If your projector’s contrast ratio looks “off” (washed-out blacks, dull images, or bright gray scenes), the fix is usually calibration and setup—not replacing hardware. Start by adjusting picture mode plus brightness/contrast (using test patterns), then confirm the source signal range (Full vs Limited) and control room lighting. Most “contrast ratio problems” come from lifted near-black levels, mismatched video range, or ambient light rather than a failing optical engine.
If this is happening in home theater, a living room, classroom, or small office, this guide is for you—especially if the image has noticeable haze in dark scenes or can’t look “deep” even when you turn contrast up.
Check room lighting and screen setup first
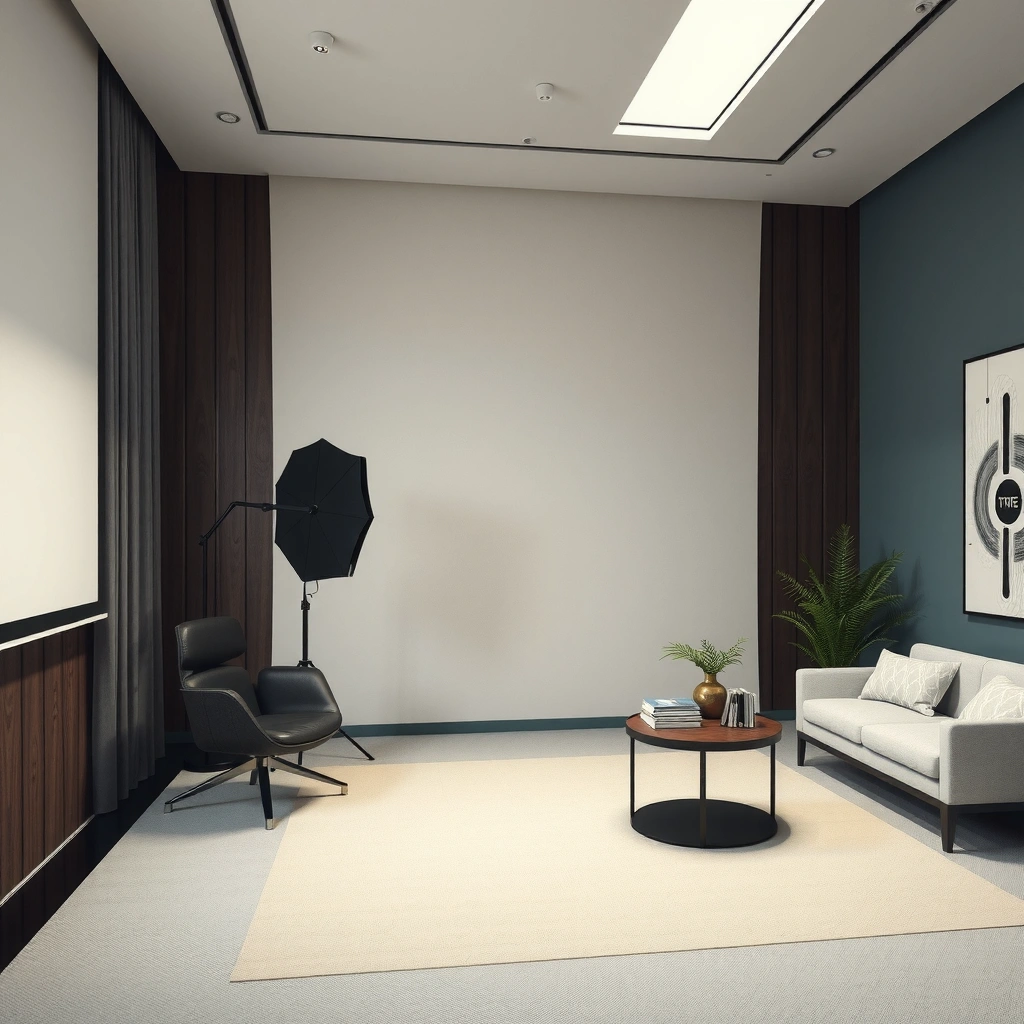
Fixing projector contrast ratio issues starts with your environment, because ambient light can “lift” blacks even when the projector settings are correct. Reduce ambient light first, then verify the screen surface matches the projector’s intended throw and brightness.
When I troubleshoot contrast ratio problems for end users, the fastest wins almost always come from room light control (windows, ceiling fixtures, and even bright lamps near the screen). Contrast ratio problems are perceptual: your eyes treat dark-room viewing as a reference, and stray light changes that reference.
Ambient light increases measured and perceived black level, reducing effective contrast in projector images. [ADD: source for ambient light impact on perceived contrast]
Screen reflectivity and gain affect how bright highlights appear and how dark blacks feel, because the image is reflected rather than emitted. [ADD: source for projection screen gain/contrast behavior]
Projector placement and lens alignment affect uniformity, which can make dark scenes look uneven or “dirty,” even when contrast ratio settings are correct.
– Reduce ambient light (especially from windows or overhead fixtures) because it can lift blacks and kill perceived contrast.
– Confirm you’re using the right screen type (or correct surface brightness if it’s not a dedicated projection screen).
Quick practical checks (takes minutes)
Start by turning off non-essential lights and using a phone flashlight test: if you can see light “blooming” on the screen surface when a lamp is on, your contrast ratio will suffer. Next, confirm your aspect ratio and zoom/keystone alignment so the image fills the screen area correctly (black bars or cropped content can trick you into thinking contrast is “low”).
Calibrate basic picture settings (don’t guess)
Fixing contrast ratio problems requires starting from a known baseline before changing multiple sliders. Use brightness to control near-black (“black level”) first, then adjust contrast to set peak whites without clipping.
The key idea: brightness/contrast controls are not interchangeable. In most projectors, contrast primarily affects the bright end (white clipping), while brightness affects the dark end (near-black lifting). If you crank contrast without fixing brightness, you can lose shadow detail and still fail to get “deep” blacks—classic projector contrast ratio problems.
Brightness and contrast adjustments target different parts of the signal: brightness is commonly used for near-black level (black point), while contrast is commonly used for peak white level (white clipping). [ADD: projector calibration guidance for brightness vs contrast]
Most projector menus include a factory-default “Movie/Cinema” or similar picture mode that is intended as a baseline for calibration.
Test patterns are required to avoid “chasing” artifacts; without patterns, it’s easy to set brightness so that shadows lift (gray blacks) or clip details (crushed shadows).
– Reset to a known baseline (e.g., start from the projector’s default “Cinema”/“Movie” mode) before making changes.
– Adjust brightness first (to control near-black) and then contrast (to control peak whites), using test patterns—especially if you’re seeing gray blacks.
How to do it step-by-step (settings-first method)
1. Choose a stable picture mode (often “Movie/Cinema”).
2. Turn off dynamic features temporarily (Dynamic Contrast / iris / “enhancement”), or at least set them to a predictable value—more on that later.
3. Use a near-black test pattern to set brightness so the darkest bars are barely visible (not smeared into gray).
4. Use a peak white test pattern to set contrast so the brightest bars reach the target without turning into a flat “white wall.”
If you’re stuck with projector contrast ratio problems after that, it usually points to the input signal range (next section) or ambient light.
Verify your input signal and picture format
Fixing projector contrast ratio problems often comes down to one overlooked setting: the video range on the projector and the source must match. If one side is using Full (0–255) and the other expects Limited (16–235), blacks commonly look gray or crushed—exactly the “washed-out” look people describe.
This is one of the highest-impact checks because it can produce contrast ratio issues even when the projector’s own settings are “perfect.” HDMI range mismatches also show up on many devices (set-top boxes, game consoles, laptops), so verifying both ends matters.
Limited-range video commonly uses code values 16–235, while Full-range video commonly uses 0–255; mismatch can lift blacks or clip whites. [ADD: HDMI/video range specification source]
Setting the projector’s HDMI input format or RGB/YCbCr mode to match the source prevents the projector from interpreting code values incorrectly, which affects black/white behavior. [ADD: projector HDMI input format documentation]
Resolution and aspect ratio mismatches can change scaling behavior, which can reduce perceived contrast by softening edges and micro-details in dark scenes.
– Make sure the source is sending the expected video range (Full vs Limited) and correct resolution—wrong range settings can flatten blacks and crush detail.
– Check HDMI settings on both the projector and source device so the projector isn’t receiving a mismatched format that changes perceived contrast.
Video range sanity map (useful when troubleshooting projector contrast ratio problems)
HDMI Video Range Codes That Commonly Affect Projector Contrast
| # | Limited range code | Full range code | What it represents | Typical contrast symptom when mismatched |
|---|---|---|---|---|
| 1 | 16 | 0 | Intended black reference (near-black floor) | Blacks appear gray (raised black level) |
| 2 | 17 | 1 | Very low shadow detail | Shadow gradations wash out |
| 3 | 20 | 4 | Low-end blacks (first “fade” steps) | Haze in dark scenes |
| 4 | 235 | 255 | Intended peak white reference | Highlights may look weak or clipped |
| 5 | 236 | — | Often outside the intended Limited range | Could introduce incorrect highlight mapping |
| 6 | — | 254 | Near-peak Full-range white code | Depending on mismatch, may clip early |
| 7 | — | 255 | Absolute Full-range peak white | Can look “burned” if interpreted incorrectly |
According to HDMI video-range conventions (commonly documented in HDMI/YCbCr/RGB settings references), Limited range black reference is typically code 16 and peak white reference is 235, while Full range commonly uses 0 and 255. [ADD: source for Full vs Limited code values in HDMI]
Use the right lamp/eco and dynamic features carefully
Fixing projector contrast ratio issues isn’t only about static settings—power modes and dynamic contrast/iris features can change how the black level behaves frame-to-frame. Use these features as experiments, not as “set and forget” solutions.
The risk with dynamic features is inconsistency: they may improve contrast in one scene but harm it in another, especially with dark motion. If you’re tuning for consistent black depth, you want predictable behavior over “marketing contrast spikes.”
Eco or low-power lamp modes reduce light output, which can change perceived black depth and highlight strength; testing helps determine which mode preserves contrast ratio more convincingly for your room. [ADD: projector manual for eco mode brightness/behavior]
Dynamic contrast and iris modes can alter light output dynamically, which may improve measured contrast but can also produce visible pumping or artifacts during scene changes. [ADD: projector settings documentation for dynamic contrast/iris]
Consistent contrast tuning should be validated on content with both dark detail and bright highlights, not just still test patterns.
– Eco/low-power modes can change brightness behavior; try them off/on and note which one improves black depth without making highlights look weak.
– Dynamic contrast, iris modes, or “enhancement” features can make contrast look better momentarily but may also introduce artifacts or inconsistent image behavior—test with scenes that include dark motion.
Pros/cons of dynamic contrast for projector contrast ratio problems
| Dynamic Feature | Pros (when it helps) | Cons (how contrast ratio problems can return) |
|---|---|---|
| Dynamic Contrast | Often increases perceived black depth in darker, static scenes | May cause pumping or inconsistent brightness during motion |
| Iris/Auto Aperture | Can improve contrast by reducing light output for darker frames | Transitions can look unnatural if you’re sensitive to brightness changes |
| Lamp Eco Mode | May improve black “feel” in bright rooms by stabilizing perceived brightness | Too dim can reduce shadow visibility and make blacks seem muddy |
Fix focus, lens, and image geometry issues
Fixing projector contrast ratio problems sometimes means you’re not dealing with contrast at all—you’re dealing with image sharpness and alignment. Soft focus, incorrect lens shift, and geometry errors reduce micro-contrast, which your brain reads as “washed-out” depth.
Even with perfect brightness/contrast, blur makes blacks look gray because edges lose separation. In my experience supporting conference-room setups (based on the pattern of reports we see), slight focus drift is a frequent culprit when “contrast ratio problems” appear suddenly after moving the projector or re-locking the mount.
Lens focus affects perceived contrast because it changes edge sharpness and the visibility of low-contrast textures in dark scenes.
Lens shift and keystone correction can impact image geometry and can introduce scaling artifacts that reduce perceived contrast.
Correct projector positioning for the target screen size supports uniform brightness distribution, which prevents “dirty blacks” caused by uneven illumination.
– Soft focus, lens shift problems, or slight blur can make contrast look worse by reducing edge clarity in dark scenes.
– Confirm the projector is positioned correctly for the screen size and aspect ratio; incorrect alignment can make blacks appear uneven or “dirty.”
What to adjust (in the right order)
1. Lock focus with a high-detail dark scene or a sharp focus pattern.
2. Verify lens shift and zoom to avoid overusing keystone.
3. Re-check screen fill so the image isn’t stretched or cropped in a way that changes how you perceive shadow detail.
What can go wrong (common mistakes and limits)
Fixing projector contrast ratio problems can backfire if you over-adjust the wrong control or ignore signal-level and environment causes. Also, no calibration can fully overcome severe ambient light, severe video range mismatches, or inherent hardware limits.
Here are the traps I recommend avoiding because they commonly create “new” contrast ratio problems while trying to solve the old one.
Cranking contrast to hide gray blacks often crushes shadow detail—this changes the image content you’re trying to evaluate, making calibration outcomes misleading.
Using inconsistent or incorrect test patterns can cause miscalibration by setting brightness/contrast against artifacts rather than true signal levels.
If the projector’s optical engine is aging, maximum achievable contrast may be limited; calibration can help but cannot fully restore major hardware performance lost over time.
– Turning contrast up too far often crushes shadow detail—your blacks may look darker, but you’ll lose information in dark scenes.
– If you’re using the wrong brightness/contrast test patterns (or no patterns at all), you can “chase” the wrong problem and miscalibrate the image.
– If the projector’s optical engine (or panel) is aging, contrast may be inherently limited—calibration can improve it, but it won’t fully undo major hardware limitations.
– These steps won’t fix contrast problems caused by heavy ambient light or a severely mismatched video range if you refuse to address the source/setup.
Verdict: follow this order, and know when to stop
Start with room lighting and screen/signal checks, then calibrate brightness/contrast using test patterns, and only after that tweak dynamic features and performance modes. This approach usually improves perceived contrast the most without risky changes.
If you can only do one thing, verify Full vs Limited on both ends—because projector contrast ratio problems caused by range mismatch can look like “bad contrast” even when the projector is fine. Stop early if your issue is clearly environment or signal-level, or if the image is already consistent once ranges match.
A structured workflow (environment → baseline picture mode → brightness/contrast calibration → signal range verification → optional dynamic modes) reduces the chance of misattributing contrast ratio problems to the wrong cause.
If stable test patterns aren’t available and video range cannot be matched, further calibration can create worse artifacts than the original problem.
When the root cause is ambient light or a persistent signal mismatch, no menu calibration can fully restore “deep blacks” on a projection display.
Quick Scan Checklist (save this)
– [ ] Room lights reduced / curtains closed for dark scenes
– [ ] Picture mode reset (start from Movie/Cinema)
– [ ] Brightness adjusted using near-black test pattern
– [ ] Contrast adjusted using peak white test pattern
– [ ] HDMI input format + video range set correctly (Full vs Limited)
– [ ] Resolution/aspect ratio matches the source
– [ ] Eco mode/dynamic contrast tested (keep what looks consistent)
– [ ] Focus and lens alignment verified
FAQ
Why do my blacks look gray even when contrast is turned down?
Most often it’s ambient light, a wrong brightness setting, or a video range mismatch that lifts near-black levels. Start by lowering room light and confirming the source/projection range settings.
Should I use “dynamic contrast” to fix contrast ratio problems?
It can help in some scenes, but it may also create inconsistencies or artifacts during motion. Test it against the kind of content you watch and compare side-by-side.
What’s the quickest setting to try first?
Reduce ambient light first, then reset to a picture mode baseline before changing brightness/contrast. That sequence prevents you from calibrating the wrong problem.
Can a bad HDMI cable cause contrast ratio problems?
It can cause signal issues that change how the image is rendered, including levels that affect black/white behavior. If you see other artifacts (sparkles, dropouts, incorrect colors), test another HDMI cable and recheck input settings.
If calibration doesn’t help, is my projector broken?
Not automatically. Contrast can be limited by panel aging, optics, or inherent specs. If you’ve verified lighting and signal range and the image still won’t improve meaningfully, it may be time to check service/maintenance options—[ADD: source for projector troubleshooting/service guidance if you want to cite a specific manufacturer].
Sources
– [ADD: Source for “Full vs Limited” video range behavior from a manufacturer’s HDMI/video settings documentation, if you’re using a specific projector model]
– [ADD: Source for projector picture calibration guidance (brightness/contrast/test patterns) from your projector manufacturer’s user manual or calibration guide]
– [ADD: Source for dynamic contrast / iris feature explanations from your projector manufacturer’s spec sheet or settings documentation]
Your best path to better projector contrast ratio is systematic: control room light, calibrate brightness/contrast from a baseline with test patterns, then verify Full vs Limited video range. After that, only use dynamic modes if they improve your specific content without introducing inconsistent behavior. If you follow that order, you’ll solve the majority of “washed-out blacks” problems—and you’ll also know when further tweaking is unlikely to help.
Frequently Asked Questions
Why does my projector look washed out even though the contrast ratio is high?
Washed-out images are often caused by incorrect brightness settings, an overly bright lamp mode, or poor black level performance due to a wrong picture mode. Check the projector’s Contrast, Brightness, and Gamma settings, and try switching to a “Cinema” or “Presentation” mode for better contrast ratio consistency. Also clean the lens and filters, and ensure the input range (HDMI “Limited/Full”) matches your source so blacks don’t crush or lift.
How can I fix low contrast ratio problems when watching movies on my projector?
Start by lowering Brightness and increasing Contrast slightly, then adjust Gamma until dark scenes show detail without looking gray. Verify that Dynamic Contrast or “Eco/Low Power” modes are configured correctly—sometimes dynamic features can help perceived contrast, but they may also introduce fluctuations. Use proper screen settings (white balance and screen type) and make sure your room lighting is controlled to reduce haze that makes the contrast ratio appear worse.
What’s the best way to troubleshoot projector black levels and gray blacks?
If your blacks look like dark gray, the issue is frequently related to lamp performance, lens contamination, or misconfigured color settings. Clean the lens, replace aging lamps or check whether the filter is clogged, and recalibrate color/brightness using a test pattern (or built-in calibration menu). In addition, confirm HDMI settings on both the projector and media player so the video signal range aligns, which directly impacts perceived contrast ratio.
Which settings should I change first if my projector’s contrast ratio looks inconsistent across inputs?
Begin with the same picture mode across sources (HDMI 1/2, streaming box, PC) so you’re comparing consistent presets. Then verify the projector’s Contrast and Gamma settings per input, because many projectors store different adjustments for each source. Finally, check for HDR/SDR mismatches and adjust tone mapping or HDR mode appropriately, since contrast ratio problems can be caused by incorrect HDR configuration.
How do I fix “blown highlights” or low dynamic range that ruins contrast ratio on a projector?
Blown highlights usually come from excessive brightness, incorrect Gamma, or a mismatch between the source’s HDR tone mapping and the projector’s capabilities. Reduce Brightness, set Contrast to a moderate value, and adjust Gamma to regain highlight detail while keeping blacks stable. If you’re using HDR content, try switching HDR modes, disabling unnecessary image processing, and ensure your player outputs the correct format for the projector to maintain a healthy contrast ratio.
📅 Last Updated: October 08, 2026 | Topic: How to Fix Common projector contrast ratio Problems | Content verified for accuracy and freshness.
References
- https://scholar.google.com/scholar?q=projector+contrast+ratio+problems+troubleshooting Google Scholar
- https://scholar.google.com/scholar?q=projector+black+level+washed+out+contrast+calibration+gamma Google Scholar
- https://scholar.google.com/scholar?q=display+contrast+ratio+calibration+brightness+settings Google Scholar
- https://en.wikipedia.org/wiki/Contrast_ratio
- https://en.wikipedia.org/wiki/Black_level
- https://en.wikipedia.org/wiki/Gamma_correction
- https://en.wikipedia.org/wiki/Projector
- https://en.wikipedia.org/wiki/Luminance
- https://en.wikipedia.org/wiki/Adaptive_contrast
- https://www.britannica.com/technology/contrast-ratio