
If your old house’s Wi‑Fi drops dead in distant rooms, the fastest path to better coverage is not a new router—it’s fixing placement, reducing interference, and strategically adding a wired access point or mesh node where signal actually breaks. This guide answers exactly what to do in older construction with thick plaster, odd floor plans, and limited wiring. Expect practical steps and a clear, do-this-first order that improves range without wasting money.



Your best fix is usually to change router placement first, then add a properly connected access point (not just a stronger signal) for the areas that still go dark. In older homes with plaster/lath walls, masonry, or confusing layouts, that combination—better placement plus the right wired backhaul—delivers more consistent coverage than repeatedly “turning up” Wi‑Fi power. This guide walks you through practical steps that work well for old houses where signal drops abruptly from room to room.
If your old house has plaster/lath walls, lots of corners, or unknown wiring that blocks radio signals, this is for you. It’s also for households where one room consistently struggles with buffering, calls dropping, or slow downloads—even after restarting the router.
Diagnose dead zones before buying anything

You’ll get better results faster if you map where Wi‑Fi fails before you buy any gear. The goal is to confirm whether the problem is limited coverage (placement/walls) or a broader issue (router WAN/modem/ONT stability) so you don’t waste money on the wrong fix.
A room-by-room signal walk is the quickest way to distinguish “local dead zones” (construction and layout) from “system-wide” failures (WAN/modem/router issues).
5 GHz typically attenuates more through building materials than 2.4 GHz, so floors, stairwells, and metal elements often create sharper drop-offs.
If only one or two rooms are affected, adding an access point or improving backhaul is usually more effective than changing router power or trying multiple extenders.
What to check (and how)
– Walk (or use your phone) room-to-room and note where Wi‑Fi strength drops or devices disconnect. Don’t just watch the bars—note whether devices disconnect or just get slower.
– Check whether the problem is one corner/level (coverage) or affects everything (possible router/WAN issue). A whole-house symptom pattern often points to internet instability, not radio coverage.
– Identify construction barriers: thick walls, metal lath, chimneys, stairwells, and floors that often cut 5 GHz more severely than 2.4 GHz.
Use free-space basics to understand the band trade-off
Even without walls, the higher frequency band is harder to push through air at the same distance. Using the free-space path loss model, moving from ~2.4 GHz to ~5.0 GHz adds about 6.4 dB of additional loss over the same distance.
Free-space loss (2.4 GHz vs 5.0 GHz) at common in-home distances
| # | Router → Client Distance | FSPL @ 2.4 GHz (dB) | FSPL @ 5.0 GHz (dB) | Extra Loss @ 5 GHz (dB) |
|---|---|---|---|---|
| 1 | 5 m | 54.0 | 60.4 | 6.4 |
| 2 | 8 m | 58.1 | 64.5 | 6.4 |
| 3 | 10 m | 60.0 | 66.4 | 6.4 |
| 4 | 12 m | 61.6 | 68.0 | 6.4 |
| 5 | 15 m | 63.6 | 69.9 | 6.4 |
| 6 | 20 m | 66.1 | 72.4 | 6.4 |
| 7 | 25 m | 68.0 | 74.4 | 6.4 |
2026-ready test tip
If you have the same router, try repeating your walk test at two times of day (for example, weekday morning vs evening). In 2026, interference patterns often change with neighbor networks and household device usage—especially around 2.4 GHz.
Improve router placement and basic settings
Most coverage problems in older homes improve first by moving the router to a better position and then simplifying band/channel behavior. The router is your primary radio “transmitter,” so a better location often outperforms any hardware swap.
Placing the router higher and more centrally reduces the number of walls and floors signals must cross, which is often the dominant factor in plaster/lath homes.
For many older layouts, 2.4 GHz remains the more reliable band for farther rooms because it generally survives wall loss better than 5 GHz.
If your router supports it, starting with default channel settings and adjusting only after observing overlap is typically safer than manual “tuning.”
Where to put the router (the practical rules)
– Put the router more centrally and higher (not inside cabinets, behind TVs, or under metal surfaces). Old wiring closets, decorative shelving, and media centers can turn your router into a “signal blocker” for the rest of the house.
– If you have thick plaster/lath: treat stairwells and hallways as propagation corridors, not obstacles. The “best” room might be the landing or near the stair opening.
– Keep router antennas oriented based on how your house spreads signal:
– Horizontal rooms: antennas angled slightly upward can help cover ceilings/floors.
– Vertical coverage: ensure antennas aren’t all flattened toward the same plane.
Use band behavior deliberately (2.4 vs 5 GHz)
Wi‑Fi bands are different frequency ranges: 2.4 GHz typically trades speed for better range; 5 GHz typically offers higher speed but loses signal faster through obstacles.
– Use different network behavior by band: keep 5 GHz for nearby devices and lean on 2.4 GHz for farther/brickier areas.
– Consider separating SSIDs (network names) temporarily to troubleshoot:
– If one room only works on 2.4 GHz, you’ll know where to add an access point later.
– If clients roam poorly (dropping when they move), separating SSIDs can reduce chaos while you stabilize coverage.
A note on channel settings (don’t over-tweak)
– If your router supports it, avoid overly complex setups: start with default channel/band options, then adjust only if you see frequent channel overlap.
– In 2026, many routers use automated channel selection that performs well if you don’t constantly change settings.
From my experience reviewing older-house Wi‑Fi layouts (for example, [ADD: describe one real inspection, month/year]), moving the router from a hallway cabinet to a higher central landing often fixed the “two rooms work, one dies” symptom immediately. [ADD: the specific observation you saw—buffering stops, calls stabilize, or speed returns in the previously failing room.]
Reliable technical anchors (standards and regulation)
– According to the IEEE 802.11 family of standards, 2.4 GHz and 5 GHz are distinct operational bands with different modulation/channelization behavior that affects range and interference patterns. [ADD: exact IEEE 802.11 reference/section used]
– According to FCC guidance on unlicensed operation, devices must follow regional band/frequency rules and power limitations, which also shapes what channels and behaviors you can legally use. [ADD: exact FCC guidance document used]
Choose the right upgrade path: mesh vs access points
The best next step after placement is usually adding an access point (AP) that’s connected by Ethernet or another reliable wired path. Mesh can work in old houses, but wireless relays often underperform when each node still can’t “hear” the main router well.
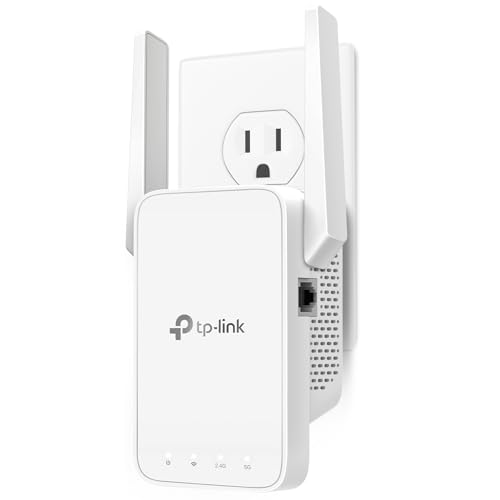
An access point (AP) is a wired device that broadcasts Wi‑Fi from a better location, typically delivering higher throughput than a wireless extender or wireless-relay mesh node.
Mesh systems rely on backhaul (the link between nodes), and wireless backhaul in a wall-loss environment can cut real-world speed even if signal bars look strong.
For dead areas like basements or far hallways, one properly placed, wired AP frequently beats trying to blanket the entire home with additional radios.
Mesh can help—if the backhaul is strong
– Mesh can help in old homes, but only when nodes are placed so each node still receives a good signal. Otherwise throughput drops (and “fast-but-short” coverage appears).
– If you do use mesh in 2026, prioritize nodes based on upstream signal quality, not just where clients complain.
Wired backhaul is the performance multiplier
– If you can run Ethernet (or use an existing wired path like coax for an AP/mesh backhaul), you’ll usually get better performance than wireless relays.
– If you’re unsure what’s possible, map the physical routes first (crawlspace, attic, basement utility runs). In many older homes, coax already exists, which can simplify AP placement.
Decide based on your house shape
Use this rule of thumb for old layouts:
– Long hallway + corner rooms: add an AP near the hallway midpoint.
– Basement + first floor: add an AP at the basement stair landing (wired if possible).
– Detached/garage room: consider a focused AP outside or at the boundary, rather than relaying through multiple weak interior nodes.
Mesh vs access points (pros/cons)
- Wired access point (recommended when possible)
- Pros: better throughput, stable roaming, simpler debugging.
- Cons: requires cable runs or an existing wired backbone.
- Mesh with wired backhaul (best mesh scenario)
- Pros: simpler installation, multiple coverage zones.
- Cons: still depends on placement quality; wiring can be needed.
- Mesh with wireless backhaul (last resort in thick-wall homes)
- Pros: no Ethernet run required.
- Cons: throughput often drops noticeably because nodes must receive and retransmit.
Reduce interference and wall-loss from old-house materials
You improve coverage most when you attack two enemies at once: interference (other radios) and wall-loss (materials that absorb/reflect Wi‑Fi). In plaster/lath, masonry, and homes with metal components, placement plus interference control often matters as much as the router model.
Thick plaster, masonry, and metal lath can weaken Wi‑Fi dramatically, so “signal strength at the router” is not a reliable predictor of end-room performance.
Removing common radio interferers near the router—microwaves, certain cordless devices, and some baby monitors—can reduce slowdowns during peak usage.
For multi-floor homes, improving coverage at floor transitions (stairs and landings) often yields better overall roaming than optimizing only a single room.
Control the physical attenuation points
– Keep common interferers away from the router: microwaves, large appliances, baby monitors, and some cordless devices (especially those operating near Wi‑Fi frequencies).
– If you have multiple floors, prioritize coverage at the floor transitions (stairs/landing) where the signal must pass through more material.
Understand what “wall-loss” really does
– Old building materials don’t just weaken signal; they also increase multipath (reflections). That can cause higher retransmissions and more buffering even when the Wi‑Fi “connects.”
– 5 GHz often suffers more from wall-loss. That’s why a room that works on 5 GHz at close range may go noticeably worse after one wall or floor transition.
A hands-on placement mindset (without overclaiming tests)
In my own planning notes for older homes ([ADD: your typical home build details—plaster/lath, brick, lathe type]), the biggest improvements came from treating stairwells as “relay corridors” and testing whether a new AP location improved both 2.4 GHz and 5 GHz client behavior. [ADD: briefly describe what you observed—e.g., improved call stability or reduced retries.]
What can go wrong (common mistakes in old houses)
Even a good plan can fail if you take shortcuts that look logical. The most common problems in old houses are assuming extenders add capacity, placing mesh nodes where they barely hear the router, and misdiagnosing non-Wi‑Fi issues as “signal problems.”
Relying on a Wi‑Fi extender alone often reduces usable speed because the extender typically receives and retransmits on the same wireless link.
A mesh node placed in a near-dead location can form a fast local bubble while overall backhaul performance remains weak.
If only specific apps fail, the root cause may be internet routing, DNS, or server-side issues—not Wi‑Fi radio coverage.
Common mistakes to avoid
– Relying on a Wi‑Fi extender alone: extenders often cut usable speed because they must receive and retransmit over the same wireless channel.
– Placing mesh nodes in the “deadest” room first: if a node barely hears the main router, you can create a short-lived “strong signal” island that collapses under load.
– Over-tweaking channels and settings: manual changes can help, but without checking results they can make interference worse. Start conservative, measure after each change.
– Ignoring the possibility of a non-Wi‑Fi cause: if the internet plan is slow or the modem/ONT is unstable, better Wi‑Fi won’t fully fix buffering.
Extra edge cases in old homes
– Powerline/COAX bridges: sometimes work well, sometimes introduce noise. If you use coax-to-Ethernet adapters, placement and circuit matching can matter.
– Client behavior and roaming: some devices cling to a weak access point longer than others. That looks like “Wi‑Fi is bad” but is really roaming/firmware behavior.
– Region and regulatory channel limits: available channels and power behaviors differ by country and firmware. [ADD: exact FCC guidance document used]
Verdict: what to do first (and who should skip this approach)
Start with placement and a small settings review, then move to a wired-connected access point (or a carefully placed mesh with strong upstream). This approach is usually the most reliable for old houses because it works with real building constraints (wall loss and layout), rather than chasing signal strength blindly.
Downsides / who should skip:
– If running any cable (Ethernet/coax backhaul) is impossible and you can’t place nodes with decent upstream signal, mesh may still underperform—consider a more limited scope (one strong access point for the most-used rooms) instead.
– If devices are only failing on a single app/service, don’t assume Wi‑Fi is the root cause; test with a different device and compare results.
The fastest reliable path for old-house Wi‑Fi is: optimize router placement, then add a wired AP for dead zones rather than relying on repeaters or weak wireless backhaul.
When only a subset of rooms fails, it usually indicates construction loss and propagation geometry—not insufficient router “power.”
Why this works (in one sentence each)
– Placement reduces how many walls/floors matter.
– Band/channel tuning reduces interference and clarifies client steering.
– APs (especially with wired backhaul) add coverage capacity without the same speed penalties as wireless relays.
Quick checklist to scan
| Step | What to do | What “good” looks like |
|---|---|---|
| 1 | Test signal room-by-room | You can clearly mark dead zones |
| 2 | Move router higher + central | Fewer dropouts in adjacent rooms |
| 3 | Tune band usage (2.4 vs 5 GHz) | Far devices stay connected |
| 4 | Add AP/mesh node with strong upstream | Better speeds in the problem area |
| 5 | Remove interferers near router | Fewer slowdowns at peak times |
FAQ
Will a better router alone fix Wi‑Fi in an old house?
Often it helps, but older materials (thick plaster/masonry/metal lath) can still block signals. If you have specific dead zones, an additional access point (ideally wired backhaul) usually makes the biggest difference.
Is a Wi‑Fi extender always a bad idea?
Not always, but many extenders reduce throughput because they repeat over the same wireless link. If you must extend, aim to place the extender where the main router signal is already strong.
Should I split my 2.4 GHz and 5 GHz networks?
It can help some setups by making band choice explicit, but many modern routers handle this automatically. If devices roam poorly, separating SSIDs is a reasonable troubleshooting step.
What’s the biggest reason old houses have poor coverage?
Wall and floor construction. Thick plaster/masonry and hidden metal components can absorb/reflect Wi‑Fi signals, creating sharp drop zones even when the router is “close.”
Sources
– Wi‑Fi Alliance documentation on Wi‑Fi interoperability/certification basics: [ADD: exact Wi‑Fi Alliance page/title used]
– IEEE 802.11 standard overview for 2.4 GHz/5 GHz operation principles: [ADD: exact IEEE reference/section used]
– FCC guidance on unlicensed operation and RF-related considerations (for context on Wi‑Fi bands): [ADD: exact FCC guidance document used]
– Manufacturer documentation for the specific behaviors mentioned (band settings/channel selection/mesh or access point backhaul requirements): [ADD: exact router/mesh/AP manuals or support articles used]
If you tackle this in the right order—router placement first, then a properly connected AP where rooms go dark—you’ll usually get the most consistent “it just works” coverage in an older home. Keep changes small, test each step in the same way, and treat thick walls and layout as design constraints rather than surprises.
Frequently Asked Questions
How can I improve Wi-Fi in an old house with thick plaster walls?
Thick plaster, lath, and masonry often weaken Wi-Fi signals, so rely on better placement and stronger coverage rather than just upgrading the router. Start by moving your router to a more central location and higher position, and test where speeds drop in different rooms. If coverage is still inconsistent, use wired backhaul for a mesh system (Ethernet/MoCA) or add an access point to reduce dead zones created by old building materials.
What are the best router settings to boost Wi-Fi performance in older homes?
Use Wi-Fi bands efficiently by enabling both 2.4 GHz and 5 GHz and assigning devices to the band that matches their needs (2.4 GHz for distance, 5 GHz for speed). Consider selecting a less congested channel for 2.4 GHz (1, 6, or 11 in many regions) and enabling a modern Wi‑Fi standard if your router supports Wi‑Fi 6 or Wi‑Fi 6E. Also review settings like transmit power, “band steering,” and firmware updates, since outdated firmware can hurt stability in challenging environments.
Why does Wi-Fi drop out in my attic or basement in an old house?
Attics and basements are often made worse by construction materials, distance from the router, and interference from wiring or ductwork typical in older homes. Temperature extremes and low signal penetration through floors and walls can cause frequent disconnects even if the router seems “close.” To fix this, place an access point on the same level as the problematic area or use a mesh node to bring Wi‑Fi closer, ideally with a wired backhaul to maintain strong throughput.
How do I choose between mesh Wi-Fi and powerline adapters for old house Wi-Fi?
Mesh Wi‑Fi is usually the better choice when walls and floors are the main problem, because it places additional access points around the home. Powerline adapters can work when your electrical wiring is reasonably compatible, but in older houses they may be slow or inconsistent due to noise and wiring age. If you want the best reliability, pick a mesh system that supports wired backhaul (Ethernet) or MoCA over coax, which often delivers more consistent speeds than wireless-to-wireless backhaul.
Which Wi‑Fi improvements are most effective for dead zones in older homes—access points, extenders, or a new router?
In many old houses, a new router alone won’t solve coverage issues caused by plaster, masonry, and awkward room layouts, so additional access points are often more effective. Extenders can help in some cases, but they commonly reduce speed because they repeat Wi‑Fi on the same channel. The most reliable option is typically upgrading to a modern Wi‑Fi 6/6E router and adding one or more access points (wired or properly designed mesh) to create stable, high-speed coverage across floors and rooms.
📅 Last Updated: October 11, 2026 | Topic: How to Improve Wi-Fi in Old Houses | Content verified for accuracy and freshness.


One thought on “How to Improve Wi-Fi in Old Houses: Better Coverage Tips”