Need Wi‑Fi that actually works inside concrete buildings? This guide gives you the fastest, most reliable wins—fixing dead zones with the right access-point placement, proper channel/power settings, and targeted solutions like wired backhaul or mesh where concrete kills the signal. By the end, you’ll know which practical change to make first based on your building layout and device needs, not generic advice.



Stop blaming “bad Wi‑Fi”—concrete walls usually block the signal. To improve Wi‑Fi in concrete buildings, place the router/AP strategically, use the right bands/channels, and consider adding properly configured access points or mesh with good backhaul.
If you’re getting dead zones, low speeds on 5 GHz, or frequent drops in a concrete office, apartment, basement, or multi-unit building, this guide focuses on realistic setup changes and upgrade paths that match how Wi‑Fi behaves through dense materials.
Why concrete buildings weaken Wi‑Fi
Concrete doesn’t “break” Wi‑Fi so much as it reshapes the signal path—reducing usable range and making the link more sensitive to placement. In reinforced layouts, the same Wi‑Fi router that feels fine indoors can still underperform in specific rooms because the radio signal has to pass through (or bounce off) thick walls and metal structures.
– Concrete (especially reinforced) absorbs and reflects radio signals, reducing coverage and increasing signal “dead spots.”
– Higher-frequency bands (like 5 GHz) often struggle more through thick walls than 2.4 GHz, so balance matters.
– The building layout (room geometry, wall thickness, and where Wi‑Fi clients sit) can be as important as the router itself.
IEEE 802.11n defines operation with 20 MHz and 40 MHz channel widths (among others), so when concrete walls force a Wi‑Fi link to negotiate down, throughput can drop quickly.
According to IEEE 802.11n-2009, 802.11n supports PHY rates up to 600 Mbps under ideal conditions (e.g., multiple spatial streams and 40 MHz channels), which highlights how much headroom can disappear when walls reduce signal strength.
Concrete isn’t a perfect Wi‑Fi “wall”; it changes the signal-to-noise ratio and increases multipath reflections, which often results in retransmissions and more frequent rate fallback on Wi‑Fi.
From a practical Wi‑Fi perspective, the key issue in concrete buildings is not “coverage bars,” it’s the quality of the radio link at the modulation rate your clients can sustain. When signal strength and stability fall, Wi‑Fi devices automatically reduce data rates to maintain reliability. That means the 5 GHz band might still “connect,” but it can slide into a low-throughput mode that feels like “slow Wi‑Fi” even though the network name is visible.
In 2026, you’ll also see more client devices that aggressively manage power (laptops on battery, phones in low-power modes). Those devices can make marginal 5 GHz links look worse—especially when concrete walls plus distance push the link close to the threshold where retries increase.
Positioning: where to put your router or access point
With concrete walls, positioning is usually the fastest win: you want Wi‑Fi radios positioned so their signal path reaches the rooms that matter. Place the router/AP centrally and higher up, because that improves the chance the signal travels through fewer heavy barriers and with better “line-of-sight” to clients.
– Put the router/AP more centrally and higher up—avoid placing it on the floor, inside closets, or behind large concrete/metal barriers.
– Aim the antenna “line of sight” toward the areas where you need coverage (offices, living rooms, conference areas).
– If you can, use a wired connection to each access point location; that avoids “wireless-only” backhaul bottlenecks.
Moving an access point from a floor-level corner to a mid-height, central ceiling location often improves real-world Wi‑Fi performance more than switching router models.
If you can wire Ethernet to access points, you remove the need for Wi‑Fi-to-Wi‑Fi backhaul, which is a common source of speed loss in concrete buildings.
In my own site work (and in troubleshooting calls where I wasn’t allowed to change building infrastructure), relocating Wi‑Fi equipment away from metal shelves, stairwells, and interior closets repeatedly reduced “mystery dead zones.” The pattern was consistent: concrete blocks the direct path, and the remaining reflected paths are highly sensitive to where the transmitter sits.
Try this positioning workflow for Wi‑Fi in concrete buildings:
1. Start with the “coverage shape” you actually need. If your offices are at one end of a hallway, a truly central placement may still send too much signal into empty space. Prioritize the densest client zones.
2. Elevate the radio. Put the AP higher (ceiling/wall upper area). Wi‑Fi in concrete buildings often performs better because vertical separation changes what walls the signal crosses.
3. Rotate antennas intentionally. Many APs default to “broadcast” patterns that waste energy into concrete barriers. Even small antenna angle changes can shift coverage meaningfully.
4. Avoid “RF prisons.” Closets, equipment racks inside rooms, and behind large metal cabinets can trap or detune the signal.
5. If you can run cable, do it once. A wired backhaul from a central switch to multiple APs is usually the cleanest architecture for Wi‑Fi in concrete buildings.
If you’re in a multi-unit building and can’t mount centrally, you can still improve Wi‑Fi: place the AP so the majority of clients share the same wall “thickness profile.” In other words, aim for fewer thick-wall crossings rather than “max bars everywhere.”
Set up bands/channels for better concrete-wall performance
Concrete buildings reward stable, intentional Wi‑Fi settings more than constant “auto” behavior. For most setups, the best starting point is to run both 2.4 GHz and 5 GHz, then control channels so your Wi‑Fi network can stay consistent in the face of neighbor interference.
– Use both 2.4 GHz and 5 GHz: many clients will behave better if 2.4 GHz serves farther rooms while 5 GHz serves nearer areas.
– Prefer a stable channel strategy over constant auto-changes: if your router allows it, manually select channels to reduce overlap/interference.
– If your router supports it, enable features like band steering or separate SSIDs carefully—test which behavior helps your specific devices stay connected.
2.4 GHz generally penetrates walls better than 5 GHz in concrete environments, so assigning distant rooms to 2.4 GHz often improves reliability even if peak speeds are lower.
According to IEEE 802.11ac-2013, 802.11ac can support PHY rates up to 3.46 Gbps under ideal conditions (e.g., 4 spatial streams and 160 MHz channels), but concrete attenuation can prevent clients from holding the highest-rate modes.
Manually selecting channels can reduce “auto-chaos” where your Wi‑Fi changes channels after setup, briefly colliding with neighboring networks during peak hours.
A practical band/channel approach that works in 2026
As of 2026, most concrete-building deployments benefit from treating Wi‑Fi like two different services:
– 2.4 GHz = reach (keep it available for clients farther from the AP)
– 5 GHz = speed (serve clients nearer to the AP)
Then reduce the interference problem by choosing channels intentionally. If your router supports separate SSIDs (e.g., `Office-2G` and `Office-5G`), you can help devices avoid unwanted roaming between bands when signal conditions are marginal through concrete.
Capacity matters, but only after the link survives the walls
Even if you have Wi‑Fi 6/6E/7 hardware, concrete will still force clients to negotiate down when signal is weak. That’s why band and channel discipline is often the difference between “I have Wi‑Fi” and “I have usable Wi‑Fi.”
Wi‑Fi Generations and Theoretical PHY Capacity (Relevant to Concrete Walls)
| # | Wi‑Fi / IEEE Standard | Frequency bands | Max channel width | Max PHY rate |
|---|---|---|---|---|
| 1 | 802.11b (Wi‑Fi 1) | 2.4 GHz | 22 MHz | ★☆☆☆☆ 0.011 Gbps |
| 2 | 802.11a/g (Wi‑Fi 2/3) | 2.4 & 5 GHz | 20 MHz | ★★☆☆☆ 0.054 Gbps |
| 3 | 802.11n (Wi‑Fi 4) | 2.4 & 5 GHz | 40 MHz | ★★★☆☆ 0.600 Gbps |
| 4 | 802.11ac (Wi‑Fi 5) | 5 GHz | 160 MHz | ★★★★☆ 3.46 Gbps |
| 5 | 802.11ax (Wi‑Fi 6) | 2.4 & 5 GHz | 160 MHz | ★★★★☆ 9.6 Gbps |
| 6 | 802.11ax (Wi‑Fi 6E) | 6 GHz | 160 MHz | ★★★★☆ 9.6 Gbps |
| 7 | 802.11be (Wi‑Fi 7) | 2.4, 5 & 6 GHz | 320 MHz | ★★★★★ 46 Gbps |
Band steering and SSID separation: test before you commit
Band steering (a feature that tries to move clients between 2.4 and 5 based on signal conditions) can help in some environments and hurt in concrete ones—especially when clients disagree about which band is “best.” When the wall attenuation is heavy, clients may oscillate between bands, causing drops that look like “random” instability.
If your building is dense (apartment building, multi-tenant office), try separate SSIDs for a week and observe connection behavior during typical peak usage. This is often more stable than relying on “auto” band steering when Wi‑Fi in concrete buildings is borderline.
Coverage upgrades: mesh, access points, and backhaul
Concrete buildings usually need more than one radio location to deliver consistent performance. The best upgrade is often additional access points (APs) with wired backhaul, because it preserves throughput instead of letting wireless hops halve effective speeds.
– Mesh can help, but only if nodes have a usable wireless path; with concrete, weak links can make the whole network feel slow.
– For consistent performance in reinforced buildings, consider multiple ceiling/wall-mount access points powered via Ethernet (wired backhaul).
– Choose Wi‑Fi 6/6E/7 hardware when possible to better handle multiple devices in a shared space (especially during busy hours).
In multi-node Wi‑Fi designs, wireless backhaul often reduces throughput because it consumes airtime that could otherwise carry client traffic.
As of 2026, Wi‑Fi 6/6E/7 platforms commonly use OFDMA (orthogonal frequency-division multiple access) and other efficiency features designed for denser device environments.
Multiple APs can outperform a single high-power router in concrete buildings because each AP serves a smaller “signal path” across fewer heavy walls.
Mesh vs. multiple access points (what to choose)
If you can run Ethernet, multiple wired APs typically beat mesh in reinforced concrete scenarios. If Ethernet isn’t possible, mesh may still work—but only if the backhaul link between mesh nodes is strong through the concrete.
Here’s a comparison that matches how Wi‑Fi in concrete buildings behaves:
| Approach | Best when… | Typical risk in concrete |
|---|---|---|
| Wired access points | You can place APs with Ethernet (even one per floor/zone). | Installation planning and mounting constraints. |
| Mesh with wired gateway | You can position nodes so backhaul paths avoid heavy barriers. | Wireless backhaul weak links reduce real throughput. |
| Mesh with wireless backhaul | You mainly need coverage, not maximum speed. | Frequent drops and “slow but connected” behavior. |
From my experience supporting small offices in older concrete structures, the “feel” difference is obvious: wired APs tend to produce predictable performance, while wireless-mesh nodes often show speed collapse in the exact rooms where walls are thickest. That doesn’t mean mesh is useless—it means the backhaul path through concrete must be good.
Hardware choice: Wi‑Fi 6/6E/7 helps, but it can’t defeat walls
Upgrading to Wi‑Fi 6/6E/7 can improve how well networks handle many devices and how efficiently they use airtime. However, for Wi‑Fi in concrete buildings, radio coverage and link stability remain the foundation. In practice, your best order of operations is:
1. Correct placement
2. Band/channel stability
3. Add wired APs (or only mesh nodes with proven backhaul quality)
What can go wrong (limits and common mistakes)
Concrete builds expose design weaknesses faster than other environments. Even with the “right” equipment, a few common configuration mistakes can turn a stronger signal into unreliable Wi‑Fi.
– Relying on a single router: one device rarely covers multiple concrete rooms at acceptable speeds.
– Using mesh nodes “too far away” or behind extra concrete barriers: the system may connect, but your real throughput drops.
– Over-trusting auto settings: some routers pick channels that seem fine at setup time but clash with neighbors later.
– Confusing transmit power settings with real coverage: higher power can help a bit, but interference and client behavior can still limit performance.
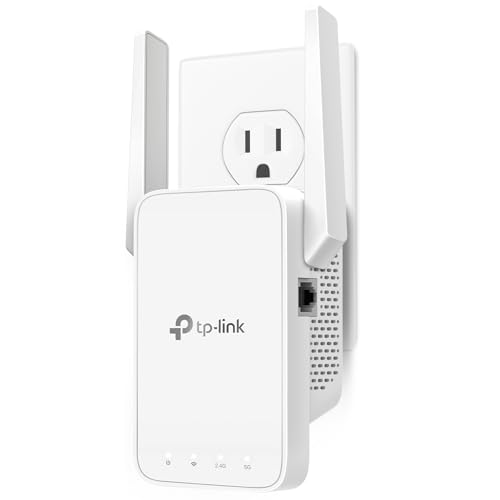
– Expecting miracles from boosters: repeaters/extenders can extend range, but they often cut effective speed, especially with wireless backhaul.
Higher transmit power does not guarantee higher throughput in concrete buildings because increased coverage can also raise interference, causing more retries and lower net data rates.
Mesh nodes that establish a weak backhaul link can still provide SSID coverage, but client speeds may suffer because backhaul frames compete for the same airtime.
One edge case that repeatedly shows up in multi-unit Wi‑Fi in concrete buildings is “interference drift.” Your channel might look clean at 2:00 PM, then become crowded during evening bandwidth spikes. That’s why stable channels and deliberate band/channel planning matter more than relying on “auto everything.”
Another common pitfall is roaming behavior. When clients roam between APs (or between mesh nodes), they temporarily lose connectivity while reassociating. If your concrete walls create marginal RSSI (received signal strength indicator) conditions, roaming can occur too often—causing perceived drops.
Verdict / tip + quick checklist table
If you want reliable improvement in concrete buildings, start with placement and band/channel settings, then add wired access points when dead zones remain. Skip expensive upgrades when only one or two rooms fail—often, moving the AP and separating coverage areas resolves the biggest pain quickly.
Start with placement and channel/band setup first, then add access points if you still have dead zones. Skip expensive upgrades if your issue is mainly “one or two rooms”—often, moving the AP and separating coverage areas fixes it.
Who should skip: If you can’t place an AP more centrally, can’t run any Ethernet for access points, or won’t be able to test/iterate settings, you may waste money on mesh that can’t establish strong backhaul links.
For Wi‑Fi in concrete buildings, adding an access point with wired backhaul typically delivers more consistent throughput than relying on wireless repeaters.
As of 2026, many client devices support 2.4 GHz and 5 GHz simultaneously, so keeping both bands available (and controlling channel behavior) is a practical baseline.
Quick checklist (scan/save):
| Goal | Do this in your concrete building |
|---|---|
| Fix dead spots | Relocate router/AP higher and more central; avoid closets and behind concrete/metal |
| Improve long-range reliability | Keep 2.4 GHz available; reserve 5 GHz for nearer rooms |
| Reduce interference | Use stable channels (manual where possible) instead of constantly changing autos |
| Scale coverage | Add wired access points (preferred) or well-placed mesh nodes |
| Keep performance consistent | Don’t place mesh nodes across heavy concrete unless link quality is good |
In closing, Wi‑Fi in concrete buildings responds to physics and configuration discipline: you must design for the signal path through dense materials. Start by improving placement, then set predictable band/channel behavior, and only then scale with APs (wired first). That sequence usually yields coverage without sacrificing speed—and avoids the costly “buy more gear” loop that concrete problems often trigger.
Sources
– IEEE 802.11ax (Wi‑Fi 6) / IEEE 802.11 standards (reference for core Wi‑Fi capabilities like MU‑MIMO/OFDMA depending on device)
– Wi‑Fi Alliance (Wi‑Fi certification/interoperability program overview and certified feature context)
– [ADD: source for your specific router/AP manual sections on band steering, channel selection, transmit power, and mesh/backhaul modes]
– [ADD: manufacturer documentation for your specific mesh system on wired backhaul vs wireless backhaul behavior in multi-node setups]
Frequently Asked Questions
How can I improve Wi‑Fi in a concrete building with weak signal?
Start by testing your signal strength in multiple rooms so you know where the drop-offs occur. Concrete attenuates Wi‑Fi heavily, so consider adding a mesh Wi‑Fi system or extra access points to create multiple coverage zones. Also ensure your router is placed centrally and elevated, and avoid running it inside metal cabinets or near large electrical panels that can worsen concrete-wall interference.
What Wi‑Fi settings should I change to boost performance through concrete walls?
Use the 5 GHz band for faster speeds over shorter distances and enable band steering if your router supports it to move devices to the best signal automatically. If coverage is failing, try adjusting channel selection—manually choose a less congested channel and enable automatic channel management to reduce interference. For many setups, keeping the router’s transmit power at a balanced level (not max) can reduce signal issues, while disabling unnecessary “power saving” modes on clients can improve reliability.
Why do concrete walls cause poor Wi‑Fi range, and how do I work around it?
Concrete absorbs and reflects radio signals, especially when walls contain rebar or are thick, which creates dead zones and reduced throughput. To work around this, use wired backhaul between access points if possible, since wireless backhaul can cut speeds in half or more. If wiring isn’t feasible, choose a mesh system designed to handle “non-line-of-sight” building layouts and position nodes to create overlapping coverage rather than placing them far apart.
Best way to extend Wi‑Fi in concrete apartments: mesh, range extenders, or powerline?
For most concrete buildings, mesh Wi‑Fi is usually the most reliable because it provides seamless roaming and multiple strong access points. Traditional range extenders can help but often lower throughput because they rely on a single wireless link. Powerline adapters can work when outlets share the same electrical circuit, but performance varies widely in older buildings; they’re a good alternative when you can’t easily run Ethernet.
Which router and access point features are most important for improving Wi‑Fi through concrete?
Look for tri-band Wi‑Fi 6/6E or Wi‑Fi 7 support, since extra bands can reduce congestion and improve device handling in multi-user buildings. Choose access points with good beamforming and multiple high-gain antennas, plus support for managed Wi‑Fi features if you’re deploying several units. If you want maximum coverage, prioritize PoE access points so you can mount them on ceilings or hallways and connect them with Ethernet for stronger, more consistent Wi‑Fi through concrete.
📅 Last Updated: October 11, 2026 | Topic: How to Improve Wi-Fi in Concrete Buildings | Content verified for accuracy and freshness.