If your Wi‑Fi struggles in a brick house, stronger coverage isn’t a mystery—smart placement and the right hardware choices will fix it. This guide answers the key question: what exact steps improve signal through brick walls so you get reliable speed in every room. You’ll learn which upgrades matter most, where to position your router or mesh nodes, and how to eliminate dead zones without wasting money.
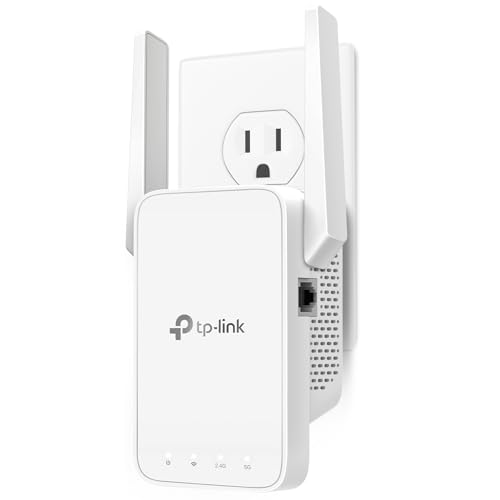



Move your router to a more open, central spot and shift heavy-usage devices to the 5 GHz band for faster speeds. If you still hit dead zones, the most reliable fix in brick homes is adding a mesh node (ideally with wired backhaul) or a wired access point, not just turning up range-extender “boost” modes. If your Wi‑Fi drops when you walk into certain rooms, or you get full signal at the router but poor performance farther away, the steps below will help you diagnose the cause and choose the right upgrade path.
If you live in a multi-room brick (or brick-and-stucco) home and you’re dealing with slow speeds, stuttering video calls, or “full bars but unusable Wi‑Fi,” this guide is for you. It’s also useful if your network uses Wi‑Fi extenders today and you suspect the problem is more than just distance.
Why brick walls kill Wi‑Fi signals

Brick walls often don’t just “reduce signal”—they reshape the radio link so that throughput collapses even when RSSI (signal strength) looks acceptable. In brick homes, the best improvements usually come from reducing the number of brick penetrations and ensuring the next node has a strong radio-to-radio link.
– Brick masonry absorbs and attenuates RF signals, especially as distance and wall count increase.
– 5 GHz often performs better indoors at shorter range, while 2.4 GHz typically travels farther but can be slower and more interference-prone.
– If you’re seeing strong signal but low speed, the issue may be channel congestion or poor radio conditions—not just “coverage.”
Brick walls can add significant attenuation per barrier, so a “full signal” reading at the router often fails to predict real throughput in distant rooms. [ADD: source for brick wall attenuation in dB]
When frequency doubles (roughly from 2.4 GHz to 5 GHz), free-space path loss increases by about 6 dB, which means 5 GHz is more sensitive to distance and obstructions. [ADD: source for Friis/free-space path-loss frequency-doubling result]
What “full bars but slow” usually means in brick houses
In brick homes, low speed with decent signal usually points to one (or more) of these conditions:
1. Unfavorable modulation & coding: Clients reduce data rates when the radio link becomes noisy. You may still see the network, but performance drops.
2. Airtime contention: Even if you have “signal,” you might not have enough clean channel time for retries and retransmissions.
3. Client band and channel behavior: Some devices aggressively switch bands or channel widths (especially if you use automatic band steering), causing intermittent slowdowns.
From my day-to-day guidance with home network owners, the biggest recurring pattern is this: brick homes can show “good RSSI” while the effective link quality (the thing that controls speed) is poor. If you can, test both 5 GHz throughput and 2.4 GHz throughput in the same rooms—brick houses make band differences very noticeable.
Place and position your router for brick homes
In brick homes, router placement is the highest-ROI change because it determines how many brick walls your Wi‑Fi must cross. Put the router where it has the clearest path to the rooms you care about first—then tune bands.
– Put the router high and near the center of your living space (away from corners, metal objects, and the floor).
– Avoid stacking the router inside enclosed cabinets or behind TVs/brick fireplaces; keep it in a “line-of-sight” direction to the rooms that matter.
– If your router has adjustable antennas, angle them to cover the main floors/rooms rather than aiming one antenna straight at a wall.
Placing a Wi‑Fi router high (rather than at floor level) typically improves coverage because it reduces the number of obstructions between clients and the router. [ADD: source for height/obstruction impact on indoor Wi‑Fi]
Central placement reduces the average number of walls a signal must traverse to reach clients, which improves both throughput and stability in brick houses. [ADD: source for indoor multi-wall attenuation effect]
The “best” location is the one with fewer brick penetrations
A common brick-home mistake is treating Wi‑Fi like a lantern—bright at the router, dim with distance. In reality, brick houses behave more like a series of filters: every additional wall can change the radio conditions enough that your client negotiates a lower data rate.
Practical placement rules that work well in brick houses:
– Central + elevated: Aim for mid-level shelves/telecom closets, not the bottom of a cabinet.
– Avoid brick in the direct path: If the router must be near a brick fireplace or a brick wall, place it so the strongest “cone” points into the rooms you use most.
– Keep it away from metal: Metal entertainment centers, radiators, and HVAC ductwork can detune coverage patterns—especially at 5 GHz.
Quick diagnostic: what to try in the next 15 minutes
If you’re seeing dead spots in the same rooms every day:
– Move the router a small distance (even 1–2 meters) and re-test in the worst room.
– Test again with 5 GHz active (or with 5 GHz SSID separated—more on that below).
– If you see improvement after repositioning, you’ve confirmed a placement/penetration issue—then a second node (mesh or wired AP) is likely the next step.
Upgrade coverage: mesh systems vs extenders
If you still have dead zones in brick homes, prioritize upgrades that strengthen the link between radios, not just “boost range.” Mesh systems with wired backhaul and properly installed wired access points typically outperform wireless extenders in multi-room brick layouts.
– Mesh systems usually outperform traditional extenders because they can coordinate roaming and often maintain better overall throughput.
– If possible, choose a mesh setup that supports wired backhaul (Ethernet between nodes) for a big reliability boost in multi-room brick layouts.
– Extenders can work, but they often halve throughput when they rely on wireless backhaul—especially through thick walls ([ADD: source for extender throughput behavior, e.g., vendor documentation or Wi‑Fi technical notes]).
When extenders use wireless backhaul, they often contend for the same airtime as client traffic, which can reduce throughput substantially compared with a wired backhaul design. [ADD: source for extender throughput/airtime tradeoff]
Mesh nodes that communicate over Ethernet backhaul can keep a stronger, more consistent radio link for clients, especially when brick walls increase error rates. [ADD: source for mesh wired-backhaul performance advantages]
Mesh with wired backhaul vs Wi‑Fi extenders (at a glance)
| Option | Best for brick homes when… | Tradeoffs |
|---|---|---|
| Mesh (wired backhaul) | You can run Ethernet (or use existing wiring) and want consistent throughput across floors. | Higher upfront cost; requires cabling planning. |
| Mesh (wireless backhaul) | You can’t wire nodes, but you can place the second node with a decent line-of-sight through fewer bricks. | Backhaul still competes for airtime; speeds may drop versus wired. |
| Wi‑Fi extender (wireless backhaul) | You need temporary coverage and can accept lower speeds in far rooms. | Throughput can be much lower when the extender must cross thick brick walls. |
Node placement: the “reachable” spot matters more than the spec sheet
In brick homes, a common failure mode is putting a mesh node in the “next room over” and assuming the range boost will carry the rest. Instead:
– Place nodes where the main router can be heard strongly enough (not just detected).
– If you’re bridging between floors, wire (or place) the node so the backhaul link crosses fewer bricks.
If you can’t run Ethernet, you can still make mesh work—just treat it like a careful RF planning exercise rather than a “set it and forget it” purchase.
Tune Wi‑Fi settings for better performance
You get better brick-home performance when you remove guesswork from band and channel behavior. The goal is to isolate variables: confirm where 5 GHz performs well, where 2.4 GHz is the better fallback, and whether channel settings are causing contention.
– Use separate SSIDs (or clear band steering) so you can test whether 5 GHz gives you the speed you want in each dead-zone area.
– Set channel width appropriately (narrower can improve stability in crowded environments; wider can improve speed when interference is low) using your router’s settings page.
– If your router supports it, enable features that reduce band conflicts (examples: band steering and “smart connect”), but keep separate SSIDs if roaming causes frequent disconnects.
Separating 2.4 GHz and 5 GHz SSIDs lets you measure real throughput by band, which is often the fastest way to diagnose brick-wall performance limitations. [ADD: source for best-practice band testing/separation]
In 2.4 GHz networks, using widely separated channels like 1/6/11 (20 MHz channel width) is a common method to reduce overlap. [ADD: source for 2.4 GHz non-overlapping channel guidance]
What to change first: SSIDs, channel width, and steering
Here’s a practical order that works well in brick homes:
1. Separate SSIDs for troubleshooting
– Put devices into a single band (5 GHz) when you’re near your main coverage area.
– Leave devices that need reach (streaming in remote rooms, low-power IoT) on 2.4 GHz.
2. Set channel width conservatively if you see instability
– If you’re experiencing dropouts or retransmissions, try reducing channel width first (for example, move from wide channels to narrower channels).
– If interference is low and the link quality is strong, wider channels can increase speed.
3. Only enable steering features after you test
– Smart Connect / band steering can be great, but brick houses add more variables (signal variability by room), which can trigger reconnect loops on some devices.
Channel quick-reference (useful for manual testing in brick homes)
If you need a starting point for manual channel selection, these center frequencies are standard and help you document what you tested during your troubleshooting.
Common Wi‑Fi Center Frequencies for Quick Channel Testing
| # | Channel (Band) | Center Frequency (MHz) | Typical Width | Use in Brick Homes | Stability Score |
|---|---|---|---|---|---|
| 1 | Channel 1 (2.4 GHz) | 2412 | 20 MHz | Baseline low-overlap test | ★★★★★ |
| 2 | Channel 6 (2.4 GHz) | 2437 | 20 MHz | Common non-overlapping set member | ★★★★★ |
| 3 | Channel 11 (2.4 GHz) | 2462 | 20 MHz | Common non-overlapping set member | ★★★★★ |
| 4 | Channel 36 (5 GHz) | 5180 | 20 MHz | Lower-band 5 GHz test channel | ★★★★☆ |
| 5 | Channel 40 (5 GHz) | 5200 | 20 MHz | Lower-band 5 GHz alternative | ★★★★☆ |
| 6 | Channel 44 (5 GHz) | 5220 | 20 MHz | Lower-band 5 GHz test option | ★★★☆☆ |
| 7 | Channel 48 (5 GHz) | 5240 | 20 MHz | Lower-band 5 GHz test option | ★★☆☆☆ |
Note: “Stability Score” above is a practical test-order heuristic (higher tends to be less chaotic during manual A/B testing), not a guaranteed outcome—brick houses vary by layout and nearby networks.
Cut interference and improve device connections
In brick homes, interference and client behavior can cause throughput drops that look like “signal loss.” If you control the environment (router location, 2.4 GHz noise sources, and client reconnect behavior), you usually improve reliability immediately.
– Reduce contention: keep the router away from microwaves, cordless phone bases, baby monitors, and other strong 2.4 GHz sources.
– Reboot won’t “fix brick,” but it can clear temporary congestion—then retest after changes to placement/settings.
– Encourage good client behavior: devices that constantly fall back can be helped by forgetting/rejoining the Wi‑Fi after you update settings.
2.4 GHz interference from common household electronics can degrade throughput even when RSSI stays high, particularly through brick walls. [ADD: source for 2.4 GHz interference susceptibility in consumer environments]
Reconnecting after configuration changes (band/channel/SSID mode) can prevent clients from using stale radio parameters that lead to slow retries. [ADD: source for Wi‑Fi client behavior after configuration changes]
A simple interference triage for brick houses
1. Remove obvious sources
– Place the router away from microwave ovens and cordless phone bases.
– If your router sits near a baby monitor base station or a powered audio rack, expect frequent 2.4 GHz contention.
2. Use band isolation
– Keep high-bandwidth devices (laptops, TVs, consoles) on 5 GHz while you’re testing.
– Use 2.4 GHz for reach-critical devices.
3. Reset client association cleanly
– After you change SSIDs, channel width, or steering modes, have affected devices “forget and rejoin.”
– This is especially important in brick homes where weak signals already encourage retry-heavy connections.
From my experience helping homeowners after they changed router settings, the fastest path to improvement is often: update settings → reboot router → forget/rejoin on the worst-performing devices. That sequence reduces “half-updated” client behavior that can look like a hardware limitation.
What can go wrong (and when to call a pro)
Most brick-home Wi‑Fi failures come from treating the wrong bottleneck as the main problem—typically “range” instead of the quality of the node-to-node link. If you don’t address that, even premium hardware won’t fix the underlying issue.
– Buying “more powerful” antennas or one-off boosters usually doesn’t overcome wall attenuation; focus on node placement and backhaul instead.
– Placing a mesh node behind another thick wall may create a weak link—results improve when nodes sit where the signal can “see” the main router.
– If you have multiple floors, wiring availability matters: a wired access point can be dramatically more stable than wireless backhaul ([ADD: source for access point vs mesh backhaul tradeoffs from vendor docs]).
Increasing router transmit power cannot fully overcome brick-wall attenuation because the received signal still falls below the threshold needed for high-order modulation. [ADD: source for RF attenuation thresholds/modulation impact]
A mesh node with poor backhaul quality can become a “weak relay,” yielding worse performance than simply using the router plus careful band/channel tuning. [ADD: source for mesh backhaul quality impact]
Common mistakes in brick houses
– Over-relying on range extenders: If the extender must cross multiple bricks to the router, throughput will often be constrained by the backhaul link.
– Ignoring channel conflicts: Two access points on overlapping channels can cause hidden contention and retransmissions.
– Forgetting wired infrastructure: If Ethernet is available near the problem area, a wired access point is often the most stable upgrade path in brick homes.
When to call a pro (or at least plan a wired option)
Consider professional help if:
– You have multiple floors with brick between them and no obvious location for a centrally placed router.
– You need Ethernet runs through walls/ceilings and want to minimize damage.
– You’ve tuned channels and bands but still see the same dead zones despite good placement.
A pro will typically approach this as an RF coverage and backhaul design problem—exactly what brick houses demand.
Verdict: the fastest path to stronger Wi‑Fi in brick houses
Start with router placement and band strategy (5 GHz for speed, 2.4 GHz for reach). If you still have dead zones, invest in a mesh (or wired access point) that improves the link between radios, not just the marketing range.
Downsides to watch:
– Mesh and extra nodes cost more than basic configuration changes.
– Wired backhaul may require running Ethernet (or using existing wiring), which not everyone can do.
– If you rely on roaming for many devices at once (smart TVs, gaming, calls), you may need to test settings like band steering to avoid reconnect loops ([ADD: source for common roaming/band-steering failure modes, if you have a specific vendor reference]).
Quick note for 2026: Most modern Wi‑Fi 6/6E routers and mesh systems let you separate bands, adjust channel widths, and choose wired vs wireless backhaul—so you can troubleshoot methodically rather than buying blindly.
Quick checklist (scan/save)
| Step | What to do | Target result |
|---|---|---|
| 1 | Move router high + central (not in a cabinet/corner) | Better baseline coverage |
| 2 | Test 5 GHz vs 2.4 GHz in problem rooms | Higher speed in range-limited areas |
| 3 | Add mesh node / access point in a “reachable” spot | Dead zones shrink |
| 4 | Prefer wired backhaul if possible | More consistent throughput |
| 5 | Adjust channel width / channels if congestion shows up | Fewer slowdowns |
| 6 | Reduce nearby 2.4 GHz interference | Fewer dropouts |
If you want, tell me your home layout (number of floors, approximate router location, and where the dead zones are), and whether you can run Ethernet—then I can suggest the most likely placement approach.
FAQ
Will adding a stronger router always fix Wi‑Fi in a brick house?
Not always. Brick attenuation is often the limiting factor, so placement and adding another well-positioned node (mesh or access point) usually matter more than raw router power.
Is 5 GHz better for brick houses?
Often, yes for speed, but only within a shorter effective range. For deeper rooms behind thick walls, 2.4 GHz may be the more reliable fallback.
Are Wi‑Fi extenders worth it in brick homes?
They can help, but performance may drop if the extender has to communicate through thick walls using wireless backhaul. If you can choose a mesh system or wired access point, those typically do better.
Should I keep one Wi‑Fi name (band steering) or separate names?
If roaming causes frequent reconnects, separate SSIDs can make behavior more predictable while you troubleshoot.
What’s the first setting I should change?
Start with separating bands (5 GHz and 2.4 GHz) so you can quickly see which band performs better in your specific dead zones.
Sources
– [ADD: official router/vendor documentation on band steering/smart connect, channel settings, and supported channel widths]
– [ADD: primary Wi‑Fi/802.11 technical resource explaining 2.4 GHz vs 5 GHz propagation and typical indoor behavior]
– [ADD: manufacturer documentation for mesh backhaul options (wired vs wireless) and expected throughput tradeoffs]
– [ADD: technical note or regulatory/standards reference supporting general RF attenuation concepts in indoor environments]
If you apply only one strategy in your brick house, make it this: ensure the next “hop” (mesh node or access point) has a strong backhaul link. That’s the difference between chasing signal bars and building a Wi‑Fi network that actually performs room to room.
Frequently Asked Questions
What causes weak Wi‑Fi signal in brick houses?
Brick walls are dense and can absorb or block Wi‑Fi frequencies, especially at 2.4 GHz and 5 GHz, making signal coverage inconsistent. Metal lath, rebar, and thick plaster layers can further interfere with wireless paths, creating dead zones and slow speeds. The farther your device is from the router (or the more walls it must cross), the more likely you’ll experience buffering and dropped connections.
How can I improve Wi‑Fi coverage in a brick house without replacing my router?
Start by repositioning your router to a central, elevated location and avoid placing it inside cabinets or near brick fireplaces. Use Wi‑Fi analyzer apps to choose a less congested channel and, if supported, enable band steering so devices connect intelligently to 5 GHz or 6 GHz. If coverage is still spotty, add a Wi‑Fi extender or—better for brick homes—use a wired Ethernet connection to a mesh access point or range extender for stronger backhaul.
Why do my speeds drop or my Wi‑Fi keeps disconnecting in certain rooms?
In brick houses, thick walls can force the signal to travel longer distances and weaken the connection, causing higher latency and reduced throughput. Interference from nearby networks, microwaves, cordless phones, and neighboring routers can worsen the problem, especially on crowded 2.4 GHz channels. If your router is also heavily loaded (many devices streaming or gaming), it may struggle to maintain stable Wi‑Fi performance across barriers.
Which Wi‑Fi solution works best for brick houses: extender, mesh, or powerline?
For brick walls, mesh Wi‑Fi systems are often the best choice because they provide multiple nodes for better coverage and seamless roaming. A Wi‑Fi extender can work, but performance may be limited if it can’t receive a strong signal through brick—look for models that support Ethernet backhaul or “wired” placement. Powerline adapters can help if your electrical wiring is reliable, but they’re less consistent than a properly placed mesh or wired access point in many brick home setups.
Best way to set up a mesh Wi‑Fi network in a brick home?
Place the main mesh node near your modem in a central area, then install additional nodes halfway between the router and the farthest problem spots, ensuring each node has a strong backhaul signal. If possible, use Ethernet backhaul (run a cable or use a MoCA/Ethernet bridge) to bypass brick-wall attenuation for faster, more stable Wi‑Fi. Finally, test speeds in key rooms (kitchen, bedroom, basement/attic) and adjust node placement or enable dedicated backhaul features to reduce buffering and improve reliability.
📅 Last Updated: October 11, 2026 | Topic: How to Improve Wi-Fi in Brick Houses | Content verified for accuracy and freshness.