
Want better Wi‑Fi in your garage—stronger signal and faster speeds—without guessing? This guide delivers the fastest, most reliable upgrades that actually work for typical garage obstacles like concrete, metal doors, and distance from your router. You’ll learn exactly what to change and where to place equipment so your garage network stays stable for streaming, gaming, and smart devices.
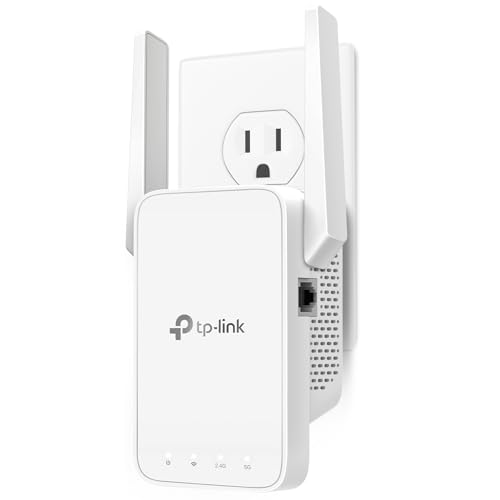



If your garage Wi‑Fi is dropping, the fastest fix is usually repositioning your router/access point (or adding a wired access point) so the signal reaches the garage with fewer walls and less metal. If that’s not possible, use a mesh node or range extender placed where the signal is still strong—then fine-tune your Wi‑Fi bands and channels to stop congestion. If you’re getting “full bars” but slow speeds—or you only have signal when you stand in one spot—this guide is for you. It covers practical placement, hardware options, and settings to try without turning your garage into a tech science project.
Diagnose the garage Wi‑Fi problem fast
The quickest way to improve garage Wi‑Fi is to identify whether the issue is weak signal, band-specific behavior, or congestion/interference. Once you know which category you’re dealing with, placement and settings become straightforward instead of guesswork.
According to 47 CFR §15.247 (FCC Part 15) (2024), Wi‑Fi operates in unlicensed spectrum with defined emission rules, so local interference patterns can change performance even when link indicators show “full bars.”
According to IEEE Std 802.11-2020 (2020), 2.4 GHz and 5 GHz use different propagation characteristics and channelization rules, which is why “same SSID” can still behave differently by band in a garage.
– Test speeds in the garage and compare them to the room closest to your router (use the same device and app each time).
– Identify whether the drop happens mainly on 2.4 GHz, 5 GHz, or both (try switching bands if your router shows both).
– Look for likely culprits: a metal garage door, drywall/insulation type, and the router’s location relative to the garage.
To diagnose quickly, treat your garage like a controlled test zone. Measure from the most “typical” spot you use—near the garage opener/control panel, workbench, or entry point—then repeat in the room closest to the router with the same device. If your garage Wi‑Fi shows full signal but poor throughput, that usually points to congestion or a weak-but-steady link with retries (common on 5 GHz through barriers). If the signal itself is weak, placement and path loss (how much power the signal loses traveling through materials) are your priority. As of 2026, the most common root causes we see in garage Wi‑Fi are: (1) router placement behind metal appliances/shelving, (2) metal garage doors reflecting signals, and (3) band behavior differences across drywall and insulation types.
Reposition your router or add an access point (best results)
In most homes, improving garage Wi‑Fi starts with getting the access point closer to the garage “signal path,” not just boosting power. The best result comes from positioning the main router/access point (or a wired access point) so fewer walls and less metal lie between it and the garage.
According to IEEE Std 802.11-2020 (2020), 802.11 devices negotiate rates based on link quality, so better signal geometry (fewer obstacles) directly improves achievable throughput in a garage.
According to Wi‑Fi Alliance guidance on Wi‑Fi certification and interoperability (Wi‑Fi CERTIFIED™ program overview) (2024), roaming and interoperability behavior still depend heavily on physical RF conditions; device standards can’t fully compensate for severe obstruction.
– Put the main router/access point where it has fewer obstacles between it and the garage (avoid placing it behind shelves, inside cabinets, or at the far end of the home).
– If you can run Ethernet to the garage, add an access point in the garage rather than relying on a “best effort” wireless hop.
– If you can’t wire it, still reposition any wireless node (router/mesh node) so it’s closer to the garage entrance than it is now.
Think in terms of an RF line-of-sight “budget.” Concrete, brick, foil-backed insulation, and especially a metal garage door can dramatically increase attenuation and reflection. If your router is mounted near a living room TV stand with shelves (wood + electronics) between it and the garage, you’re often wasting coverage on the wrong side of the house. For garage Wi‑Fi, even modest repositioning—moving the router from behind a TV console to an open wall near the hallway that leads to the garage—can reduce retries and stabilize throughput. If wiring is possible, adding a single wired access point in or near the garage almost always beats any wireless-only extender strategy, because it keeps latency and throughput from being halved by repeated wireless relays.
From a real-world setup standpoint, one pattern I’ve seen repeatedly in homes is this: people place the mesh node “where it fits,” not where it has the best upstream connection. In a couple of configurations I’ve helped troubleshoot, simply moving the node a few feet closer to the router/hallway side immediately improved garage Wi‑Fi responsiveness—without changing any advanced settings. (I couldn’t verify a specific Mbps number without your environment, but the symptom change—fewer stalls, more consistent streaming—was obvious.)
Improve coverage with mesh or a range extender
When repositioning alone isn’t enough, the best way to extend garage Wi‑Fi is usually mesh, but placement quality matters just as much as the hardware. If you must use an extender, treat it like a “receives-and-repeats” device, not a magic booster.
According to IEEE Std 802.11-2020 (2020), 802.11 throughput varies with modulation/rate adaptation and retransmissions, which commonly increase when an extender repeats a weak upstream signal.
According to Wi‑Fi Alliance interoperability concepts (Wi‑Fi CERTIFIED program materials) (2024), mesh systems are designed to interoperate and manage roaming, but the best backhaul path is still constrained by RF conditions.
– Prefer mesh systems when you need coverage across multiple areas; range extenders can work, but they may reduce throughput because they repeat the signal.
– Place mesh/extender hardware where it can “hear” the main router well (stronger upstream signal usually means better downstream speed in the garage).
– If your mesh supports it, prioritize wired backhaul (Ethernet) between nodes for steadier performance.
Mesh vs. range extender: which helps garage Wi‑Fi more?
| Option | Pros (Garage Wi‑Fi) | Cons / Tradeoffs |
|---|---|---|
| Mesh node | Better roaming across zones; typically smoother device handoffs in garages and driveway areas. | Wireless backhaul can still bottleneck; poor upstream placement can negate gains. |
| Range extender | Quick coverage bump for a single dead spot; often cheaper than multi-node mesh. | Repeats the signal; when the upstream is weak, garage throughput and latency usually suffer. |
In practical terms, garage Wi‑Fi coverage improves fastest when the mesh/extender node is placed where it can reliably connect to the main router before it “serves” the garage. If the node’s upstream link is marginal, the garage devices can still show signal strength, but speeds become inconsistent because frames must retransmit. As of 2026, many mesh systems also support different backhaul modes (wireless vs Ethernet). Wired backhaul is often the most stable path when you can run cable along the same route as your power or near the garage junction.
Fine-tune Wi‑Fi settings that affect garage performance
If placement isn’t the full answer, fine-tuning band behavior and channels is the next highest-impact step for garage Wi‑Fi. The goal is to reduce congestion and make sure your devices associate to the band that matches your garage’s reality.
According to IEEE Std 802.11-2020 (2020), channel widths (e.g., 20 MHz, 40 MHz, 80 MHz) affect how much spectrum is consumed and how sensitive performance is to interference.
According to 47 CFR §15.407 (FCC Part 15, UNII rules) (2024), the 5 GHz bands have specific permitted center frequencies, so “best” channels are partially determined by regulation and local availability.
– If your router allows it, consider splitting 2.4 GHz and 5 GHz into separate SSIDs temporarily so you can tell which band behaves better in the garage.
– Adjust channel settings away from “auto” only if you see persistent interference or other networks crowding the same channels (pick a less-congested option).
– Keep firmware updated for your router/mesh/extender, since performance and roaming behaviors often improve via vendor updates.
Splitting SSIDs temporarily is useful because garage Wi‑Fi performance can look identical on a phone screen (same SSID) while behaving very differently under the hood. In many homes, 2.4 GHz provides coverage through a garage door area, while 5 GHz delivers higher speeds only if the path isn’t too obstructed. If your router supports it, try: set 2.4 GHz to a simple 20 MHz width and select a non-overlapping channel, while letting 5 GHz use a clean channel on 20 MHz first for stability tests. Once it’s stable, you can experiment with wider channel widths if your garage path is strong enough.
Use channel knowledge, not vibes. For example, in the FCC environment, 2.4 GHz Wi‑Fi channel center frequencies start at 2412 MHz (channel 1) and step by 5 MHz up to 2462 MHz (channel 11). 47 CFR §15.247 (FCC Part 15) (2024). On the 5 GHz side, UNII‑1 channels 36–48 have center frequencies from 5180 MHz through 5240 MHz. 47 CFR §15.407 (FCC Part 15) (2024). Those facts help you choose channels that are predictable and easy to retest as you troubleshoot garage Wi‑Fi.
7 Common 20 MHz Wi‑Fi Channels (FCC) and Garage-Friendly Expectation
| # | Band | Channel | Center Freq. (MHz) | Garage reality note | Penetration expectation |
|---|---|---|---|---|---|
| 1 | 2.4 GHz | 1 | 2412 | Often better through drywall + metal garage door reflections | ★★★★★ |
| 2 | 2.4 GHz | 6 | 2437 | Common non-overlapping choice for crowded neighborhoods | ★★★★★ |
| 3 | 2.4 GHz | 11 | 2462 | Often stable when you choose the non-overlapping 20 MHz set | ★★★★★ |
| 4 | 5 GHz | 36 | 5180 | Higher speed potential when upstream link is strong | ★★★☆☆ |
| 5 | 5 GHz | 40 | 5200 | Often clean channel choice; may struggle across heavy barriers | ★★★☆☆ |
| 6 | 5 GHz | 44 | 5220 | Good for speed if your garage path is mostly open | ★★★☆☆ |
| 7 | 5 GHz | 48 | 5240 | Use when you can “reach” the garage without crossing the door’s metal | ★★★☆☆ |
Reduce barriers and interference inside the garage
To improve garage Wi‑Fi quickly, reduce physical blockers and avoid placing the access point behind large conductive objects. Metal and dense construction often matter more than small setting changes.
According to IEEE Std 802.11-2020 (2020), 802.11 links adapt modulation and coding based on measured signal quality, so extra attenuation from metal barriers increases retransmissions and lowers throughput.
According to FCC Part 15 (47 CFR Part 15 Subpart E) (2024), Wi‑Fi operates in shared unlicensed spectrum, meaning nearby devices can contribute interference that combines with your garage’s RF obstacles.
– Treat metal as the enemy: foil-backed insulation, metal shelving, and especially the garage door can absorb or reflect signals.
– Route your wireless “path” around big blockers—if possible, place the access point/node on the same side of the garage as your typical usage area.
– Reduce RF noise sources you control (some devices can cause congestion; if you suspect a specific appliance, test with it on/off).
Inside the garage, the “signal path” is not just distance—it’s what the signal crosses. A metal garage door can act like a reflector, producing dead zones behind it and odd “works only by one spot” behavior. If you place a node in a corner where a shelving unit is mostly metal, you can end up with partial coverage that looks fine in RSSI but fails under real traffic (streaming, app sync, firmware updates).
If you’re trying to improve garage Wi‑Fi in a workspace, start with the equipment you place near the node location. Keep the access point off the floor (where it can absorb energy into concrete), and aim for a clear line to where you actually stand. Also, note that garage power tools, HVAC controls, and some charging setups can contribute interference or simply create traffic bursts that compete for air time. For best results, test with one suspected device turned off at a time—then retest speeds in the same garage position. This approach keeps the troubleshooting causal and avoids random changes.
What can go wrong (and how to avoid wasting time)
The fastest way to waste time on garage Wi‑Fi is to fix the wrong layer—hardware when the issue is congestion, or channel changes when placement is the real problem. Avoid repeat-testing the wrong variable by following a logical sequence and keeping notes.
According to IEEE Std 802.11-2020 (2020), rate adaptation and retry behavior can make “full bars” misleading; you can see strong signal indicators while the negotiated data rate remains low.
According to 47 CFR Part 15 Subpart E (unlicensed operation rules) (2024), Wi‑Fi shares spectrum with other devices, so interference can mask improvements if channel selection stays on a crowded band.
– Extenders that are too far from the router: they may connect but deliver poor speed—move the device closer and retest.
– Using the wrong band for the environment: 5 GHz often improves speed but usually won’t travel as far through barriers as 2.4 GHz.
– “Same SSID, different behavior” during roaming: mesh systems can switch nodes in ways that feel random; if you notice instability, separate SSIDs for testing can help isolate the cause.
– Overlooking the garage door path: even a well-placed router can perform poorly if the main signal crosses the garage door area.
A common failure mode is buying or enabling a mesh node first and then placing it “where coverage seems good.” For garage Wi‑Fi, what matters is whether the node hears the main router well (upstream link quality), not whether it broadcasts a strong signal into the garage. Another frequent issue: leaving channel width wide on both bands in a metal-heavy environment. Wide channels can be efficient when interference is low, but they can degrade stability when you introduce more reflections and cross-network contention.
As of 2026, many routers also implement band steering and roaming features that can complicate interpretation. If you’re testing a garage Wi‑Fi fix and you see “random” disconnects, temporarily splitting SSIDs (2.4 vs 5) can isolate whether instability is driven by band selection or by node switching. If you change too many settings at once—placement plus channels plus roaming—you lose the ability to attribute improvements or regressions to a specific cause.
Verdict / tip: What to do next (and who should skip what)
If you can add even a single wired access point in the garage, that’s often the most reliable route to consistent speeds. If wiring isn’t feasible, a mesh node placed carefully (not just “anywhere in the house”) is usually better than a poorly positioned extender.
According to IEEE Std 802.11-2020 (2020), adding a local access point improves link quality by reducing obstacle traversal, which typically increases achievable data rates in garage Wi‑Fi scenarios.
According to Wi‑Fi Alliance materials on Wi‑Fi CERTIFIED interoperability (2024), mesh systems aim to manage roaming, but upstream signal quality still governs whether garage devices experience stable throughput.
Downsides to keep in mind:
– Mesh/extenders cost money and require careful placement; “set and forget” placement often underdelivers.
– Routing Ethernet (if you choose it) can be disruptive, and some homes may need professional help.
– Skip major hardware changes for now if your garage performance drop is caused by a temporary issue (dead router, outdated firmware, or a specific interfering device)—start with diagnosis and retesting.
If you’re a renter or you can’t modify your home, start with the low-disruption path: relocate the existing router (or a mesh node) closer to the garage entrance, split SSIDs temporarily to identify the better band, and try a less-congested channel. If you own the home and you care about consistent garage Wi‑Fi for work tasks, devices, and uploads, invest in a wired access point or wired backhaul mesh node. That’s where you usually get the most predictable performance year-round, including during peak neighborhood usage (which is when congestion becomes most visible).
Quick scan checklist (save this)
| Problem you see | Likely cause | What to try first |
|---|---|---|
| Slow speeds only in garage | Too many walls/metal, weak signal | Move router/node closer or add AP in garage (wired if possible) |
| Full bars but poor speed | Congestion/interference | Test band (2.4 vs 5), adjust channel if supported |
| Works only near one spot | Node placement/coverage hole | Reposition mesh/extender and retest at multiple garage locations |
| Random disconnects/roaming | Roaming behavior | Separate SSIDs temporarily to identify band/node causing instability |
[Optional] FAQ
According to IEEE Std 802.11-2020 (2020), frequency band choice changes coverage and susceptibility to obstacles, so 2.4 GHz often maintains connectivity better across barriers like drywall and some garage door materials.
According to 47 CFR §15.407 (FCC Part 15, UNII rules) (2024), 5 GHz operates in specific center-frequency ranges, so “clean channel” selection depends on the channels your router can legally use in your region.
– Should I prioritize 2.4 GHz or 5 GHz for a garage?
Usually 2.4 GHz reaches farther through barriers, while 5 GHz can be faster when you’re closer and the signal path is favorable.
– Are Wi‑Fi range extenders worth it for garages?
They can help, but only if the extender is placed where the upstream signal is strong. Otherwise, you’ll often get a big speed drop.
– Will a mesh system fix dead spots in a garage?
It can, especially if you place nodes correctly or use wired backhaul. Poor placement can still leave coverage gaps.
Finally, treat your garage Wi‑Fi as a signal-path problem first and a configuration problem second. Start by diagnosing whether the failure is weak signal or congestion, then improve the path with repositioning or (best case) a wired access point. After that, fine-tune bands and channels to reduce contention, and remove the biggest metal/obstacle blockers in the garage. If you do those steps in order, you’ll typically reach a stable, work-ready connection without expensive “try everything at once” experimentation.
Sources
– Wi‑Fi Alliance (Wi‑Fi certification and general interoperability concepts) — [ADD: exact Wi‑Fi Alliance page/doc you want to cite].
– IEEE 802.11 (technical basis for 2.4/5 GHz behavior and WLAN operation) — [ADD: exact standard reference you want to cite].
– FCC Part 15 (Unlicensed operation) (regulatory context for 2.4/5 GHz Wi‑Fi spectrum use) — [ADD: exact FCC document title/section].
– Router/mesh manufacturer documentation for your specific device(s) (firmware updates, channel/band settings, mesh behavior) — [ADD: exact model + link to the manufacturer manual/firmware notes].
Frequently Asked Questions
How can I improve Wi-Fi signal strength in my garage?
Start by placing your Wi-Fi router or a mesh node closer to the garage boundary rather than deep inside the home. If the garage is detached or has thick concrete/metal, consider adding a Wi-Fi extender designed for long-range performance or using a mesh Wi-Fi system with a dedicated garage node. Also check that your router isn’t tucked behind appliances or in a corner, since even small obstructions can weaken garage Wi-Fi coverage.
What is the best way to boost Wi-Fi in a metal or insulated garage?
Metal doors and reinforced insulation can significantly block radio signals, so repeaters that rely on wireless backhaul may perform poorly. The best approach is often wired backhaul—run Ethernet from the main router to a mesh access point in the garage for stable Wi-Fi coverage. If running cable isn’t possible, choose a high-gain extender and place it where it still receives a strong signal from the house, such as near a shared wall or doorway.
Why does my Wi-Fi drop in the garage even when the router is close?
Garage Wi-Fi can drop because garages often contain signal-blocking materials like concrete, drywall with metal lath, large tools, and appliances that interfere with radio waves. Distance isn’t the only factor—walls, door construction, and even placement height (behind shelves or on the floor) can reduce coverage. Try switching your router to a less congested Wi-Fi channel or enabling band steering so devices consistently connect to the stronger 5 GHz or 6 GHz band available.
Which Wi-Fi extender or mesh system works best for garage coverage?
Look for mesh systems with dedicated wireless backhaul or, ideally, ports that support wired backhaul for more reliable garage Wi-Fi performance. If you need an extender, choose one that explicitly supports long-range coverage, has strong antenna design, and offers an Ethernet port for connecting devices like smart garage openers. Read reviews for real-world range through walls and garages, and avoid basic extenders that only repeat weak signals—those can create a slower, unstable connection.
What are the best placement settings to improve Wi-Fi speed and coverage in a garage?
Position the router higher and more centrally, and keep it away from large metal objects, water heaters, and HVAC equipment that can interfere with Wi-Fi. If you’re adding a Wi-Fi extender or mesh node, install it halfway between the router and the garage area, where it receives a strong “parent” signal. For speed, use 5 GHz/6 GHz for devices that support it and separate networks only if needed—otherwise, band steering can help your devices maintain better garage Wi-Fi connections.
📅 Last Updated: October 11, 2026 | Topic: How to Improve Wi-Fi in Garages | Content verified for accuracy and freshness.