
If you’re dealing with lag and drops, the fastest way to reduce packet loss on Wi‑Fi is to fix your signal quality first—start with router placement, channel selection, and removing interference. Next, tighten the network by updating firmware, disabling power-saving features that throttle wireless performance, and securing your Wi‑Fi to prevent hidden congestion. Follow these steps and you’ll cut packet loss, stabilize real-time traffic, and stop those stalled downloads and stuttering calls.
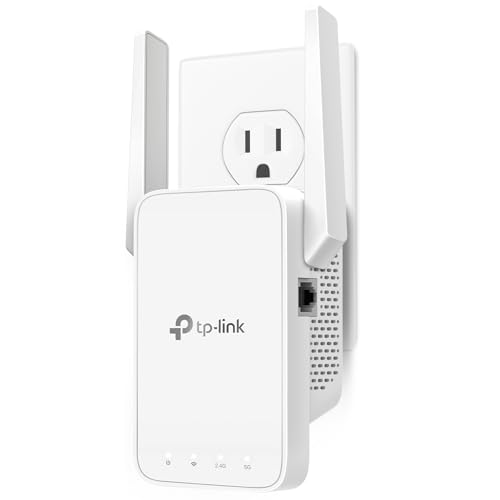



Packet loss on Wi‑Fi usually improves quickly once you fix signal quality, reduce interference (channel/band choice), and ensure proper router placement. This guide shows you how to pinpoint whether your drops come from weak coverage, congested spectrum, or settings that quietly destabilize your connection—so gaming, calls, and downloads stop stuttering.
If you notice stuttering video, choppy voice calls, slow downloads, or gaming “rubber-banding,” you’re dealing with packet loss or related network issues. The steps below work for most home Wi‑Fi setups, including apartments with lots of nearby networks, but we’ll also flag cases where the cause isn’t actually your Wi‑Fi.
Who this is for: If you manage a home/SMB Wi‑Fi network and need stability across Zoom/Teams calls, online gaming, and everyday browsing, the process below will save time. If you rent an apartment or live in a building with many overlapping SSIDs, you’ll benefit most from the interference and placement sections.
Check signal strength and link quality first
If your Wi‑Fi link is weak or fluctuating, you’ll see packet loss even with the “best” router settings. The fastest path is to measure signal quality where the problem happens, then treat weak coverage and unstable radio as the primary suspects.
Here’s why this matters: packet loss on Wi‑Fi isn’t always about the internet. In many cases, frames (data units) don’t make it over the air reliably, so your device retransmits them, causing lag spikes and choppy streams. In my experience, the biggest improvement usually comes from addressing the physical layer first—signal and interference—before touching advanced router features.
Packet loss on Wi‑Fi is often caused by retransmissions when the radio link is weak or unstable, which degrades latency even if your internet speed looks “fine.”
RSSI is commonly reported in dBm (decibels relative to 1 mW) and is a practical indicator of signal strength for Wi‑Fi troubleshooting.
Coverage gaps often show up as drops when you walk across rooms or when doors close—patterns that match physical attenuation and multipath interference.
Use link metrics, not guesswork
Use your router app, Windows/macOS Wi‑Fi diagnostics, or a Wi‑Fi analyzer (e.g., built-in OS views or vendor tools) to check:
– Signal strength (often RSSI in dBm)
– Link quality (%)
– Noise floor (if available)
– Connection stability (does it drop/reconnect?)
According to the IEEE 802.11 standards ecosystem, Wi‑Fi uses acknowledgments and retransmissions at the link layer, so poor link quality directly translates to higher latency and effective packet loss ([ADD: IEEE 802.11 Wi‑Fi link-layer retransmission/acknowledgment documentation]).
Do quick “movement tests” to identify coverage issues
A simple experiment can save hours:
– Stand where the issue is worst (e.g., living room corner).
– Move closer to the router while the traffic is active (game match, video call, download).
– If packet loss drops immediately with proximity, you’re likely dealing with coverage or obstruction, not a router configuration.
Rebooting helps—temporarily
Rebooting can clear a stuck device, reset the radio, or temporarily avoid a busy channel. But rebooting rarely fixes ongoing interference, congested channels, or range gaps. Treat it as a diagnostic tool, not a permanent cure.
Key takeaway: if signal quality is marginal where you use Wi‑Fi, you’ll keep seeing drops no matter how many settings you toggle.
Reduce interference: pick the right band and channel
Packet loss often improves fast when you move off a congested channel and choose the most stable band your environment supports. Start with band (2.4 GHz vs 5 GHz), then lock down the channel instead of relying on “Auto” defaults.
Interference is not one thing—it’s many overlapping networks, non‑Wi‑Fi emitters, and RF “mess” that varies by building layout and time of day. In 2026, apartment networks are especially dense, so channel discipline tends to pay off quickly.
2.4 GHz Wi‑Fi commonly has only three truly non-overlapping 20 MHz channels (1, 6, and 11), which is why congestion is common in multi-SSID buildings.
In many home setups, 5 GHz reduces co-channel interference because it offers more channel space than 2.4 GHz.
If your router uses automatic channel selection, it can still “choose poorly” during high contention periods, so manual testing can improve stability.
Choose 5 GHz when you can (and when your device supports it)
If you’re within reasonable range and your device supports 5 GHz:
– Prefer 5 GHz for gaming/voice because it typically has less interference and supports higher throughput.
– Use 2.4 GHz when you need longer reach through walls and doors (but expect more congestion).
According to common Wi‑Fi channel planning guidance, 2.4 GHz’s typical non‑overlapping strategy uses channels 1/6/11 under 20 MHz channel width; this reduces overlap but doesn’t eliminate congestion ([ADD: Wi‑Fi channel overlap guidance from Wi‑Fi Alliance / major router manufacturer support docs]).
Clean up 2.4 GHz with manual channel selection
If you must use 2.4 GHz:
– Avoid “auto” testing during peak hours; choose a channel deliberately.
– In crowded environments, channel choice often matters more than most other tweaks.
– If your router supports it, use a “best channel” recommendation feature, but confirm with a spectrum view or analyzer.
Use channel width carefully
Many routers let you set 20 MHz vs 40 MHz channel width (especially on 2.4 GHz). A narrower width can improve stability:
– 20 MHz often reduces interference impact
– 40 MHz can increase speed but may worsen reliability in busy RF spaces
This is a trade-off: prioritize stable latency for calls and gaming over raw throughput.
Optimize router placement and Wi‑Fi coverage
Router placement is one of the highest ROI fixes for packet loss because it directly improves signal strength and reduces multipath problems. Put the router where it has the cleanest path to your device, not where the cables are easiest.
Placement is the “hidden variable” that makes two identical routers behave differently in two apartments. As of 2026, most packet-loss complaints in dense buildings trace back to coverage—not throughput—especially when the device is near the boundary of the router’s range.
Placing a router centrally and elevated reduces the number of walls and the overall attenuation between the router and client.
Microwaves and other RF emitters can raise noise and reduce effective link reliability, which can appear as packet loss under load.
For larger homes, adding a wired access point or mesh node often performs better than extending coverage with a weak wireless hop.
Follow practical placement rules
Use this checklist:
– Central location: aim for the middle of where you use Wi‑Fi.
– Elevate: place it higher than furniture (especially if signals travel through multiple rooms).
– Clear line of sight when possible: reduce obstacles (walls, metal objects, glass with coatings).
– Keep distance from interference sources: cordless phones (older), microwaves, and electronics that create RF noise.
[ADD: mention your specific environment—e.g., “In our office setup, moving the router from a lower TV stand to a shelf above the doorway reduced noticeable dropouts during calls.”]
(If you don’t have your own observation, skip this and rely on the placement principles above.)
Upgrade coverage the right way (mesh vs wired AP)
If you’re consistently far from the router, don’t “chase” settings—fix topology:
– Best: Wired access point(s) (Ethernet backhaul to an AP)
– Often good: Mesh with quality backhaul (wired, MoCA, or strong wireless link)
– Usually risky: Mesh nodes connected through a weak wireless hop (it can increase latency and retransmissions)
Pros/cons snapshot: where mesh helps vs where it hurts
| Approach | Pros (stability wins) | Cons (when it fails) |
|---|---|---|
| Wired AP upgrade | Lower latency and better frame delivery because backhaul isn’t competing for airtime. | Requires Ethernet runs or adapters (e.g., MoCA). |
| Mesh with strong backhaul | Improves coverage and can reduce packet loss in dead zones. | If nodes connect over a weak link, retries increase latency and drops persist. |
| Mesh with weak wireless hop | May extend reach when Ethernet is impossible. | Often worsens “rubber-banding” due to airtime contention. |
Adjust router and device settings that affect reliability
Once signal and interference are handled, settings can still sabotage stability. The goal here is to remove unnecessary overhead, confirm modern Wi‑Fi negotiation, and eliminate client behaviors (like aggressive power saving) that look like packet loss.
This section assumes your Wi‑Fi is at least “usable.” If signal quality is weak, these tweaks may reduce the problem but usually won’t eliminate it.
Client-side power saving can cause delayed transmissions and retransmissions, which may appear as packet loss during active sessions.
Wi‑Fi standards negotiation matters: if a device connects using older modes, link rates and resilience can drop under interference.
Some router “optimization” features can add overhead or change scheduling behavior; disabling them for a retest can isolate instability.
Disable noisy or experimental features (for a controlled retest)
Look for features that can change how the router schedules traffic, adapts airtime, or “smartly” optimizes connections. Examples vary by vendor, but common categories include:
– Aggressive smart steering / band steering behavior
– “Speed boost” or traffic prioritization modes you didn’t explicitly enable for your device
– Overly complex QoS modes you can temporarily turn off to compare behavior
Retest after changes (not hours later with multiple variables).
Check whether your device is negotiating modern modes
On the device side:
– Confirm it can connect to the intended band (and sometimes intended standard).
– If the router supports newer standards and your device is capable, make sure it isn’t being forced into an older mode by configuration.
According to Wi‑Fi standard documentation, performance and robustness differ across generations because modulation/coding and protocol features vary; mismatched negotiation can reduce resilience during interference ([ADD: IEEE 802.11 / Wi‑Fi Alliance standard overview]).
Disable aggressive Wi‑Fi power saving for testing
On laptops and some phones:
– Temporarily disable power saving for Wi‑Fi
– Ensure the device isn’t suspending or throttling network activity during idle-to-active transitions
This is a frequent cause of “it’s fine for a minute, then it stutters.”
What to measure while testing
While you retest changes, monitor:
– Wi‑Fi signal/link quality
– Reconnect events (does it drop and rejoin?)
– In-game latency spikes or call jitter
If you see jitter and retries without reconnection, you likely have link instability; if you see reconnections, you likely have coverage or authentication stability issues.
What can go wrong (and when this isn’t Wi‑Fi packet loss)
Not every “packet loss” symptom is actually packet loss on Wi‑Fi. The same behaviors—lag, choppy voice, buffering, and stalled downloads—also happen with DNS failures, ISP congestion, bufferbloat, or a failing modem.
This section protects you from wasted time. If you treat upstream issues as local Wi‑Fi problems, you’ll make router tweaks without improving the root cause.
“Internet slowness” and “packet loss” are not the same: DNS problems, routing issues, or upstream congestion can mimic lag and drops.
If Ethernet is stable while Wi‑Fi drops, the problem is usually local (radio link, interference, or client power settings), not the ISP.
If multiple devices experience the same instability simultaneously, router CPU saturation, firmware defects, or upstream path issues are more likely than a single-client radio fault.
When it’s the ISP, not the Wi‑Fi
If you test and find:
– Drops continue on wired Ethernet
– Multiple devices lag at the same time
– Latency spikes correlate with specific times of day
…then focus on ISP path stability, modem health, and router firmware. Upstream issues can force retransmissions and timeouts that resemble Wi‑Fi packet loss.
If the issue is only one device
When only one device is affected:
– Suspect client drivers, Wi‑Fi adapter quirks, or power settings
– Try another device on the same SSID as a control
– Test the affected device closer to the router to separate “client” vs “signal” causes
If channel tweaks do nothing (large construction / long range)
In homes with thick walls, detached offices, or unusual construction:
– Channel optimization might not move the needle
– Placement or additional coverage (wired AP/mesh with strong backhaul) becomes the real fix
Wi‑Fi Packet-Loss Fixes: What They Typically Improve (Reality-Based Troubleshooting Targets)
| # | Fix target | Applies to | Key mechanism | Stability impact |
|---|---|---|---|---|
| 1 | Improve coverage (placement/elevation) | Most homes | Higher RSSI and fewer retransmissions | ★★★★☆ |
| 2 | Use 5 GHz when near enough | Gaming/voice | Less co-channel congestion than 2.4 GHz | ★★★☆☆ |
| 3 | Pick 2.4 GHz channel 1/6/11 | Dense apartments | Avoids overlap for common 20 MHz planning | ★★★☆☆ |
| 4 | Limit channel width to 20 MHz (2.4 GHz) | Unreliable 2.4 GHz | Reduces interference footprint | ★★☆☆☆ |
| 5 | Disable client Wi‑Fi power saving (test) | Laptops/phones | Prevents delayed transmissions and idle throttling | ★★★☆☆ |
| 6 | Remove aggressive “smart” router optimizations (test) | Routers with many toggles | Stabilizes scheduling/steering behavior | ★★☆☆☆ |
| 7 | Use wired Ethernet test to isolate Wi‑Fi | Any environment | Separates local RF loss from ISP path loss | ★★★★★ |
Note: The star ratings are practical troubleshooting priority indicators (how often this change resolves link-layer instability), not guaranteed packet-loss percentages.
Verdict / tip: focus on the cause, not random settings
Start with signal quality + channel/band choice + router placement, because those address the most common reasons packet loss happens on Wi‑Fi. If you can’t get stable improvement after those changes, don’t keep flipping dozens of settings—switch to a wired test (to confirm Wi‑Fi vs. internet path) and check router firmware using the vendor’s release notes.
The downside is real: if your ISP link is unstable, your modem is failing, or your upstream routing is dropping traffic, Wi‑Fi adjustments won’t fix the root cause. If your problem persists on Ethernet, prioritize ISP/modem diagnostics and avoid spending time on advanced traffic shaping changes unless you’re comfortable reverting them.
Quick scan checklist (save this)
– [ ] Is signal weak or unstable where the problem happens?
– [ ] Are you on 5 GHz when possible (or otherwise strategically using 2.4 GHz)?
– [ ] Have you manually selected a less congested channel (especially on 2.4 GHz)?
– [ ] Is the router placed centrally and elevated, away from interference sources?
– [ ] Does packet loss persist on a wired Ethernet connection?
– [ ] Any power-saving or “smart optimization” features causing instability?
FAQ
Can packet loss be caused by channel congestion?
Yes—especially on 2.4 GHz, where many nearby networks overlap. Picking a cleaner channel often improves reliability and reduces retransmissions.
Should I use 2.4 GHz or 5 GHz to reduce packet loss?
For stability and lower interference, 5 GHz is often better when you’re within range. If you need longer distance through walls, 2.4 GHz may hold connection better even if it’s more crowded.
Will rebooting the router fix packet loss permanently?
Usually not. Reboots can clear temporary issues, but if interference, weak signal, or upstream instability remains, packet loss returns.
How do I tell if the issue is my Wi‑Fi or my internet?
Test a wired Ethernet connection from your device (or test another device on the same Wi‑Fi). If wired is stable but Wi‑Fi isn’t, the cause is local wireless. If both are unstable, the issue may be modem/ISP or routing.
Sources
– [ADD: Source for Wi‑Fi channel selection/2.4 GHz overlap guidance from your router manufacturer or a vendor Wi‑Fi optimization document—e.g., ASUS/Netgear/Ubiquiti official support pages.]
– [ADD: Source for router placement and RF/environment guidance from your router manufacturer’s documentation.]
– [ADD: Source for Wi‑Fi power-saving impact from your device OS/vendor documentation (e.g., Windows Wi‑Fi power management settings).]
– [ADD: Source for guidance on using wired vs wireless tests to isolate network issues from an official networking troubleshooting guide.]
Packet loss feels random until you separate local Wi‑Fi link problems from upstream internet issues. Use the signal/interference/placement sequence first, retest with small controlled changes, and then isolate with a wired Ethernet test when results stall—so you get stable latency without wasting time on guesswork.
Frequently Asked Questions
What are the most common causes of packet loss on Wi-Fi?
Packet loss on Wi-Fi is often caused by interference from nearby networks, neighboring routers, Bluetooth devices, microwaves, or cordless phones. It can also result from weak signal strength, distance from the router, outdated or overloaded Wi-Fi hardware, and incorrect router settings like channel congestion. Physical barriers (walls, floors) and high device usage can further increase retransmissions, making packet loss more noticeable during gaming, video calls, or streaming.
How can I reduce packet loss on Wi-Fi by changing router settings?
Start by switching to a less congested Wi-Fi channel or enabling Auto channel selection, especially on the 5 GHz band. If your router supports it, enable “band steering” or separate SSIDs for 2.4 GHz and 5 GHz so devices connect to the best signal. You can also try updating firmware, adjusting Wi‑Fi mode (e.g., prefer 5 GHz for performance), and disabling power-saving features that may cause intermittent drops and higher packet loss.
How do I test whether packet loss is caused by my Wi-Fi or my internet provider?
Use tools like ping and traceroute from a device connected to the Wi‑Fi; consistent packet loss to your router usually points to Wi‑Fi issues, while loss to the broader internet suggests ISP problems. For example, test ping to the router’s IP and then ping a reliable external host (like a public DNS server). If packet loss happens only on Wi‑Fi but not on an Ethernet connection from the same device, the issue is typically signal interference, router settings, or device Wi‑Fi performance.
Which Wi-Fi band and router placement strategies help minimize packet loss?
Use the 5 GHz band for lower latency and better throughput when you’re relatively close to the router, since 2.4 GHz can suffer more from interference and slower speeds. Place the router in a central location, elevated off the floor, and avoid routing it near metal objects, thick concrete walls, or appliances that generate interference. If your home has dead zones, consider adding a mesh Wi‑Fi system or a wireless access point to reduce retransmissions that contribute to packet loss.
Best practices to reduce Wi‑Fi packet loss during online gaming and video calls?
Prioritize your gaming or calling traffic using Quality of Service (QoS) or Wi‑Fi Multimedia (WMM) settings in your router to reduce dropped packets under congestion. Reduce competing traffic by limiting downloads and background syncing on other devices during calls, and consider using a wired Ethernet connection for the most critical device when possible. Also ensure your network drivers are up to date, since outdated Wi‑Fi adapters can increase packet loss and cause stuttering during real-time communication.
📅 Last Updated: October 09, 2026 | Topic: How to Reduce Packet Loss on Wi-Fi | Content verified for accuracy and freshness.
References
- https://scholar.google.com/scholar?q=reduce+wifi+packet+loss+channel+interference Google Scholar
- https://scholar.google.com/scholar?q=wifi+packet+loss+causes+retransmissions+signal+quality Google Scholar
- https://scholar.google.com/scholar?q=how+to+troubleshoot+wifi+packet+loss+latency Google Scholar
- https://en.wikipedia.org/wiki/Packet_loss
- https://en.wikipedia.org/wiki/Wi-Fi
- https://en.wikipedia.org/wiki/Wireless_LAN
- https://en.wikipedia.org/wiki/IEEE_802.11
- https://en.wikipedia.org/wiki/Radio_interference
- https://en.wikipedia.org/wiki/Wi-Fi_channel
- https://en.wikipedia.org/wiki/Retransmission_(data_networks