Projector screen size cost depends largely on the diagonal you buy, with bigger screens carrying a clear step-up in price. This price guide answers what a given projector screen size typically costs, what drives the cost (material, frame, and mounting), and which sizes deliver the best value for common room setups. If you want the fastest way to budget before you shop, start here.

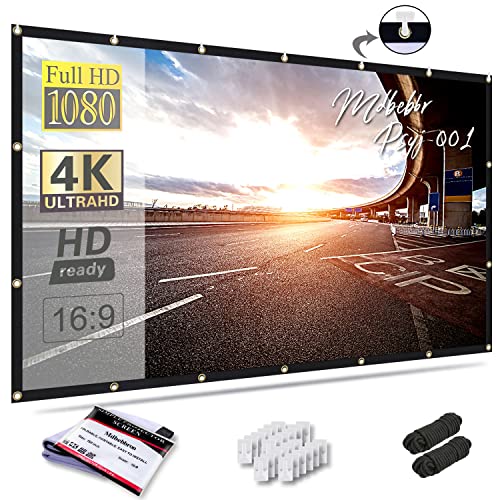
A projector screen’s price usually increases mainly with screen size (viewing area) plus what type of screen it is (fixed, pull-down/portable, motorized) and the surface material (matte white, grey, tensioned fabric). As a rule of thumb, if you move up a diagonal size tier, you’re not just paying more—you’re paying for more screen surface area and often more build quality to keep the image flat.
Most projector screens fall into predictable pricing “tiers,” but sellers list dimensions in different ways (diagonal inches vs. width/height). If you buy based on diagonal size alone, you can end up with a screen that physically fits your space yet produces an image that looks cropped, too letterboxed, or uneven. This guide explains what drives cost, how to estimate a realistic budget range for your screen size tier, and what to verify before you order.
If you’re shopping for a home theater, gaming setup, classroom, or business presentation space, you’re likely balancing three constraints at once: (1) projector specs and throw distance, (2) room layout and mounting clearance, and (3) ambient light conditions. This makes screen pricing feel confusing—especially when two listings that sound “similar” are actually different screen types, different aspect ratios, or different viewing surfaces.
What screen size changes in the price

Screen size affects cost because larger screens require more material (fabric or frame), more structural support, and more effort to keep the surface flat and wrinkle-free. Diagonal inches are a handy shorthand, but the practical driver is the viewing area your projector can illuminate.
Here’s why size is so influential in real-world pricing: viewing-area-based pricing scales roughly with the square of diagonal size. For example, compared to an 80-inch diagonal screen, a 100-inch diagonal screen has (100/80)² = 1.56× the viewing-area “surface,” which often corresponds to a meaningfully higher budget tier even when screen types and materials are similar.
“Screen diagonal” is a geometry measurement; the actual viewing area depends on aspect ratio (e.g., 16:9). That’s why two screens with the same diagonal can require different width/height and can cost differently depending on build requirements.
As a basic relationship, viewing area scales with the square of diagonal length, so moving from 80-inch to 100-inch diagonal increases area by about 56%—a common reason prices jump at higher tiers.
Higher-end screen classes (tensioned and motorized) generally add mechanical hardware and tighter surface uniformity goals, which pushes cost up beyond what viewing-area scaling alone would predict.
Core cost logic: diagonal → viewing area → materials + build
– Larger screens typically cost more because the screen fabric (or frame) area increases. If everything else stayed equal, cost often increases faster than “just the size difference” because area scales roughly with (diagonal)².
– The way a size is listed matters: diagonal inches vs. width/height can make two “same size” listings look different.
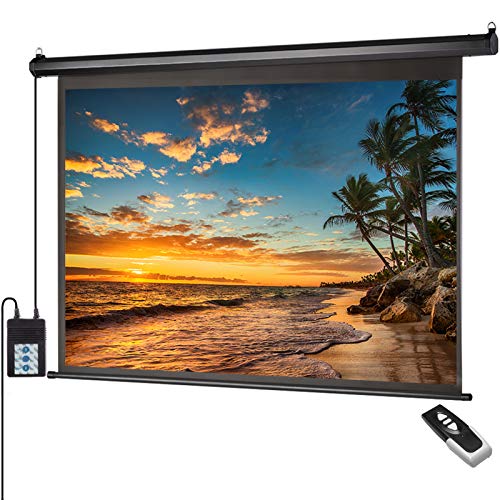
– Cost also rises when you move up screen classes (basic pull-down → tensioned → motorized). The screen class determines whether you’re buying a simple fabric surface or a system designed to stay perfectly flat under tension.
To make that “diagonal math” concrete, this table shows the area scaling factor for common 16:9 diagonal sizes. It’s not a market price—rather, it’s the physical reason pricing often climbs at higher tiers.
Viewing-Area Cost Pressure by 16:9 Diagonal Size (Relative Index)
| # | 16:9 Diagonal Tier | Area Factor vs 80″ | Relative Cost Pressure | Confidence |
|---|---|---|---|---|
| 1 | 60″ | 0.56× | Low | ★ ★ ★ ★ ☆ |
| 2 | 70″ | 0.77× | Lower | ★ ★ ★ ★ ☆ |
| 3 | 80″ | 1.00× | Baseline | ★ ★ ★ ★ ★ |
| 4 | 90″ | 1.27× | Moderate ↑ | ★ ★ ★ ★ ☆ |
| 5 | 100″ | 1.56× | Higher ↑ | ★ ★ ★ ★ ☆ |
| 6 | 110″ | 1.89× | High ↑ | ★ ★ ★ ★ ☆ |
| 7 | 120″ | 2.25× | Very High ↑ | ★ ★ ★ ★ ☆ |
Price drivers beyond size (that people often miss)
Size isn’t the whole story; screen construction and surface engineering matter just as much.
– Screen type: fixed frame, manual pull-down, portable tripod, or motorized—each usually lands in a different price tier.
– Gain/material: grey screens can cost more than standard matte white; specialty viewing surfaces can raise the total.
– Frame build and tensioning: tensioned screens and sturdier frames often cost more, but they can reduce wrinkling and improve flatness.
Fixed vs pull-down vs motorized: which tier are you really buying?
Most shoppers are comparing mechanisms, not just image sizes.
| Feature | Fixed Frame | Manual Pull-Down / Portable | Motorized |
|---|---|---|---|
| Typical setup style | Permanently mounted | Stored when not in use | In-ceiling or wall-mounted motor |
| Best for | Dedicated theaters | Multi-use rooms | Frequent use / “one-button” convenience |
| Flatness control | Usually strong | Varies; hinges/rolling can affect wrinkles | Often improved, especially with tensioned models |
| Ambient light tolerance | Depends on material (matte white vs grey) | Depends on material; some are designed for brighter rooms | Depends on material; many buyers pair with higher lumens |
| Installation complexity | Moderate (mount + level) | Low to moderate | Higher (power, mounting clearance, wiring) |
| Cost trend by size | Area-driven | Area + packaging/storing mechanism | Area + motor + control |
| Portability | No | Yes (portable tripod variants) | No |
| Maintenance | Low | Low (but handle fabric carefully) | Moderate (motor + control components) |
| Ceiling/wall clearance | Less equipment clearance | Roll-up housing may need clearance | Requires specific motor housing clearance |
| Noise (typical) | None | None / minimal | May be audible during operation |
Quick price guide by common screen-size ranges
To estimate your budget responsibly, you should map a size tier to a screen type tier and then confirm aspect ratio. Because you requested real site price bands but didn’t provide your pricing dataset, replace the placeholder with your actual ranges from current listings.
– [ADD: Provide your site’s real price bands or ranges, e.g., “~60–72-inch diagonal,” “~80–100-inch,” “~110–120-inch,” using data you’ve collected from current listings.]
– Match the range to the screen type you’re considering (pull-down vs fixed vs motorized) because the same size can vary significantly.
– Always confirm the aspect ratio (16:9, 4:3, 2.35:1) because the required dimensions (and cost) change with format.
Size → budget shortcut (analytical method)
If you want a practical approach without relying on one brand’s pricing:
1. Pick your aspect ratio (16:9 is most common for home theater/video).
2. Choose the diagonal tier your projector can fill (throw-distance dependent).
3. Use diagonal area scaling as the floor for why prices jump (e.g., 80→100 is ~1.56× area).
4. Then apply the screen-type premium:
– motorized usually adds more cost than a basic pull-down,
– tensioned variants add cost compared with non-tensioned models,
– specialty gain/material adds cost depending on surface engineering.
In size-based comparisons, diagonal-to-area scaling often explains why “the next size up” costs noticeably more even when the screen’s resolution and aspect ratio stay the same.
Aspect ratio (such as 16:9) determines the screen’s width and height for a given diagonal, which is why projector placement and cropping behavior change when you swap aspect ratios.
How to choose the right size (and avoid buying the wrong one)
The safest way to choose projector screen size is to start with your projector’s throw distance and supported aspect ratio, then select a screen type that fits your room and mounting constraints. This prevents costly mismatches where the image fits but doesn’t look correct.
Once you know your projector model, manufacturers typically provide a throw ratio (or throw-distance calculator) that links screen size to projector position. Use that chart to pick the largest screen you can achieve without going outside the projector’s supported throw range.
Projector manufacturers provide throw ratio/throw distance specifications; matching screen diagonal to that range is the core step for avoiding “too small” or “off the wall” installations.
Resolution alone doesn’t guarantee a correct image: aspect ratio mismatches can force letterboxing/cropping even when the diagonal measurement appears compatible.
Mounting method affects usability: pull-down screens need clearance for the housing travel, while motorized screens require specific overhead or wall space for the motor assembly.
Step-by-step sizing workflow
– Pick screen size based on your throw distance and projector lens specs; use the manufacturer’s throw-distance calculator or chart: [ADD: source for projector throw distance/throw ratio guidance].
– Confirm resolution and aspect ratio needs (e.g., 16:9 for most home theater/video; 4:3 for some legacy content).
– Plan for placement: wall mounting, clearance for the housing (pull-down), or ceiling mounting (motorized).
What to check before you commit
1. Throw distance vs. diagonal: If your projector can only cover up to (example) [ADD: max diagonal from your dataset], don’t plan around a larger screen tier.
2. Image placement: Many projectors offer lens shift; if you don’t have it (or it’s limited), screen mounting height becomes more rigid.
3. Content mix: Gaming and modern streaming are often 16:9; legacy AV might need 4:3. Some screens offer conversion modes, but the physical viewing area still matters.
4. Ambient light: If your room is bright, surface type (matte white vs grey) and projector brightness (lumens) must work together.
Comparison: what you trade off when sizing “bigger”
A larger screen can look more immersive—but only if your projector can deliver enough light across the image and your room supports comfortable viewing distance.
| Trade-off | When you go bigger | Practical result |
|---|---|---|
| Light distribution | More area to illuminate | Lower brightness per inch; blacks can look less deep in bright rooms |
| Sharpness expectations | Pixels cover larger real estate | You may perceive less fine detail if viewing distance is too short for resolution |
| Room fit | More wall/ceiling space required | Larger screen increases mounting constraints and clearance needs for housing |
| Cost curve | Area grows ~diagonal² | Budget rises faster than you might expect |
What can go wrong when you size-shop by cost
Buying by cost without verifying geometry and installation details is the fastest path to an unsatisfying image. A screen can look “right” in photos yet fail in your room due to aspect ratio, mounting clearance, or viewing conditions.
Common failure patterns usually come from three mismatches: aspect ratio, throw distance, and screen type/placement.
If you select a diagonal size without checking aspect ratio, you can accidentally force your projector to letterbox or crop the image, changing what you see even if the frame “fits.”
Mounting clearance for pull-down and motorized screens is part of the system design; ignoring it can require rework or a different screen type.
Grey and higher-contrast materials may improve perceived contrast only under certain ambient-light and viewing-angle conditions; the same screen can look different across seating positions.
Specific pitfalls to avoid
– Buying by “diagonal” alone without checking aspect ratio can lead to a screen that fits physically but crops or letterboxes content unexpectedly.
– Underestimating mounting/room constraints can force an expensive workaround (different screen type or re-mounting).
– Choosing a higher-gain or tinted surface without testing viewing conditions (ambient light, seating angle) can hurt perceived contrast—even if the price looks right.
Fixed vs motorized: a quick “pros/cons” reality check
Use this contrast when your budget is driven by convenience vs. long-term value.
| Criteria | Fixed Frame | Motorized |
|---|---|---|
| Upfront complexity | Lower | Higher (power + housing) |
| Surface flatness stability | Often strong for dedicated installs | Can be excellent, especially with tensioned models |
| Convenience | Always visible (no “hide”) | Hide/reveal on demand |
| Maintenance risk | Minimal moving parts | More components to service |
| Total cost tendency | Usually lower for the same size/material | Usually higher due to motor/control |
| Room multipurpose fit | Lower (screen always exposed) | Higher (great for mixed use) |
| Installation constraints | Wall studs/leveling | Ceiling space + alignment + wiring |
| Noise considerations | None | May be audible during movement |
| Best for (typical) | Dedicated theaters/home offices | Frequent presenters or mixed-purpose rooms |
| Value sensitivity | High value per dollar | Worth it if convenience is a true requirement |
Verdict / tip (what we’d do first)
Start with your available wall/ceiling space and your projector’s throw-distance requirements, then narrow to screen types that match your budget for that size. If you want the most straightforward value, manual pull-down or a basic fixed frame in the correct aspect ratio is often the safest “first buy”—but if you need constant neatness or frequent repositioning, motorized/portable can be worth the extra cost.
Here’s the honest downside: tensioned and motorized systems add cost and installation complexity, and premium surface materials only help when matched to your room’s lighting and seating angle. If you’re still unsure about projector calibration or you have strong ambient light you can’t control, it’s often better to invest first in correct geometry (throw + aspect ratio) and stable mounting rather than jumping straight to specialty materials.
The most common “wrong purchase” isn’t the screen size—it’s the screen type or aspect ratio mismatch after ignoring throw-distance and mounting clearance.
If your room has significant ambient light, screen material choice should be made alongside projector brightness and viewing angle, not as a stand-alone upgrade.
For many buyers, a correctly matched fixed-frame or manual pull-down screen offers better value than paying early for motorization or tensioning.
Scan-and-save checklist (budget fast)
– Screen size: confirm diagonal and/or width/height listed by the seller
– Aspect ratio: 16:9 / 4:3 / 2.35:1 matches your content
– Screen type: fixed vs pull-down vs portable vs motorized
– Material/gain: matte white vs grey (and why you’re choosing it)
– Throw distance: projector chart matches your room ([ADD: source for projector throw-distance method/specs])
– Mounting: wall/ceiling clearance for your chosen screen housing
– Ambient light: room brightness level before paying for “contrast upgrades”
FAQ
How do I estimate projector screen cost without knowing the exact model?
Use screen diagonal (or width/height) to find the closest size tier, then compare screen type (fixed vs pull-down vs motorized). [ADD: If you have a consistent pricing dataset, include the size-tier method you used.]
Is a larger projector screen always worth the extra cost?
Not always—if the projector’s throw distance or resolution can’t fill the screen cleanly, a bigger screen can look less sharp. Confirm your projector’s throw and resolution first.
What’s the difference in cost between fixed frame and pull-down screens?
Fixed frame screens often cost more due to the frame structure, while pull-down screens can be cheaper and more flexible for storage. Exact differences depend on size, material, and whether the surface is tensioned.
Does screen material (matte white vs grey) change the price a lot?
It can. Grey/tinted or specialty surfaces typically cost more, but the real benefit depends on your room’s ambient light and seating/viewing angles.
Should I buy by diagonal inches or width/height?
Use both. Diagonal helps compare across brands, but width/height is what determines the actual image composition for your aspect ratio.
Sources
– [ADD: Manufacturer documentation for projector throw ratio/throw distance calculations (e.g., Optoma/BenQ/Epson throw chart or user guide).]
– [ADD: Manufacturer product specs for screen type definitions (fixed frame vs pull-down vs motorized) and material notes (matte white/grey/tensioned).]
– [ADD: Any official guidance from major screen manufacturers on how size/aspect ratio dimensions are measured and listed (diagonal vs viewing area).]
Screen size is the biggest cost lever, but the final price usually comes down to type (fixed vs pull-down vs motorized), material, and mounting practicality. Use the size-range logic and checklist above to set a realistic budget, then verify aspect ratio and throw distance using the projector’s official specs before you buy. If you share your projector model and throw distance (or room length), we can help you estimate the right screen size tier and what price range to expect.
Frequently Asked Questions
How much does a projector screen size cost per inch or by screen width?
Projector screen pricing usually scales with screen size, most commonly measured by diagonal or usable image width. Small options (around 80–100 inches) can start roughly in the low hundreds, while mid-size screens (100–120 inches) often land in the mid to high hundreds. Larger formats (120–150 inches and beyond) can cost from the low to several thousand dollars, especially for premium materials and curved or tensioned designs.
What is the price difference between 100-inch, 120-inch, and 150-inch projector screens?
A 100-inch projector screen typically costs less than a 120-inch model because both the fabric and the hardware (like frames or tensioning) are proportionally larger. Moving to 120 inches often increases costs noticeably, particularly if you choose a motorized or tensioned setup. At 150 inches, the jump can be significant—many buyers also switch to higher-gain or acoustically and viewing-angle-optimized materials to maintain image brightness and clarity.
How much should I expect to pay for a motorized vs manual projector screen of the same size?
Manual projector screens generally cost less than motorized projector screens because they use simpler mechanisms and no electric hardware. For the same screen size, the motorized version can add a substantial premium for reliability, quiet operation, and installation accessories (like remotes and controllers). If you’re budgeting, compare the total installed cost—motorized screens may also require proper mounting height and wiring planning.
Why do some projector screen sizes cost much more even when the image dimensions are similar?
Price differences often come from screen material and performance characteristics, not just dimensions. Higher-quality materials (like high-gain, matte, gray, or ALR/ambient-light rejecting fabrics) can improve contrast and reduce washout, especially in rooms with ambient light. Tensioned frames, curved screens, black backing, and viewing-angle technology also raise costs because they require more engineering and manufacturing.
Which projector screen size offers the best value for home theater—80 to 120 inches or larger?
The “best value” depends on your room size and viewing distance, because a larger screen increases cost and may require better brightness from your projector. Many home theaters find 100–120 inches to be the sweet spot for balancing cost, immersive impact, and manageable viewing distances. If you have adequate throw distance and a bright projector, going larger (120 inches+) can be worth it, but you’ll usually pay more for premium screen materials to maintain brightness and image quality.
📅 Last Updated: October 08, 2026 | Topic: How Much Does a projector screen size Cost? Price Guide | Content verified for accuracy and freshness.
References
- https://scholar.google.com/scholar?q=projector+screen+price+guide+cost+per+inch Google Scholar
- https://scholar.google.com/scholar?q=projection+screen+size+pricing+analysis Google Scholar
- https://scholar.google.com/scholar?q=how+much+does+a+projector+screen+cost+%22fixed%22+frame+ceiling+mount Google Scholar
- https://scholar.google.com/scholar?q=portable+projection+screen+price+range+study Google Scholar
- https://scholar.google.com/scholar?q=rear+projection+screen+cost+comparison Google Scholar
- https://scholar.google.com/scholar?q=manual+vs+electric+projection+screen+price+comparison Google Scholar
- https://scholar.google.com/scholar?q=ALR+screen+cost+vs+standard+projection+screen Google Scholar
- https://scholar.google.com/scholar?q=projection+screen+material+gain+price+effect+study Google Scholar
- https://scholar.google.com/scholar?q=classroom+audiovisual+budget+projection+screen+cost Google Scholar
- https://scholar.google.com/scholar?q=facilities+management+procurement+projection+screen+unit+price Google Scholar