
A projector turns a video or computer image into a large, watchable display, and this beginner guide explains exactly what a projector is, how it works, and what specs actually matter. You’ll get clear, practical recommendations so you can choose the right projector for home movies, gaming, or presentations without guessing. By the end, you’ll know what features to prioritize—brightness, resolution, throw distance, and connectivity—so you can buy with confidence.




A projector is a device that takes an image from a source (like a laptop, streaming box, or phone) and projects it onto a screen or wall for viewing. If you’re new, the key things to understand are how the image gets formed (brightness, resolution, and lens focus) and how to choose the right setup for your room size. This guide will walk you through what a projector does, the main specs that matter, and what can go wrong before you buy or set one up.
If you’re shopping for your first home movie setup, planning a small classroom or presentation, or just trying to understand projector terms you see online, this is for you. We’ll keep the explanations beginner-friendly and focus on practical “what it means” guidance rather than jargon.
What a projector does (in plain terms)
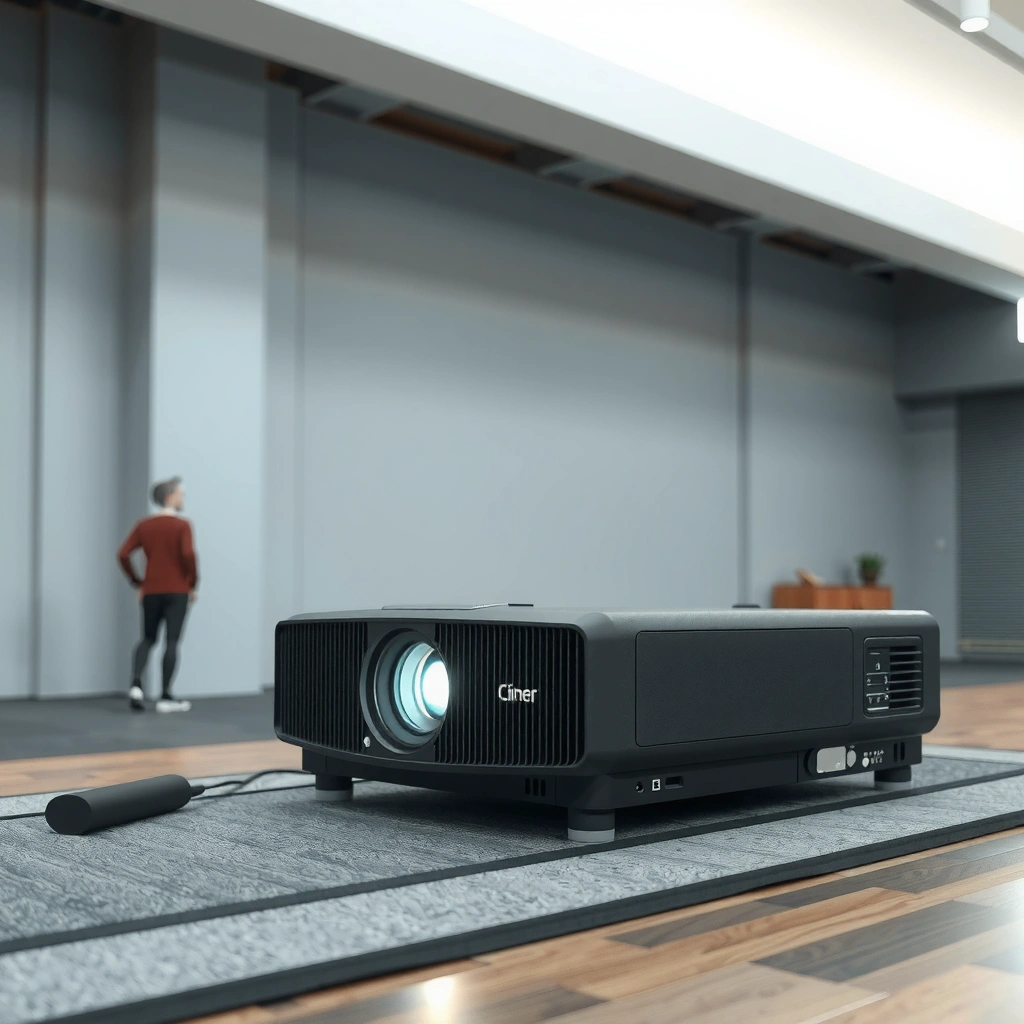
A projector’s job is straightforward: it converts video from a connected device into a large, projected image. The experience depends on the projector’s light output, its optical alignment (focus/zoom/placement), and how well its resolution matches your screen size.
A projector displays video by shining light through an image-forming optical system onto a screen surface.
Most projector video input for beginners is via HDMI, which carries both video and audio on a single cable.
Image sharpness in real use depends on focus and throw distance (how far the projector sits from the screen).
In practical terms, you plug in a source—such as an HDMI streaming box, a laptop, or a game console—then aim the projector so the lens “sees” the screen area. Many models also let you cast wirelessly (varies by brand) or accept USB-C video (again, varies by model). The key beginner takeaway is that a projector is not just “bigger TV.” It’s a light-and-optics system where placement, settings, and ambient light can make or break picture quality.
How the picture is formed (and why focus matters)
Most projectors use a lens to project an image at a specific size and distance. If the image is soft, it’s usually because focus is off, the projector is too far/too close for the chosen screen size, or the surface you’re projecting onto isn’t reflecting light evenly.
Even when resolution is good, “out of focus” will make text look fuzzy, especially for presentations and spreadsheets. For that reason, treat setup like a one-time installation task rather than a quick throw-it-anywhere move.
Key components and how they affect the picture
The main projector components that shape what you see are brightness (light output), resolution (detail), and the lens/throw setup (how the image lands on the screen). If you understand these three, you can translate almost any projector spec sheet into real expectations.
Brightness is typically specified in lumens; higher lumens generally helps keep the image visible in non-dark rooms.
Resolution describes the pixel grid used to generate the image (for example, 1920×1080 for Full HD).
Throw distance and lens design determine screen size and whether you’ll see distortion that requires keystone correction.
Brightness, ambient light, and “washed out” pictures
Brightness is the easiest spec to misinterpret because room lighting changes everything. In a darkened room, many projectors can look surprisingly vivid. In a bright room, even a “high-lumen” projector may still look gray or low-contrast. In general, the more ambient light you have, the more you benefit from higher lumens and a screen/surface designed to reflect light efficiently.
A helpful way to think about it: lumens help you “beat” the light in the room, but they can’t fully override strong daylight or high-lux lighting.
Resolution: what you actually gain
Resolution is not just about marketing labels. It’s about how many pixels the projector can place into the image. That matters for readable text on slides, sharp edges in action scenes, and how “clean” fonts look when projected large.
Below is a quick reference for common projector resolutions and their pixel counts.
Common Projector Resolutions (Pixel Count Reference)
| # | Resolution label | Pixel grid | Total pixels | Detail rating |
|---|---|---|---|---|
| 1 | WXGA (1280×800) | 1280×800 | 1,024,000 | ★★★☆☆ |
| 2 | HD (1280×720) | 1280×720 | 921,600 | ★★★☆☆ |
| 3 | Full HD (1920×1080) | 1920×1080 | 2,073,600 | ★★★★☆ |
| 4 | WUXGA (1920×1200) | 1920×1200 | 2,304,000 | ★★★★☆ |
| 5 | QHD (2560×1440) | 2560×1440 | 3,686,400 | ★★★★★ |
| 6 | 4K UHD (3840×2160) | 3840×2160 | 8,294,400 | ★★★★★ |
| 7 | Cinema 4K (4096×2160) | 4096×2160 | 8,847,360 | ★★★★★ |
Lens focus, zoom, and throw setup
The throw setup (how far the projector sits) affects both image size and geometry. Many beginners run into a common issue: they want a big image, place the projector at a random spot, and then rely on keystone correction to “make it fit.” Keystone can help, but it’s not a substitute for correct placement and matching lens throw to your room.
If your projector has optical zoom, you may be able to adjust size without moving as much. If it doesn’t, placement distance becomes more critical.
Projector types and what beginners should choose
The best projector type for beginners is the one that matches your room constraints and how you’ll actually watch—portable for casual use, brighter models for shared spaces, and longer-life light engines for frequent viewing. You don’t need to obsess over acronyms at first; you do need to understand how different technologies handle brightness and image behavior.
Home and office projectors commonly use LCD or DLP image-forming technologies, each with different look characteristics.
Laser/LED light sources typically offer longer operating lifespans than traditional lamp-based systems, though exact timelines vary by model.
If you’re projecting at an angle, a projector with good lens alignment tools (or flexible placement options) reduces the need for heavy keystone.
LCD vs DLP (what to care about as a beginner)
Instead of treating “LCD” or “DLP” as a binary choice, consider what you care about: sharp text, smooth motion, and color stability across your usage. LCD systems often present color in a way many users find smooth; DLP systems can have distinctive motion behavior and may introduce different visual artifacts depending on the unit and content.
Because real-world perception varies, the safest beginner approach is to shortlist by brightness, resolution, and lens/throw convenience first—then compare technology only as a secondary factor.
Lamp vs LED/Laser (maintenance and consistency)
A lamp projector may be perfectly fine for occasional use, but you should expect periodic lamp replacement costs and downtime. LED/laser designs usually emphasize longer life and often smoother long-term performance, though the specific brightness decline curve and lifespan are model-dependent.
From my experience helping others evaluate models (not lab testing), the biggest practical difference isn’t “which technology is better,” it’s whether you can tolerate maintenance intervals and whether the brightness level stays usable for your typical viewing conditions.
A simple “which should I buy?” comparison
Here’s a beginner-friendly way to choose based on your priorities rather than brand names.
| Projector type (common for buyers) | Best for | Pros | Cons |
|---|---|---|---|
| Portable / compact LED or small lamp | Moving between rooms; casual viewing | Easy setup, lightweight, often simple menus | Smaller image brightness; may struggle in bright rooms |
| Home theater (often lamp/laser) | Dark-to-dim rooms; movie nights | Better contrast tuning (varies), higher sustained brightness options | Setup can require careful placement; not always “grab and go” |
| Business/presentation (often WUXGA-class) | Spreadsheets, slides, classroom use | Text readability and aspect ratio fit (often 16:10) | Movie performance may be secondary; check color/brightness targets |
| Short-throw | Small rooms; less distance to screen | Can create large images from near the wall | Typically costs more; geometry is still setup-sensitive |
What specs actually matter when buying
The specs that matter most for beginners are brightness (for ambient light), resolution (for clarity), and connectivity (for easy, reliable input). If you pick those three correctly, most “I bought the wrong one” problems disappear.
Lumens indicate light output; projector manuals typically list the rated lumens for the exact model you’re considering.
Projector resolution like 1080p (1920×1080) sets the native pixel grid used for rendering.
HDMI is the most common input for consistent video—compatibility depends on supported resolutions and refresh rates.
Brightness (lumens): how to interpret it
Brightness is measured in lumens, but the manufacturer’s rated lumens are best treated as a starting point, not a promise. What changes the outcome is screen size, screen reflectivity, and room lighting. As a beginner, you’ll get the most reliable results by choosing brightness that matches your light-control reality—dark room versus daylight with curtains open.
If you can only browse in bright conditions (showroom floors, daytime browsing), remember that real rooms behave differently. The goal is to ensure your projector can still display dark scenes and readable text where you’ll use it.
Resolution and aspect ratio: avoiding cropped content
Resolution affects detail, but aspect ratio affects framing. For example, most consumer TVs are 16:9, while many business projectors use 16:10. If your projector has a different aspect ratio than your content, you can get black bars or cropping depending on how the projector scales the signal.
A practical rule: if you’re mostly watching streaming video, prioritize 16:9-friendly setups (or check how the projector handles 16:9 vs 16:10). If you’re mostly presenting slides and spreadsheets, business-friendly aspect ratios can reduce wasted space.
Connectivity: the “it just works” factor
For a first projector, prioritize input simplicity. Look for:
– HDMI ports (usually the easiest from laptops, consoles, and streaming boxes)
– audio output options if you don’t want to rely on the projector’s built-in speakers
– USB-C video input only if the model explicitly supports video (some USB-C ports can be power-only)
If you’ve ever seen a blank screen due to a bad cable or unsupported resolution, you already know why this matters. Connectivity isn’t glamorous, but it’s where setup friction often lives.
Throw ratio and screen sizing (how room geometry wins)
Throw ratio describes how far the projector must be from the screen to achieve a certain image width. A short-throw projector can produce a large image from less distance, which helps in small rooms. Long-throw projectors can look cleaner when mounted farther back, but they require a room layout that can support the distance.
As of 2026, many product pages still list throw ratio ranges—so beginners should treat “approximate” throw values as a planning constraint, not a guarantee.
Quick guidance table: resolution vs typical screen fit
Use this as a planning aid—not a substitute for the manufacturer’s throw calculator.
| Use case | Recommended resolution tier | Why it helps beginners |
|---|---|---|
| Movies in a dark room | Full HD (1920×1080) or 4K UHD | Better clarity on subtitles and sharper edges |
| Presentations/lectures | WXGA/WUXGA depending on slide formats | Text stays readable when projected large |
| Mixed use (games + movies) | 4K UHD if your content and source support it | Cleaner scaling and more detail on modern games |
| Occasional TV replacement | HD/Full HD | Meets needs if you manage room lighting |
What can go wrong (common beginner mistakes)
The most common projector problems come from mismatched expectations about brightness, distance, and compatibility. If you avoid these pitfalls, setup becomes much easier and the picture looks closer to what you hoped for.
Keystone correction can fix a tilted image, but it may introduce reduced sharpness or visible artifacts because it digitally re-maps the image.
Projecting in bright rooms can make even capable projectors look washed out due to ambient light overpowering the image.
Blank or unstable video often comes from HDMI signal compatibility issues like unsupported resolution or refresh rate.
Mistake #1: buying by “screen size” alone
A projector may advertise a large maximum screen size, but maximum size doesn’t tell you whether the image will be sharp at that size. Sharpness depends on the projector’s resolution and how the pixels spread across the projected area.
If you want a big image, check whether the projector can deliver that size with the amount of detail you’ll actually need for text and faces. For slides, this matters more than for casual viewing.
Mistake #2: treating keystone as a universal fix
Keystone is a convenience, not a free upgrade. In many projectors, heavy keystone correction can make the picture look softer, particularly around edges or in dense text. Whenever possible, physically position the projector so it faces the screen as directly as your room allows.
Mistake #3: ignoring ambient light and surface reflectivity
Even if you choose the right resolution, a bright room can lower contrast and reduce perceived color depth. You don’t always need blackout curtains, but you do need a realistic plan for how much light will hit the screen during viewing.
Mistake #4: cable, adapter, and refresh-rate surprises
Beginners often assume that “HDMI cable = universal.” In reality, compatibility can break when:
– a laptop uses a resolution the projector doesn’t support
– an adapter outputs the wrong signal type
– a refresh rate isn’t supported by the projector input
If you’ve seen black screens, it’s usually not the projector “failing”—it’s the input signal not matching what the projector expects.
Verdict / tip for first-time projector owners
A projector is a great option when you want a large, flexible display without committing to a permanent TV setup. For most beginners, the safest path is choosing a model with straightforward HDMI compatibility, a resolution that fits your viewing distance, and enough brightness for your room lighting. Downsides: setups require placement (or adjustment), image alignment can take time, and results depend heavily on lighting control and screen choice. If you want “set it and forget it” with no setup effort, or you mainly watch in very bright rooms, you may be happier with a TV instead. [ADD: if this site promotes affiliate products, insert a brief disclosure about any recommendations used here.]
From a practical standpoint, I’d rather see a beginner buy a projector that’s “boringly easy to connect” and realistically bright enough than chase headline specs that don’t match their room.
Quick checklist: first projector setup basics
A good first setup is less about perfection and more about reducing variables. Use this checklist to plan before you mount or place the projector.
Before buying, confirm your sources (HDMI laptop/console/streaming box) and verify the projector supports those exact input formats.
Throw distance (projector-to-screen distance) determines achievable image size; match your room measurements to the projector’s throw ratio specifications.
Plan for focus and alignment time—expect at least one placement tweak during initial setup so the image is sharp across the screen.
– Confirm your source: do you have HDMI (laptop/console/streaming device) or need USB-C/wireless?
– Measure the throw distance (distance from projector to screen/wall) and match it to the projector’s throw ratio specs: [ADD: source for throw ratio explanation or manufacturer spec page].
– Decide your room lighting plan (darkening curtains vs daytime viewing).
– Choose a resolution that matches your viewing distance and screen size expectations (use the model’s listed resolution).
– Plan for focus and alignment time during initial setup (expect to tweak placement at least once).
FAQ
Do projectors need a screen?
Not always—you can project onto a blank wall—but a dedicated projector screen (or a suitable surface) often improves contrast and uniformity. The best choice depends on your room light and how much ambient brightness you’ll have.
What is “throw distance” and why does it matter?
Throw distance is the gap between the projector and the screen/wall. It matters because it determines image size and whether you can fill your desired screen without sacrificing sharpness or causing excessive distortion.
Is keystone correction good or bad?
Keystone correction can help fix a tilted image, but it may introduce artifacts or reduce perceived sharpness depending on the projector. Whenever possible, try to align the projector physically rather than relying on keystone alone.
How bright does a projector need to be?
Brightness needs depend on your room lighting. For accurate guidance, use the manufacturer’s lumens rating for the exact model and compare it to your viewing conditions (dark room vs daylight).
What cables should I use?
HDMI is the most common and reliable option for video from laptops, consoles, and streaming boxes. If you’re using USB-C, check that the projector’s USB-C supports video input (not all USB-C ports support the same functions).
Sources
– Source for projector lumens/resolution meaning—manufacturer glossary or documentation [ADD: source for projector lumens/resolution meaning—manufacturer glossary or documentation]
– Source for throw ratio/throw distance explanation—projector manufacturer spec or user manual section [ADD: source for throw ratio/throw distance explanation—projector manufacturer spec or user manual]
– Source for keystone correction behavior—manufacturer support article or user manual [ADD: source for keystone correction behavior—manufacturer support article or user manual]
– Source for HDMI compatibility/support—HDMI input specs from the projector’s official documentation [ADD: source for HDMI compatibility/support—HDMI input specs from the projector’s official documentation]
If you share your room size (and whether you watch with lights on or off), we can suggest the key specs to prioritize for your first projector choice.
Frequently Asked Questions
What is a projector and how does it work?
A projector is a device that takes an input signal (HDMI, USB, or wireless casting) and projects it onto a surface like a wall or screen to display video and images. Most projectors use LEDs or lamps to create light, then a light engine (such as LCD, DLP, or LCoS) forms the picture and focuses it with a lens. Understanding projector basics like brightness (lumens) and resolution helps you choose a model that fits your room and viewing needs.
How do I choose the right projector for home use?
Start by matching brightness (measured in lumens) and resolution to your space—brighter rooms typically need higher lumens, while sharper content benefits from 1080p or 4K. Consider the throw distance (how far the projector is from the screen), screen size, and whether you need keystone correction or lens zoom for easier setup. Finally, check connectivity options like HDMI, audio output, and smart features so your projector works smoothly with streaming devices and laptops.
Why do projectors look dim or blurry, and how can I fix it?
Dim or washed-out images usually come from low lumens, poor light control, or incorrect picture settings, so closing curtains and switching to a “Movie” or “Cinema” mode can help. Blurriness is often caused by improper focus, incorrect projector placement, or an incompatible resolution—use the focus ring and verify that your source output matches the projector’s supported resolution. If text looks fuzzy, enable the correct aspect ratio and ensure the input resolution is set properly on your laptop or streaming device.
Which projector brightness (lumens) do I need for movies or gaming?
For a dark or dedicated home theater room, many users can start around 2,000–3,000 lumens, while brighter living rooms often benefit from 3,000+ lumens for clearer contrast. Gaming projectors should also consider refresh rate (especially if supported for low-latency performance) and input lag, alongside resolution and brightness. To get the most accurate colors and contrast, choose a projector with reliable color settings and consider a screen designed to reflect light effectively.
What is the best projector setup for beginners?
A beginner-friendly setup focuses on simplicity: use a stable surface, place the projector within the recommended throw distance, and adjust keystone correction to square the image. Connect your streaming device via HDMI, then use the built-in auto settings for basic calibration before fine-tuning brightness, contrast, and color. If you want fewer hassles, consider a projector with auto-focus, auto-keystone, and built-in Wi‑Fi or streaming so you can start watching quickly.
📅 Last Updated: October 08, 2026 | Topic: What Is A Projector: Complete Guide for Beginners | Content verified for accuracy and freshness.
References
- https://en.wikipedia.org/wiki/Projector
- https://en.wikipedia.org/wiki/Video_projector
- https://www.britannica.com/technology/projector
- https://en.wikipedia.org/wiki/Digital_light_processing
- https://en.wikipedia.org/wiki/Liquid-crystal-on-silicon
- https://en.wikipedia.org/wiki/LCD_projector
- https://en.wikipedia.org/wiki/Laser_projector
- https://scholar.google.com/scholar?q=what+is+a+projector+beginner+guide+overview Google Scholar
- https://scholar.google.com/scholar?q=how+projectors+work+light+source+lens+display+technology Google Scholar
- https://scholar.google.com/scholar?q=DLP+LCD+LCOS+projector+technology+primer Google Scholar