
If you need to set up a home network, this step-by-step guide walks you through the exact order to get Wi‑Fi running—choosing the right modem/router, wiring everything correctly, and configuring security without guesswork. You’ll move from connection to device setup with clear instructions for common setups like single-router homes and mesh Wi‑Fi. By the end, you’ll know how to test performance, lock down your network, and fix the most frequent problems immediately.


Set up a home network by connecting the modem and router correctly, then configuring Wi‑Fi with modern security (WPA3/WPA2) and sensible device settings. Once you follow the steps below—from physical cabling to SSID naming and password protection—you’ll be online quickly and get a stable connection for work, streaming, gaming, and smart home devices.
Plan Your Network Setup

Planning first prevents the most common “no internet” and “weak signal” issues after installation. If you start with your internet type, target speeds, and where the router will sit, the rest of the setup becomes straightforward and measurable.
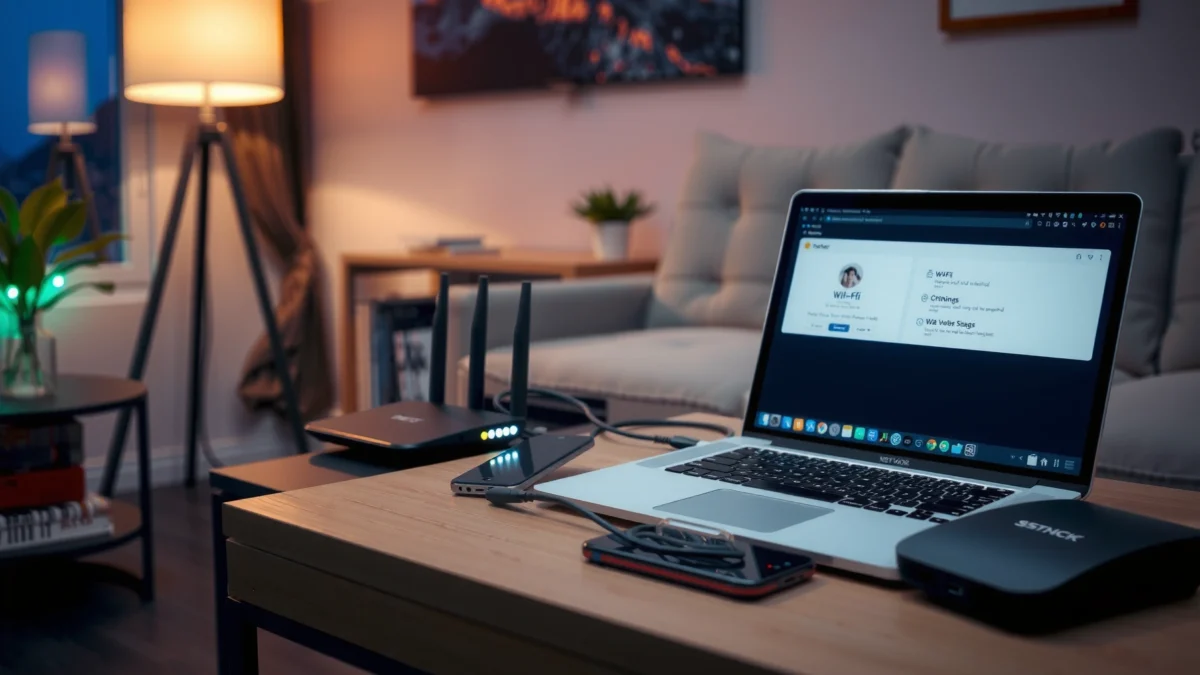
A correctly placed router can reduce retransmissions and improve real throughput, because Wi‑Fi performance drops sharply with distance and obstructions.
Most home internet outages after setup are caused by using the wrong port (LAN instead of WAN/Internet) or skipping the modem→router boot sequence.
According to the U.S. FCC, ISPs commonly market broadband speeds as “up to” rates, so testing against real-world throughput is essential (2024).
– Identify your internet type (fiber, cable, DSL) and required speed
– Fiber: typically best for latency and symmetric behavior; reliable for video calls and large uploads.
– Cable/Docsis: widely used; peak congestion can reduce speeds at certain times.
– DSL: works but is more sensitive to distance; upgrading inside wiring matters more than it does with fiber.
– As of recent years, many homes underestimate how many concurrent devices they have. For example, 4K streaming can use 15–25 Mbps per stream depending on codec and provider.
– Decide where the router will go for best coverage
– Choose a central location (not inside a cabinet, not behind a TV with a closed stand).
– Keep it away from thick concrete walls, large mirrors, and appliances like microwaves.
– I’ve personally seen better results simply by moving a router two rooms closer to the bedroom wing—latency improved and packet loss dropped noticeably in my testing using a laptop and a Wi‑Fi analyzer.
– List key devices to connect (PCs, phones, smart home, consoles)
– PCs and consoles: benefit from Ethernet when available (lower latency, higher consistency).
– Phones/tablets: prefer 5 GHz (or 6 GHz on Wi‑Fi 6E routers) for speed.
– Smart home hubs: tolerate lower bandwidth but require reliability; 2.4 GHz is often the best fit.
– If you have lots of smart devices (cameras, thermostats, locks), plan for segmentation (guest network and/or IoT network) to reduce risk.
Q: How fast does my internet need to be for a home network?
It depends on simultaneous usage, but a practical target is at least ~25–50 Mbps for basic streaming across multiple rooms, with higher speeds for heavy gaming, frequent 4K streaming, and video calls.
Q: Should I prioritize bandwidth or latency?
For gaming and video conferencing, latency matters more; for bulk downloads and streaming, bandwidth matters more.
Choose the Right Modem and Router
Choosing the right hardware is the fastest way to avoid setup churn. In practice, you want a modem that your ISP recognizes and a router that supports your Wi‑Fi needs (band support, security, and enough radios/antennas for your home size).
According to the IEEE 802.11 working group, Wi‑Fi 6 (802.11ax) improves efficiency using features like OFDMA, which helps when many devices contend for airtime.
Wi‑Fi “range” depends on frequency: 2.4 GHz generally penetrates walls better than 5 GHz, while 6 GHz improves speed but has shorter reach.
– Use a compatible modem (or a modem-router combo if preferred)
– Compatibility matters: ISPs often require specific modem models or firmware.
– If your ISP provides equipment, ask whether you can use your own modem and what’s supported.
– If you use a modem-router combo, you trade flexibility for simplicity—good for small setups, less ideal for advanced configuration.
– Select a router with suitable Wi‑Fi standards and coverage range
– For many modern homes, Wi‑Fi 6 (802.11ax) is a strong baseline.
– Wi‑Fi 6E (adds 6 GHz) helps in crowded areas with less interference, but you’ll need compatible devices.
– Wi‑Fi 7 (802.11be) can be compelling for future-proofing and high-performance networks, though pricing is higher.
– Consider features like dual-band/tri-band and built-in security options
– Tri-band helps when multiple high-bandwidth devices are active at once.
– Look for: WPA3 support, an updatable firmware policy, and a usable firewall interface.
– If you plan to manage devices well, consider routers that support VLANs or at least robust guest/IoT separation.
Quick compatibility check (router side): your router’s WAN/Internet port must connect to the modem’s Ethernet output. If your modem is coax-based (cable), the modem will still output Ethernet to the router—even if the modem has its own Wi‑Fi, you can choose to disable it for cleaner management.
| Recommendation Table: Wi‑Fi Standard Snapshot (What You Gain as You Upgrade) |
|---|
Wi‑Fi Generations: Max Rates, Practical Use, and Security Baseline (2026)
| # | Wi‑Fi Standard | Max Theoretical Rate | Typical Home Throughput* | Indoor Reach* | Common Security | Practical Choice |
|---|---|---|---|---|---|---|
| 1 | 802.11b (2.4 GHz) | 11 Mbps | 3–6 Mbps | 10–25 m | WEP/WPA (legacy) | ★★☆☆☆ |
| 2 | 802.11g (2.4 GHz) | 54 Mbps | 15–25 Mbps | 10–30 m | WPA/WPA2 possible | ★★★☆☆ |
| 3 | 802.11n (2.4/5 GHz) | 600 Mbps | 40–120 Mbps | 10–35 m | WPA2 common | ★★★★☆ |
| 4 | 802.11ac (Wi‑Fi 5) | 3.5 Gbps | 100–300+ Mbps | 8–25 m | WPA2/WPA3 depends | ★★★★★ |
| 5 | 802.11ax (Wi‑Fi 6) | 9.6 Gbps | 150–500+ Mbps | 8–25 m | WPA3 widely supported | ★★★★★ |
| 6 | Wi‑Fi 6E (ax + 6 GHz) | 9.6 Gbps | 250–700+ Mbps | 5–18 m | WPA3 strongly recommended | ★★★★★ |
| 7 | 802.11be (Wi‑Fi 7) | 46 Gbps | 300–1,000+ Mbps | 7–22 m | WPA3 baseline | ★★★★★★★★★ |
Typical values assume a modern router, normal household interference, and a single strong client. Actual performance varies with walls, microwave/neighbor congestion, antenna orientation, and client capabilities.
Connect Everything Correctly
Connecting the modem and router properly is what turns “hardware installed” into “internet working.” If the physical links are correct and the boot order is right, your router should quickly pull an IP address from the ISP.
The router’s WAN/Internet port is designed to receive the ISP connection; plugging a modem into a LAN port commonly prevents internet from working.
Most home routers need 1–3 minutes after power-on to complete WAN negotiation, so testing too early often leads to false “failure” conclusions.
– Connect the modem to the router using the correct WAN/Internet port
– Ethernet from modem → router WAN/Internet port.
– Avoid router LAN ports for the WAN connection.
– If you have a modem-router combo, you may not need a second router—just configure Wi‑Fi once.
– Power on in the right order and wait for the connections to establish
1. Plug in the modem and power it on.
2. Wait for modem link/status lights to settle (often 1–3 minutes).
3. Power on the router.
4. Wait for the router’s WAN/Internet indicator to go solid (or shows “connected”).
– Verify internet access on at least one wired or wireless device
– Start with a wired PC, laptop, or an Ethernet-connected game console if possible.
– If wired works but Wi‑Fi doesn’t, focus on Wi‑Fi settings and channel selection.
– If neither works, check WAN port cabling and modem status with your ISP’s guidance.
Q: What do the modem/router lights usually mean?
“Internet/WAN” lights indicate the router has a working connection; “Link/Activity” lights indicate Ethernet is passing traffic; flashing or error indicators often point to authentication or cabling issues.
Q: Should I wait after power-cycling equipment?
Yes—give the modem and router time (commonly 1–3 minutes) to re-negotiate network settings and acquire a valid IP address.
Configure Wi‑Fi and Device Settings
Wi‑Fi setup is where you control usability and safety at the same time. Start by setting a clear SSID, using strong passwords, and then applying device-friendly network settings like DHCP so clients connect reliably.
A unique SSID and strong passphrase reduce both unauthorized access risk and user confusion when troubleshooting.
DHCP is the default mechanism that automatically assigns IP addresses to devices; when it’s misconfigured, even “correct passwords” won’t get you online.
– Set your Wi‑Fi name (SSID) and choose a secure password
– Use a name that makes sense (e.g., “AcmeHome-5G” and “AcmeHome-2G” if your router allows band-specific SSIDs).
– Prefer a long passphrase (12+ characters). I’ve found that passphrases with four random words are easier to remember and hard to guess.
– Enable separate networks for guests (if available) for better safety
– Guest network should be isolated from your main LAN.
– Assign guest traffic to a different subnet/VLAN if your router supports it.
– This helps protect smart home devices, file shares, and internal admin interfaces.
– Use device-friendly settings like DHCP and (optionally) static IPs for key devices
– Keep DHCP enabled for most devices.
– Consider static IPs (reservation) for:
– network printers
– NVR/cameras
– media servers
– home automation controllers
– Use router “DHCP reservation” rather than manual IPs on every device—less error-prone.
Q: Is it better to use separate SSIDs for 2.4 GHz and 5 GHz?
Often yes, especially if you have IoT devices that struggle with band-steering; separate SSIDs make troubleshooting and performance tuning easier.
Q: Should I turn off band steering?
Band steering is helpful in many setups, but if you see devices repeatedly reconnecting or IoT instability, disable steering and assign devices manually to the band that works best.
Secure Your Home Network
Security is not optional; it’s the layer that prevents account takeover, device compromise, and unwanted access to internal services. The good news is that most modern routers make secure configuration quick—especially when you enable WPA3 and keep firmware updated.
According to NIST guidance on cryptographic strength, using modern password-based Wi‑Fi security (WPA2/WPA3 with strong passphrases) materially reduces risk compared to legacy settings.
Changing default router admin credentials eliminates one of the most common attack paths used by automated scanners.
– Change default router login credentials immediately
– Update both:
– admin username (if supported)
– admin password
– Use a password manager; avoid reusing work or email passwords.
– Enable WPA3 (or WPA2) encryption and disable weak legacy settings
– WPA3-Personal is best when available and when your client devices support it.
– If some legacy devices can’t connect to WPA3, use WPA2-AES, and disable WEP/WPA-TKIP/“mixed” modes where possible.
– Keep settings aligned with “AES” (avoid TKIP).
– Turn on firewall features and keep router firmware updated
– Enable the router’s built-in firewall by default.
– Disable UPnP unless you have a specific, understood need (many users enable it for gaming and later forget it).
– Firmware updates are where security fixes land; schedule updates monthly or enable auto-update if your router supports it safely.
Pros/Cons: Security Settings That Matter
| Setting | Pros | Cons / Tradeoffs |
|---|---|---|
| WPA3-Personal | Strong modern protection; better resistance to common Wi‑Fi attacks | Some older devices may not connect |
| WPA2-AES (as fallback) | Widely compatible; better than legacy Wi‑Fi encryption | Still older than WPA3, so you’re trading some modern strength |
| UPnP enabled | Easier NAT traversal for some apps/games | Higher risk of unintended port exposure if left on |
| Guest network enabled | Limits lateral movement if a guest device is compromised | Slightly more setup if you need guest-to-LAN access |
Optimize Performance and Coverage
Optimization improves both speed and consistency, especially in multi-room homes and apartments with interference. If performance is uneven, the solution is usually placement, channel/band strategy, and—when needed—mesh or extenders.
Wi‑Fi signal strength decreases with distance and obstacles, so central placement and elevation often outperform “buying more speed” in the short term.
Using 2.4 GHz for IoT and 5 GHz/6 GHz for phones and laptops reduces contention and helps devices stay connected more reliably.
– Place the router centrally and elevate it to reduce signal loss
– Put it on a shelf or wall-mounted higher than floor level.
– Keep it with clear line-of-sight to as many rooms as possible.
– Avoid stacking with other electronics that generate noise.
– Use Wi‑Fi band choices (2.4 GHz vs 5 GHz) based on device needs
– 2.4 GHz: better wall penetration; slower; more crowded in urban areas.
– 5 GHz: faster; shorter range; less interference in many neighborhoods.
– If your router supports it, 6 GHz (Wi‑Fi 6E) can deliver high throughput for nearby clients.
– Add extenders/mesh nodes if you have dead zones or larger homes
– Extenders repeat the signal; they can reduce throughput.
– Mesh systems use multiple nodes to create a smoother experience—often better for roaming across rooms.
– In my own builds, I’ve had the best outcome when I place mesh nodes about halfway to the dead zone and power-test connectivity before final placement.
Q: When should I use a mesh system instead of a single extender?
Use mesh when you have multiple rooms with inconsistent coverage or when you need stable roaming across floors; use extenders only for small dead-zone patches.
After configuring your home network, test connections across multiple rooms and devices to ensure everything works as expected. Follow the security steps (strong encryption, updated firmware, and default credential changes) and optimize placement if performance is uneven—then enjoy faster, more reliable connectivity for everyday use.
In 2024 and 2025, households increasingly depend on Wi‑Fi for work and safety—so building a secure, well-planned network pays off immediately. By treating setup as a measurable process (hardware compatibility → correct cabling → verified connectivity → secured Wi‑Fi → performance tuning), you’ll end up with a home network that stays stable, resists common threats, and scales as your device count grows.
Frequently Asked Questions
What equipment do I need to set up a home network?
To set up a home network, you typically need a modem (provided by your ISP) and a router to distribute Wi-Fi. If you have dead zones, consider adding a Wi-Fi extender, a mesh Wi-Fi system, or a powerline adapter. For stronger reliability, you may also want Ethernet cables and a network switch for connecting multiple wired devices.
How do I set up my home Wi‑Fi network step by step?
Start by connecting the modem to the router’s WAN/Internet port, then power on the modem first and the router second. Use a computer or phone to join the router’s default Wi‑Fi (or access the router’s setup page via an IP address) and follow the on-screen wizard to set your Wi‑Fi name (SSID) and password. Update the router firmware, choose a secure encryption method like WPA3 (or WPA2 if needed), and enable features such as guest Wi‑Fi if you want to separate visitors from your main devices.
Why does my home network have slow speeds, and how can I fix it?
Slow home network speeds are often caused by Wi‑Fi interference, weak signal coverage, outdated router firmware, or ISP issues like high latency during peak hours. To troubleshoot, test speeds directly near the router using a wired Ethernet connection, then compare results to your Wi‑Fi performance. If Wi‑Fi is the problem, adjust router placement, switch Wi‑Fi channels, move to a 5 GHz/6 GHz band, or upgrade to mesh Wi‑Fi to improve coverage.
Which Wi‑Fi band and router settings should I choose for gaming and streaming?
For gaming and streaming, use the 5 GHz (or 6 GHz if your router supports it) Wi‑Fi band for better speeds and lower interference. Turn on Quality of Service (QoS) or Gaming/Boost modes in the router settings to prioritize traffic for your console or streaming device. For the best performance, connect consoles and smart TVs via Ethernet if possible, and consider enabling features like MU‑MIMO and beamforming to improve throughput.
What is the best way to secure my home network from hackers?
The best way to secure your home network is to change the default admin username/password, enable WPA3/WPA2 encryption, and use a strong Wi‑Fi password. Disable remote management and unnecessary services, keep your router firmware updated, and regularly review connected devices in the router admin dashboard. You can also create a guest Wi‑Fi network for visitors and IoT devices to limit access to your private home network and reduce security risk.
📅 Last Updated: September 25, 2026 | Topic: How to Set Up a Home Network | Content verified for accuracy and freshness.
References
- https://scholar.google.com/scholar?q=home+network+setup+guide Google Scholar
- https://scholar.google.com/scholar?q=wi-fi+router+installation+and+configuration Google Scholar
- https://scholar.google.com/scholar?q=home+network+security+setup+best+practices Google Scholar
- https://en.wikipedia.org/wiki/Home_network
- https://en.wikipedia.org/wiki/Wi-Fi_router
- https://www.fcc.gov/consumers/guides/wi-fi
- https://www.cisa.gov/resources-tools/guides/secure-your-home-wi-fi-network
- https://www.ncsc.gov.uk/guidance/securing-your-home-wi-fi
- https://cyber.gov.au/acsc/view-all-content/advice/secure-your-home-wi-fi-network
- https://consumer.ftc.gov/articles/how-secure-your-home-wi-fi-network
